


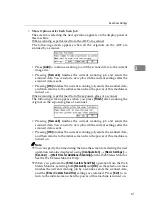


System Settings
55
3
MMMM
Press
[
↓↓↓↓
Next
]
.
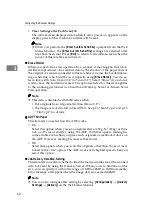
“14. Date/Time(Yr/Month/Day/
Hr/Min/Sec)” appears.
To set the date and time
A
Press
[
Settings
]
.
B
Enter the numeric values to
correct the date and time using
the Number keys.
C
Press
[
OK
]
.
To specify the IP address of the
Time Server
A
Press
[
Settings
]
.
B
Press
[
Time Svr
]
.
C
Enter the IP address of your lo-
cal time server.
Note
❒
Press
[
Cancel
]
twice if you do
not wish to change. You will
return to the “14. Date/Time
(Yr/Month/Day/Hr/Min/S
ec).”
D
Press
[
OK
]
twice.
Reference
For configuration of the Time
Server, set by referring to
[
Configuration
]
→
[
Basic Set-
tings
]
→
[
Scanner
]
→
[
Time
Zone
]
on the Web Status
Monitor.
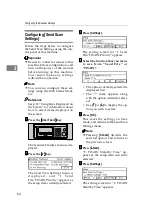
NNNN
Press
[
↓↓↓↓
Next
]
.
“15. Select Language”appears.
Press
[
Settings
]
and select a lan-
guage you wish to use with
[
↓↓↓↓
]
or
[
↑↑↑↑
]
. Press
[
OK
]
to return to the
menu.
Note
❒
Press
[
Cancel
]
if you do not wish
to change.
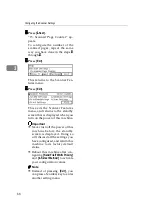
OOOO
Press
[
↓↓↓↓
Next
]
.
“16. Firmware Version” appears.
Press
[
Settings
]
to confirm the firm-
ware version with this screen.
PPPP
Press
[
Exit
]
.
This returns to the System Settings
menu.
QQQQ
Press
[
Exit
]
.
This exits the Scanner Features
menu, and returns to the standby
screen that is displayed when you
turn on the power.
Summary of Contents for Network Scanning Unit A
Page 8: ...vi ...
Page 28: ...What You Can Do With This Machine 20 1 ...
Page 36: ...Setting Up the Machine 28 2 ...
Page 118: ...Configuring the Scanner Settings 110 3 ...
Page 138: ...Sending Scan File by E mail 130 5 ...
Page 148: ...Sending Scan File by Scan to Folder 140 6 ...
Page 154: ...Sending Scan File by Scan to FTP 146 7 ...
Page 164: ...Printing Scanned Image Files 156 8 ...
Page 168: ...Sending Scan Files Using Delivery Server 160 9 ...
Page 172: ...Using the Network TWAIN Scanner Function 164 10 ...
Page 204: ...196 EN USA G829 8602 ...
Page 206: ...Network Scanning Unit Type A Operating Instructions EN USA G829 8602 ...