User’s Manual
32
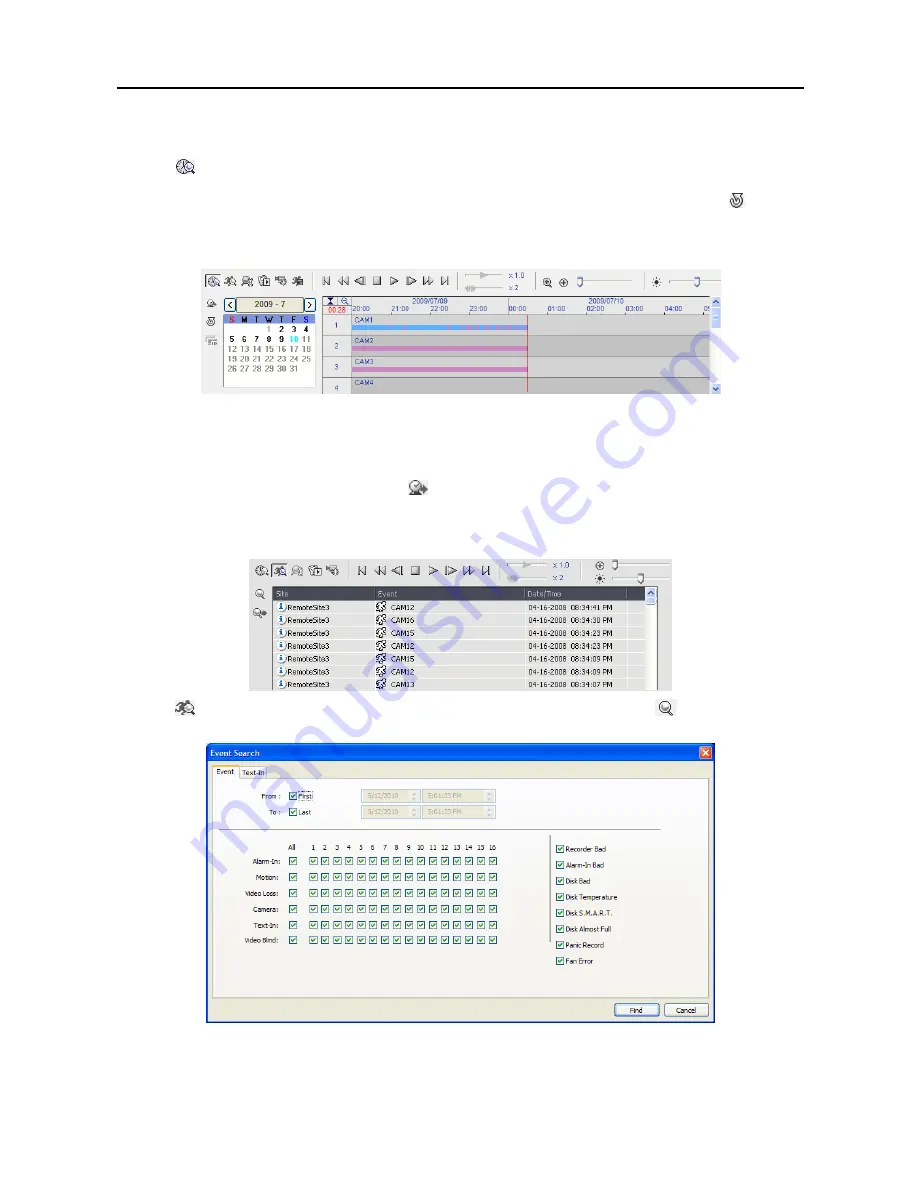
Time-Lapse Search
Click the
button on the Search View panel to enter the time-lapse search mode. Selecting a date from the calendar
initiates the time-lapse search. The dates for which recorded images are available are enabled. When first entering the
time-lapse search, the latest date with recorded images will be selected (highlighted) in the calendar. Click the (
Reload)
button to reload the date information. Recorded information available from the selected date will be displayed on the
timetable. The recorded data are displayed by time and bar-shaped segments indicate there are recorded data during
that time. Select a specific hour by clicking the mouse on the desired hour segment.
The recorded data of each camera channel are displayed by time in one-minute segments and a red vertical line indicates
the selected time that will be played back.
The color of the bar indicates different types of recording: Yellow for
Pre-event, Purple for Event, and Blue for Time-lapse. If the DVR has more than one video segment in the same time
range, each segment will be separated by a yellow vertical line.
To view an image from a specific time, click the
(
Go To)
button and set up the date and time to search.
Event Search
Click the
button on the Search View panel to enter the event search mode. First, click the
button, and set up the
search condition in the following
Event Search
dialog box.
Summary of Contents for R16DVR3
Page 1: ......
Page 2: ......
Page 6: ...User s Manual iv...
Page 48: ...User s Manual 42 MAP OF SCREENS ADVNACED SETUP...
Page 50: ......
Page 51: ......
Page 52: ......
Page 54: ...User s Manual ii...
Page 56: ...User s Manual 2...
Page 82: ...User s Manual 28...


