Copyright Planika Sp. z o.o.
www.planikafires.com
IG0139#02
30.07.2018
46
5.12.
Glasses
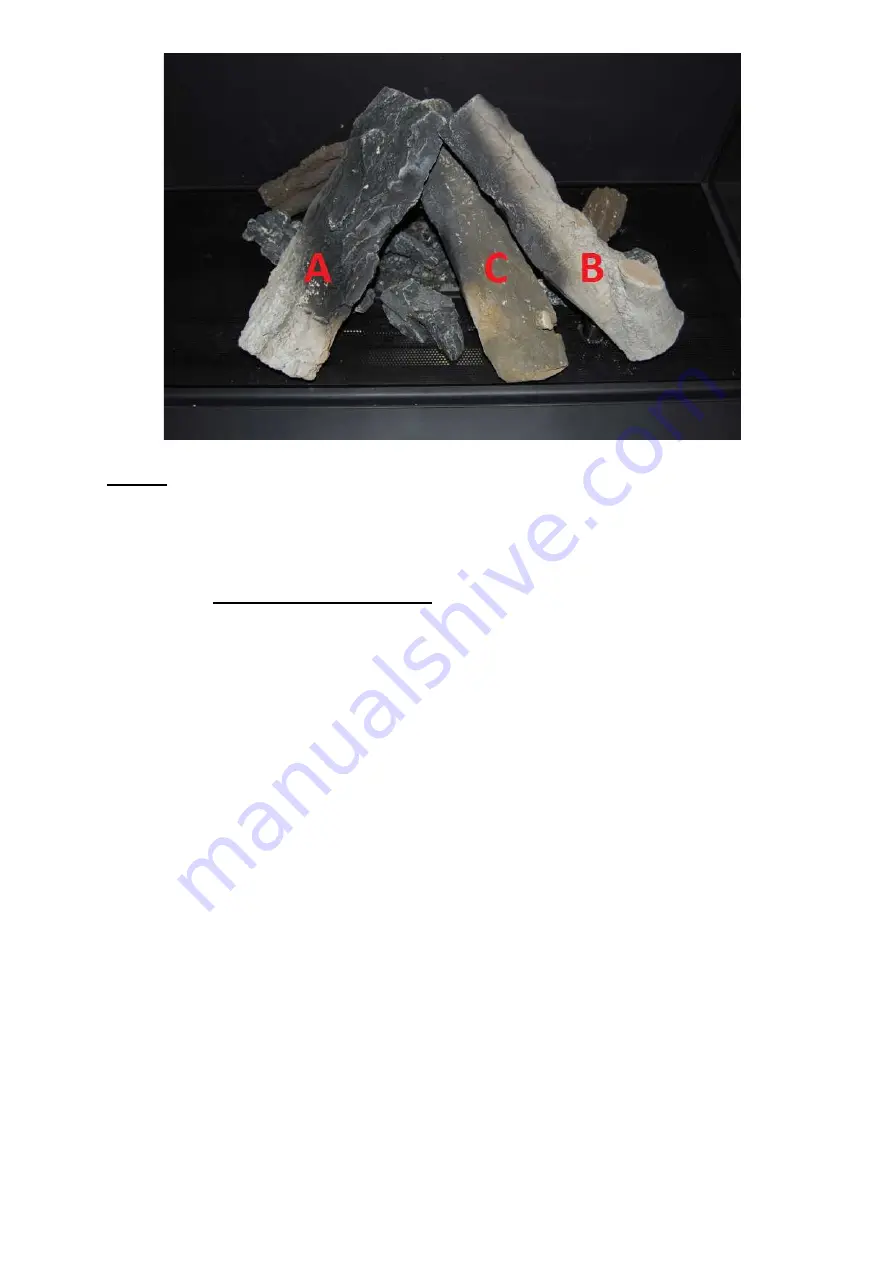
Please note that only after proper placement of logs or decorative stones, you can start installing the glass.
You should be careful not to damage the glass during handling or assembly.
5.12.1.
Assembly of the glass pane
The device is equipped with heat-resistant ceramic glass to withstand temperatures up to 800 ° C.
Depending on the glazing of the unit, disassembly and assembly of the front glass takes place in a different
way.
WARNING!
Avoid leaving fingerprints, because they will burn out on the glass.
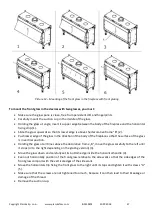
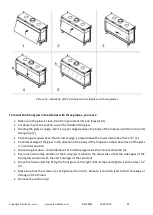
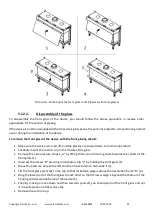
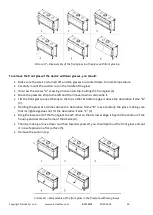
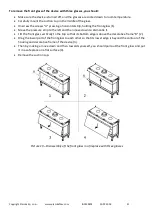
To mount the front glass of the device with the front glazing you must:
Make sure the glass is clean, free from persistent dirt and fingerprints.
Carefully mount the suction cup in the middle of the glass.
Holding the glass at angle, insert its upper edge between the body of the fireplace and the horizontal
fixing strip (1).
Slide the glass upwards so that its lower edge is above the lower decorative frame "D" (2).
Push lower edge of the glass in the direction of the body of the fireplace so that the surface of the glass
is in vertical position (3).
Move the glass down and carefully set its bottom edge inside the horizontal handle.
Even out horizontally position of the front glass relative to the side walls so that the side edges of the
front glass comport with the vertical edges of the side walls.
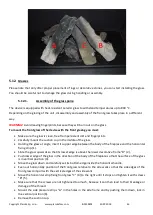
Move the horizontal strip fixing front glass "C" (4) to the right until it stops and tighten it with screws
"B" (5).
Make sure that the screws are not tightened too much, because it can then lead to their breakage or
damage of the thread.
Mount the side pressure strips "A" in the holes in the side frame and by pushing them down, lock in
the vertical position (6).
Remove the suction cup.

