

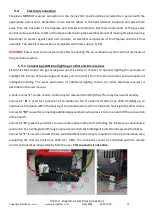


Copyright Planika Sp. z o.o.
www.planikafires.com
IG0139#02
30.07.2018
21
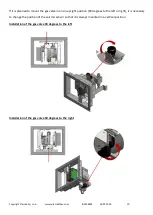
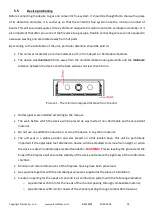
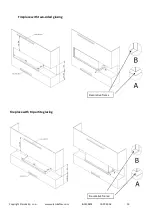
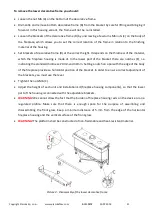
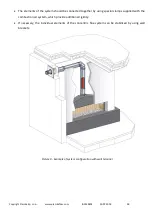
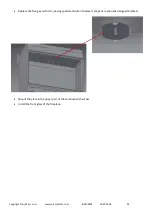
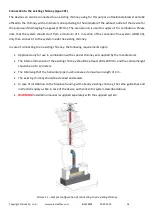
To remove the lower decorative frame you should:
Loosen the nut M6 (A) on the bottom of the decorative frame.
Dismantle and remove bottom decorative frame (B) from the bracket by careful lifting and bringing it
forward. In this housing variant, the frame will not be re-installed.
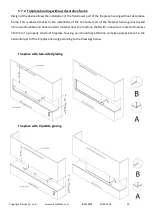
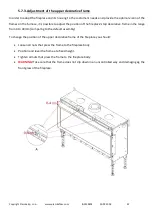
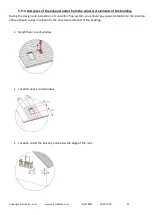
Loosen the brackets of the decorative frame (D) by unscrewing a few turns M6 nuts (C) on the body of
the fireplace, which allows you to set the correct location of the frame in relation to the finishing
material of the housing.
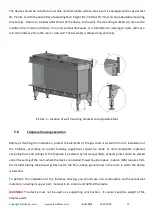
Set brackets of decorative frame (D) at the correct height. It depends on the thickness of the material,
which the fireplace housing is made of. In the lower part of the bracket there are notches (E), i.e.
indicating the standard thickness: 20mm and 30mm. Setting a notch on a par with the edge of the body
of the fireplace provides a horizontal position of the bracket. In order to ensure correct adjustment of
the brackets, you must use the level.
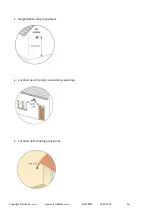
Tighten the nuts M6 (C).
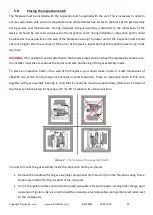
Adjust the height of each unit and installation kit (fireplace housing components), so that the lower
part of the housing is connected with the adjustable brackets.
WARNING!
We cannot allow the fact that the burden of fireplace housing rests on the device or on a
regulated profile. Make sure that there is enough space for the purpose of assembling and
disassembling the front glass. Keep a minimum distance of 5 mm from the edge of the horizontal
fireplace housing and the vertical surface of the front glass.
WARNING!
The platform shall be constructed of non-flammable and heat-resistant material.
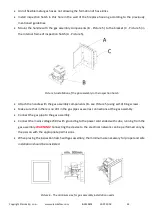
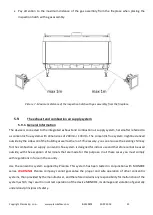
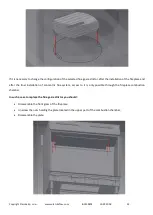
Picture 3 - Disassembly of the lower decorative frame


