


Adding a graphic
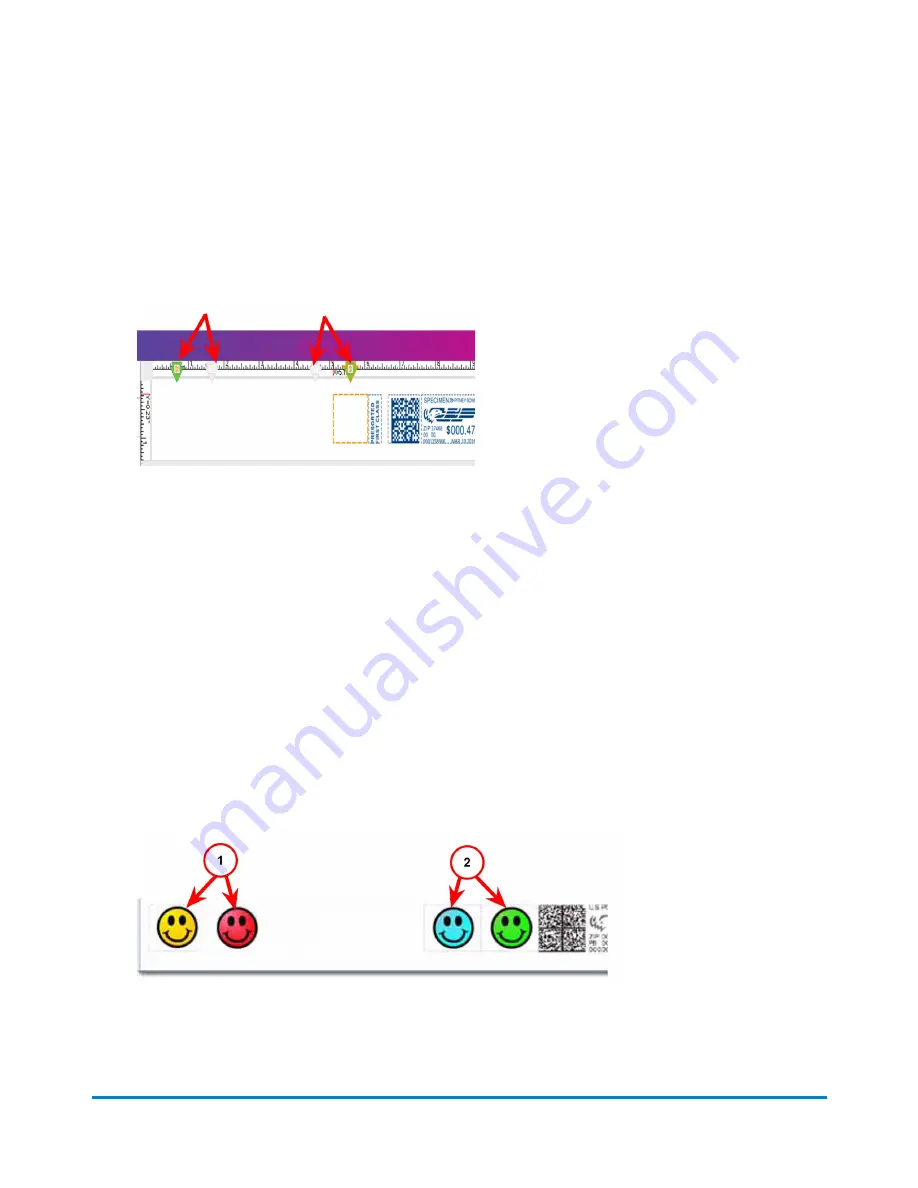
1. As soon as you open the Graphic Ad screen, a series of markers appear along the top of the
envelope. The arrows indicate the location of the markers.
l
The number of markers that appear depend on the size of the envelope or tape. A #10
envelope and has four graphic markers.
l
The markers are grouped as left justified (left edge of the envelope) or right justified (next to
the indicia). The markers define the locations for the graphic images.
2. To select a graphic, choose the marker, then select the graphic from the list (a checkmark
appears in the checkbox).
l
If the zone is empty, by default the right justified marker next to the indicia is automatically
selected and the first graphic will appear in this location.
l
To remove the graphic, simply de-select it so that the checkmark is removed from the
checkbox.
3. Select
OK
to place the graphic on the envelope. The Run Mail screen appears with the graphic
displayed on the envelope.
4. For a #10 envelope template you can add up to four graphics: two will be right justified (2) and
two will be left justified (1).
5. If you try to add an image and there is not enough room, the system will display a message
telling you to either remove an existing image or change the size of the envelope.
Running mail
Pitney Bowes
User Guide April 2022
75


