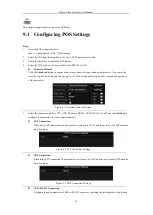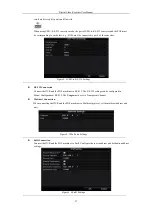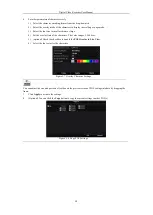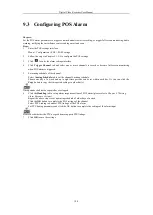
Digital Video Recorder User Manual
102
Purpose:
The DVR can receive the VCA alarm (line crossing detection, intrusion detection, sudden scene change detection
and audio exception detection) sent by analog camera, and the VCA detection must be enabled and configured on
the camera settings interface first. All other VCA detection features must be supported by the connected IP camera.
10.1
Face Detection
Purpose:
Face detection function detects the face appears in the surveillance scene, and some certain actions can be taken
when the alarm is triggered.
Steps:
1.
Enter the VCA settings interface.
Menu > Camera > VCA
2.
Select the camera to configure the VCA.
You can click the checkbox of
Save VCA Picture
to save the captured pictures of VCA detection.
3.
Select the VCA detection type to
Face Detection
.
4.
Click
to enter the face detection settings interface. Configure the trigger channel, arming schedule and
linkage action for the face detection alarm. Please refer to step3~step5 of
Chapter 8.1 Setting Motion
Detection
for detailed instructions.
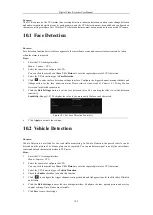
5.
Click the
Rule Settings
button to set the face detection rules. You can drag the slider to set the detection
sensitivity.
Sensitivity:
Range [1-5]. The higher the value is, the more easily the face can be detected.
Figure 10. 1
Set Face Detection Sensitivity
6.
Click
Apply
to activate the settings.
10.2
Vehicle Detection
Purpose:
Vehicle Detection is available for the road traffic monitoring. In Vehicle Detection, the passed vehicle can be
detected and the picture of its license plate can be captured. You can send alarm signal to notify the surveillance
center and upload the captured picture to FTP server.
Steps:
1.
Enter the VCA settings interface.
Menu> Camera> VCA
2.
Select the camera to configure the VCA.
You can click the checkbox of
Save VCA Picture
to save the captured pictures of VCA detection.
3.
Select the VCA detection type to
Vehicle Detection
.
4.
Check the
Enable
checkbox to enable this function.
5.
Click
to configure the trigger channel, arming schedule and linkage actions for the Blacklist, Whitelist
and Others.
6.
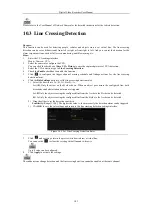
Click the
Rule Settings
to enter the rule settings interface. Configure the lane, upload picture and overlay
content settings. Up to 4 lanes are selectable.
7.
Click
Save
to save the settings.
Summary of Contents for DVR-TVI-04
Page 1: ...Digital Video Recorder User Manual ...
Page 13: ...Digital Video Recorder User Manual 12 Chapter 1 Introduction ...
Page 21: ...Digital Video Recorder User Manual 20 Chapter 2 Getting Started ...
Page 32: ...Digital Video Recorder User Manual 31 Chapter 3 Live View ...
Page 40: ...Digital Video Recorder User Manual 39 Chapter 4 PTZ Controls ...
Page 49: ...Digital Video Recorder User Manual 48 Chapter 5 Recording Settings ...
Page 67: ...Digital Video Recorder User Manual 66 Chapter 6 Playback ...
Page 78: ...Digital Video Recorder User Manual 77 Chapter 7 Backup ...
Page 82: ...Digital Video Recorder User Manual 81 Chapter 8 Alarm Settings ...
Page 87: ...Digital Video Recorder User Manual 86 Figure 8 9 Copy Settings of Alarm Input ...
Page 96: ...Digital Video Recorder User Manual 95 Chapter 9 POS Configuration ...
Page 102: ...Digital Video Recorder User Manual 101 Chapter 10 VCAAlarm ...
Page 110: ...Digital Video Recorder User Manual 109 Chapter 11 VCA Search ...
Page 116: ...Digital Video Recorder User Manual 115 Chapter 12 Network Settings ...
Page 130: ...Digital Video Recorder User Manual 129 Chapter 13 HDD Management ...
Page 142: ...Digital Video Recorder User Manual 141 Chapter 14 Camera Settings ...
Page 146: ...Digital Video Recorder User Manual 145 Chapter 15 DVR Management and Maintenance ...
Page 153: ...Digital Video Recorder User Manual 152 Chapter 16 Others ...
Page 161: ...Digital Video Recorder User Manual 160 Chapter 17 Appendix ...


