Magnum C3C Spreader Sprayer
Operator Manual
Refer to the cover page for restrictions regarding
reproduction or disclosure of this material.
Page 35
September/08
SPREADER CALIBRATION, ADJUSTMENT, AND OPERATION (continued)
1. Place the spreader operating lever in the CLOSED position. Verify that the spreader
discharge holes are closed.
2. If the spreader discharge holes are not completely closed, adjust the length of the control
cable running from the controls on the left handlebar down the handle to the outer hopper
control plate by loosening and repositioning the locknuts.
3. Establish the spreader initial adjustment and calibration position as follows:
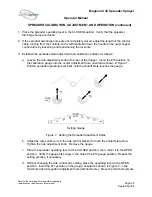
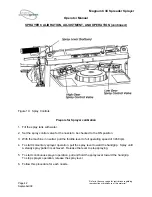
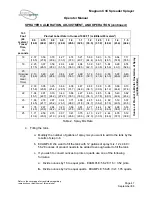
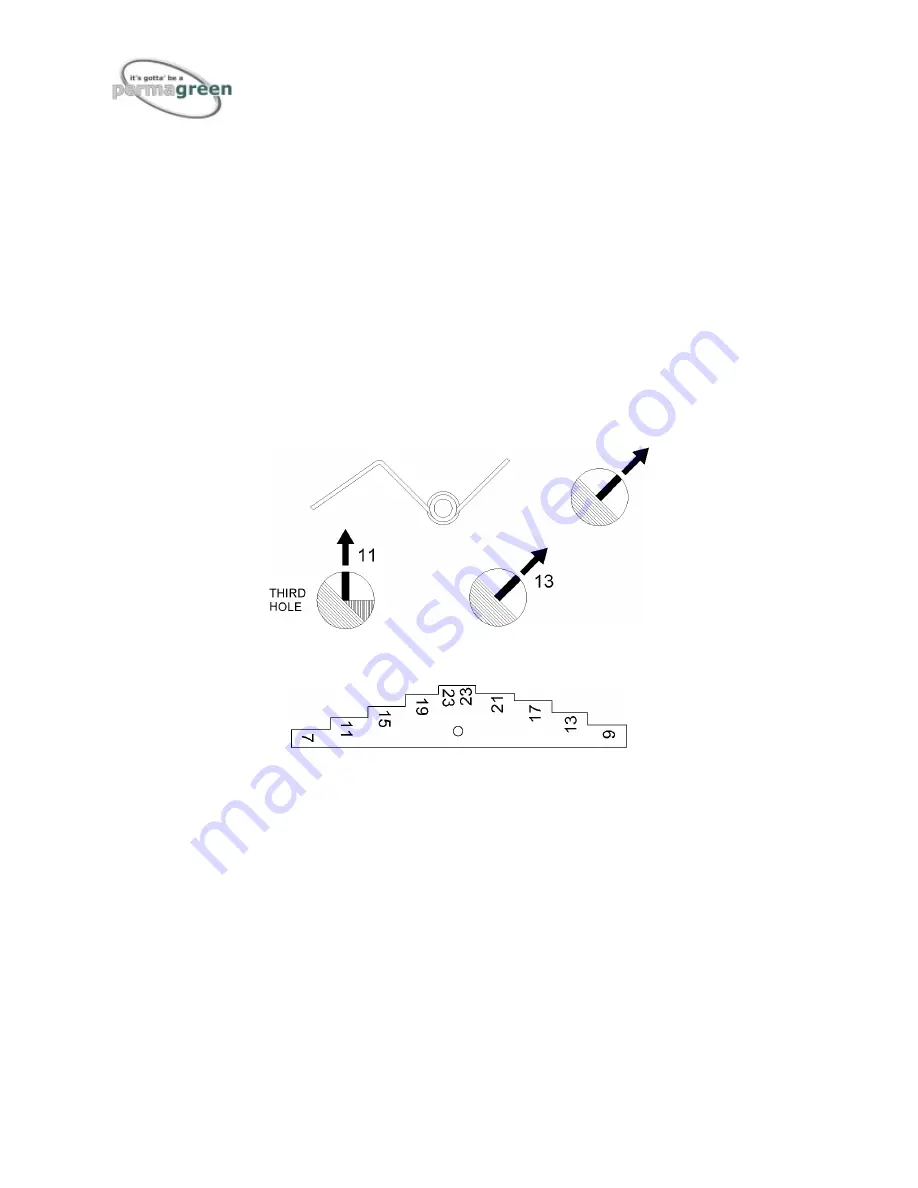
a. Loosen the rate adjustment knob at the rear of the hopper. Insert the #13 position on
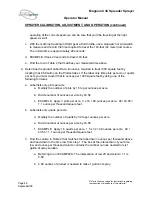
the calibration gauge into the center adjustment hole, oriented as shown in Figure 7.
Pull the spreader operating lever back until the shutoff plate touches the gauge.
Setting Gauge
Figure 7. Setting the Spreader Adjustment Holes
b. Adjust the rate control arm in the rate control bracket to touch the shutoff plate stop.
Tighten the rate adjustment knob. Remove the gauge.
c. Place the spreader operating lever at the CLOSED position, then, return it to the OPEN
position. Verify the gauge fits snugly in the hole at the #13 gauge position. Repeat the
setting process, if necessary.
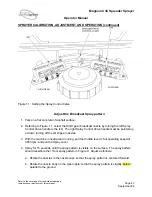
d. Without changing the rate control arm setting, place the operating lever at the OPEN
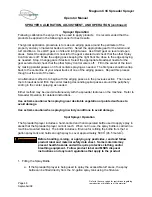
position. Insert the #11 position on the gauge, oriented as shown in Figure 7, in the
third-hole right side pattern adjustment hole (left-hand hole). Move the third-hole remote

