Connection
OMCTT5639E09
25
5. Connection
5.1 Connecting output cables
This section explains the connection in case of using a
special torch. (The same applies to connections for the arc spot.)
When using other torches and/or extension cables: see
section “Installation: Peripheral equipment”.
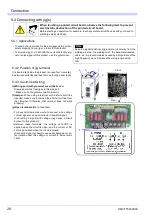
5.1.1 About output cables (Below figures are images)
Important
The installation shall be done by qualified installation personnel and should conform to all national
and local codes.
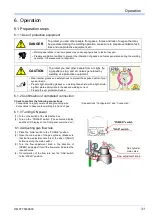
DANGER
Touching current carrying parts may cause a fatal accident like an electric
shock, burn injury and so on.
To prevent physical accidents like an electric
shock, burn injury and so on, make sure to observe the followings.
• Make sure to turn off the switches of this product and the distribution box before starting connections.
• Do not perform any connection work with moistened hands.
• Make sure to insulate all bare current-carrying parts like joints and so on by tape, etc.
• Do not strain cables, or let them make contact with the welding arc area.
• For safety reasons, make sure to provide this product and base material with class D or class C grounding
work done by qualified electricians.
CAUTION
Observe the followings to prevent a fire caused by overheat of cables.
• Use cables at least with specified thickness.
• Fasten all cable connections securely.
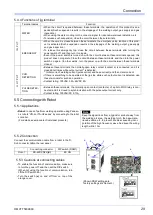
Name
Connect to (Power source side)
The polarity relation between the torch and
base material is electrode minus (DCEN).
1
Weld torch side
(1a)
Torch cable
“Negative (-)” terminal
Note
(1b)
Gas hose
“Gas output” joint
(1c)
Torch switch
“Torch switch” outlet
2
Base metal side
(Attach the fingertip joint
*
)
“Positive (+)” terminal
Note
3
Remote controller
(Optional unit)
“Remote” outlet
Note: Insert it into the “(-)/(+) terminal” in line with the guide respectively,
and turn it clockwise until it is locked.
1a
2
*
1c
1b
3
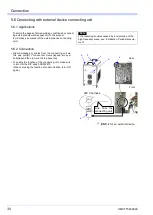
Lay the torch cable and base-material-side cable side by
side without winding to keep down their impedance (alter
-
nating current resistance in the circuit)
If it is necessary to wide the cables:
• Wind the torch-side cable and the base-material-side
cable respectively in opposite directions.
• Wind in the same winding number.
• Wind each of the winding piled alternately.
Note
Large impedance may cause Err-13 (secondary over-
voltage error. See section “Troubleshooting”.)
(Good)
(Bad)
Summary of Contents for YC-300BP2YAF
Page 10: ...Rated Specifications OMCTT5639E09 10 2 2 1 Dimensions ...
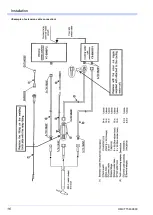
Page 16: ...Installation OMCTT5639E09 16 Example of extension cable connection ...
Page 49: ...Parts list OMCTT5639E09 49 9 Parts list ...
Page 52: ...OMCTT5639E09 52 ...
Page 53: ...Circuit diagram OMCTT5639E09 53 10 Circuit diagram NF9 NF8 ...
Page 54: ...Circuit diagram OMCTT5639E09 54 10 1 Enlarged left half NF8 MCB ...
Page 55: ...Circuit diagram OMCTT5639E09 55 10 2 Enlarged right half NF9 ...
Page 62: ...OMCTT5639E09 62 ...
Page 63: ...OMCTT5639E09 63 ...

