Operation
OMCTT5639E09
34
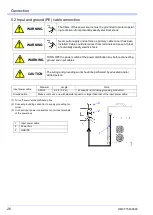
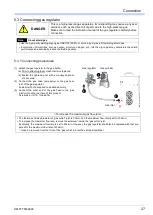
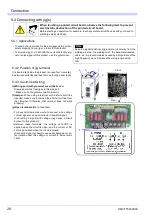
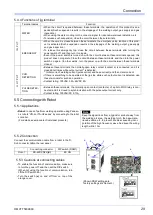
6.3.2 How to change settings
• Change these welding conditions as desired before use.
• As for any important welding conditions, store them in
the product by allocating the program numbers (See sec
-
tion "Storing welding conditions.”)
• As for welding condition not in store, the setting of the
product returns to the original factory-set welding condi
-
tions when the factory setting is restored,.
6.3.3 How to restore the original factory setting of this product
If you want to restore the original factory-setting, carry out
the operation indicated in the following table. (Underlined
bold character in the “LCD display” column indicates the
cursor position.)
Operation
Remarks
1
Set “FUNCTION” button to “DETAIL.”
First, “
V Disp Status
” appears on
the LCD display.
On “Set-value” display, set con
-
tents is indicated.
2
Press the JOG dial until the set item
you want to change appears.
3
Turn the JOG dial until the required
set item appears.
Turn the JOG dial either clock
-
wise or counter-clockwise.
4
Press the JOG dial.
The present set content is stored
and the next set item is displayed.
5
Then, repeat the procedure from (2) through (4) until desired change of set
contents are completed.
6
Switch the “FUNCTION” button to “WELD” to start welding operation.
LCD display
Set-value
JOG dial
display
“FUNCTION” button
Note
If you get lost during the operation, turn the power off,
and repeat the same operations from item (1) again.
Operation
Set-value display
LCD display
1
• Hold down the JOG dial, and while holding it down,
turn on the “POWRE” switch.
Then indication changes to
2
• Press the JOG dial to determine the choice.
• *When you turn the JOG dial without pressing
down, the screen displays the next set item. In that
case, turn it further until the desired set item reap
-
pears.
(Cursor flashes.)
3
• Press the JOG dial.
4
• Turn the JOG dial and have “YES” displayed.
5
• Press the JOG dial
(Cursor flashes.)
6
• Turn the JOG dial and have “YES” displayed.
7
• Press the JOG dial to complete.
Rescue Menu
YC-300BP Series
1
Set Defaults?
No
1 Set Defaults?
N
o
1 Set Defaults?
N
o
Are you sure?
* * *
*
Welding Current
Summary of Contents for YC-300BP2YAF
Page 10: ...Rated Specifications OMCTT5639E09 10 2 2 1 Dimensions ...
Page 16: ...Installation OMCTT5639E09 16 Example of extension cable connection ...
Page 49: ...Parts list OMCTT5639E09 49 9 Parts list ...
Page 52: ...OMCTT5639E09 52 ...
Page 53: ...Circuit diagram OMCTT5639E09 53 10 Circuit diagram NF9 NF8 ...
Page 54: ...Circuit diagram OMCTT5639E09 54 10 1 Enlarged left half NF8 MCB ...
Page 55: ...Circuit diagram OMCTT5639E09 55 10 2 Enlarged right half NF9 ...
Page 62: ...OMCTT5639E09 62 ...
Page 63: ...OMCTT5639E09 63 ...


