Maintenance/replacement
ENGLISH - 105
Maintenance
4) Attach the air filter unit to the
projector.
▶
z
The top and bottom of the air filter unit are
different.
(Check the arrow (
ヶヱ
) direction.)
▶
z
Perform Step
2)
in reverse order.
5) Attach the air filter cover to the
projector and use a Phillips
screwdriver to tighten the air filter
cover screw.
▶
z
Perform Step
1)
in reverse order.
Attention
z
After washing the air filter unit, dry it thoroughly
before attaching it back to the projector. Attaching a
wet unit will cause an electric shock or malfunction.
z
Do not disassemble the air filter unit.
Note
z
Make sure that the air filter unit is properly attached
before using the projector. If not properly attached,
the projector will suck in dirt and dust which causes
malfunction and the power to switch off 10 minutes
later. (The time remaining until the power switches
off is displayed in 1-minute increments.)
z
Replace the air filter unit with a replacement filter
unit (ET-EMF300) if it is damaged or if the dirt does
not come off even after washing.
z
Air filter replacement is recommended after
cleaning the unit two times.
z
The dust-proof properties may be reduced after
each cleaning.
Replacing the unit
▶
■
Air filter unit
If dirt does not come off even if the unit is maintained, it is time for the unit to be replaced.
The replacement filter unit (ET-EMF300) is an optional accessory. To purchase the product, consult your
dealer.
▶
■
Replacement of the air filter unit
Attention
z
Make sure to turn off the power before replacing
the air filter unit.
z
When replacing the unit, make sure that the
projector is stable. Perform the replacement in a
safe place where the projector will not be damaged
even if you drop the air filter unit.
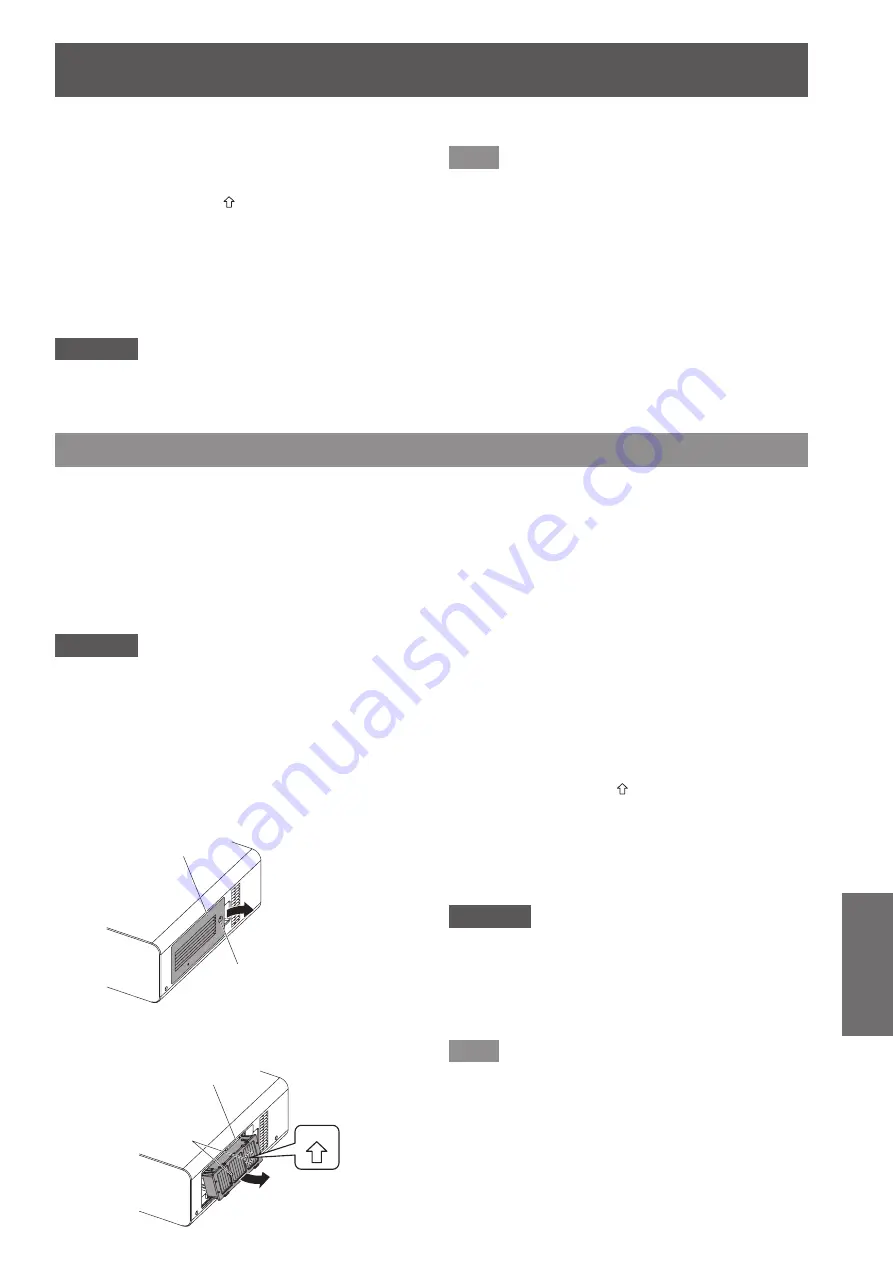
1) Remove the air filter cover.
▶
z
Use a Phillips screwdriver to turn the air filter
cover screw counterclockwise until it turns
freely, and then remove the air filter cover.
Air filter cover fixing screw
Air filter cover
2) Pull out the air filter unit.
▶
z
Grasp the air filter unit tabs and remove the air
filter unit from the projector body.
72
Air filter unit
Tabs
▶
z
After pulling out the air filter unit, remove any
large foreign objects or dust present in the air
filter unit compartment and the air intake port of
the projector body.
3) Attach the separately sold replacement
filter unit (ET-EMF300) to the projector.
▶
z
The top and bottom of the air filter unit are
different.
(Check the arrow (
ヶヱ
) direction.)
▶
z
Perform Step
2)
in reverse order.
4) Attach the air filter cover to the
projector. Using a Phillips screwdriver,
tighten the air filter cover screw.
▶
z
Perform Step
1)
in reverse order.
Attention
z
When switching on the projector, make sure that
the air filter unit is installed. If not properly attached,
the projector will suck in dirt and dust which causes
malfunction and the power to switch off 10 minutes
later. (The time remaining until the power switches
off is displayed in 1-minute increments.)
Note
z
The replacement cycle of the air filter unit varies
greatly depending on the usage environment.


