Maintenance
Version 1.0.1 dated 2017-11-16
Page 78
Translation of the original instructions
TX6222
GB
T
X
6222
_GB
_5.
fm
OPTIMUM
M A S C H I N E N - G E R M A N Y
®
We recommend that the electrical cabinet is cleaned every 1000 operating hours .
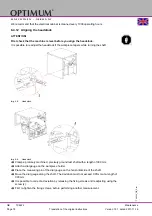
6.4.12 Aligning the headstock
ATTENTION!
First check that the machine is level before you align the headstock.
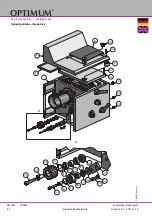
It is possible to readjust the headstock if the workpiece tapers while turning the shaft.
Img. 6-8:
Headstock
Img. 6-9:
Headstock
Clamp a precisely machined, precisely ground test shaft with a length of 300 mm.
Attach a dial gauge on the workpiece holder.
Place the measuring pin of the dial gauge on the horizontal side of the shaft.
Move the dial gauge along the shaft. The deviation must not exceed 0.01mm at a length of
300 mm.
It is possible to correct a deviation by releasing the fixing screws and readjusting using the
screw (J).
First re-tighten the fixing screws, before performing another measurement.


