


30
CASY TT Operator‘s Guide
MAIN MENU – Edit Setup
5.4 MAIN MENU – Edit Setup
Edit Setup
opens the setup screen. All the parameters provided by the CASY TT to define the mea-
suring conditions, display the size distribution, calculate and output the measuring results, can be
edited in this screen. The active parameters are always displayed. Any setup you wish to edit must
first be loaded through
Select Setup
(see Chapter 5.3).
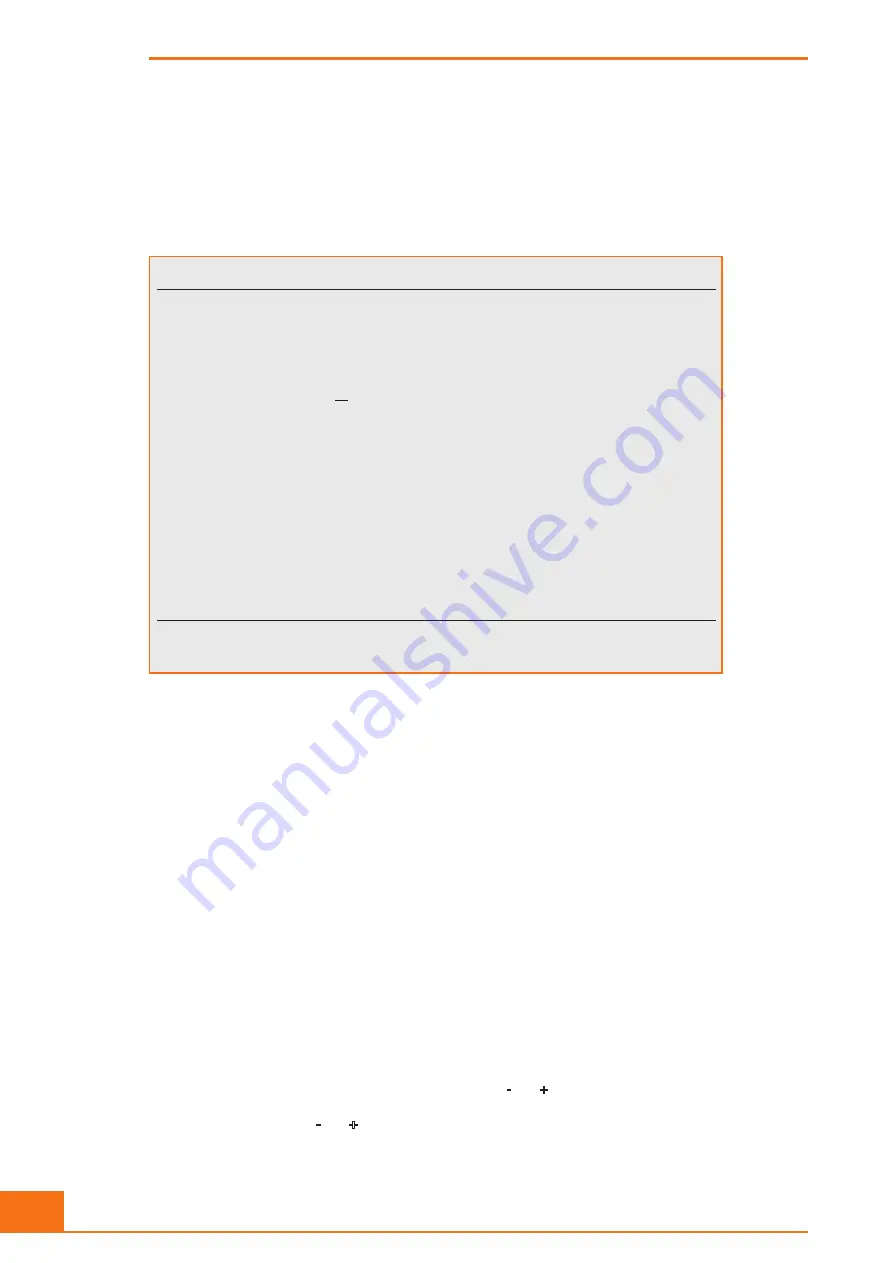
SETUP NUMBER: 01 NAME: Chondrozyt
Capillary : 150 µm X-Axis : 50 µm
Sample Vol : 400 µl Cycles : 2
--------------------------------------------
Dilution : 1.000e+02
Y-Axis : Auto
Eval.Cursor : 11.20 - 50.00 µm
Norm.Cursor : 6.80 - 50.00 µm
%Calculation: %Via Debris : On
Aggr.Correct: Auto P.Vol : 0.000e+00 fl
Interface : Par P.Feed : On
Print-Mode : Manual Graphic: On
USE MENU AND NEXT TO STEP. USE +/- TO EDIT.
USE CANCEL TO LEAVE SCREEN OR ENTER TO CONFIRM CHANGES.
The setup screen is divided into three areas. The header, separated by a horizontal line, contains the
SETUP NUMBER
(00 –19) and the
NAME
(setup name) you have defined. If the active parameters
do not correspond to any of the stored setups, two forward slashes // are shown in place of the
setup number and
NOT SAVED
in place of the setup name.
The block below, separated by another horizontal line, contains all the
measuring parameters
. These
parameters must be defined before a measurement takes place. They may not be retrospectively
changed.
The main block below contains all
evaluation parameters
and also the output para meters, which
define the settings for outputting via a directly connected printer or via the serial interface. The
parameters can be modified following a measurement.
When a setup screen is opened, the input marker is located initially on the
Dilution
input field.
The current input position is indicated by a flashing, horizontal line below the characters which can
currently be changed. From this point, you can use the
MENU
key to move forwards or backwards
between the input fields. To move forwards, press the
MENU
key briefly. The input marker skips
forward to the next available input position. To move backwards, keep the
MENU
key pressed until
the input marker reaches the position you require. Both methods move you to the start or the end
of the screen when the last or the first parameter respectively is reached.
When inputting numbers, you can move forwards from number to number using the
NEXT
key. To
increase or decrease a number selected using
NEXT
, use the
-
and
+
keys.
For all other parameters, the
-
and
+
keys can be used to select various pre-defined values. This also
applies for the individual characters of the setup name.


