- 64 -
Scanning to Network PC
4
Scanning
13
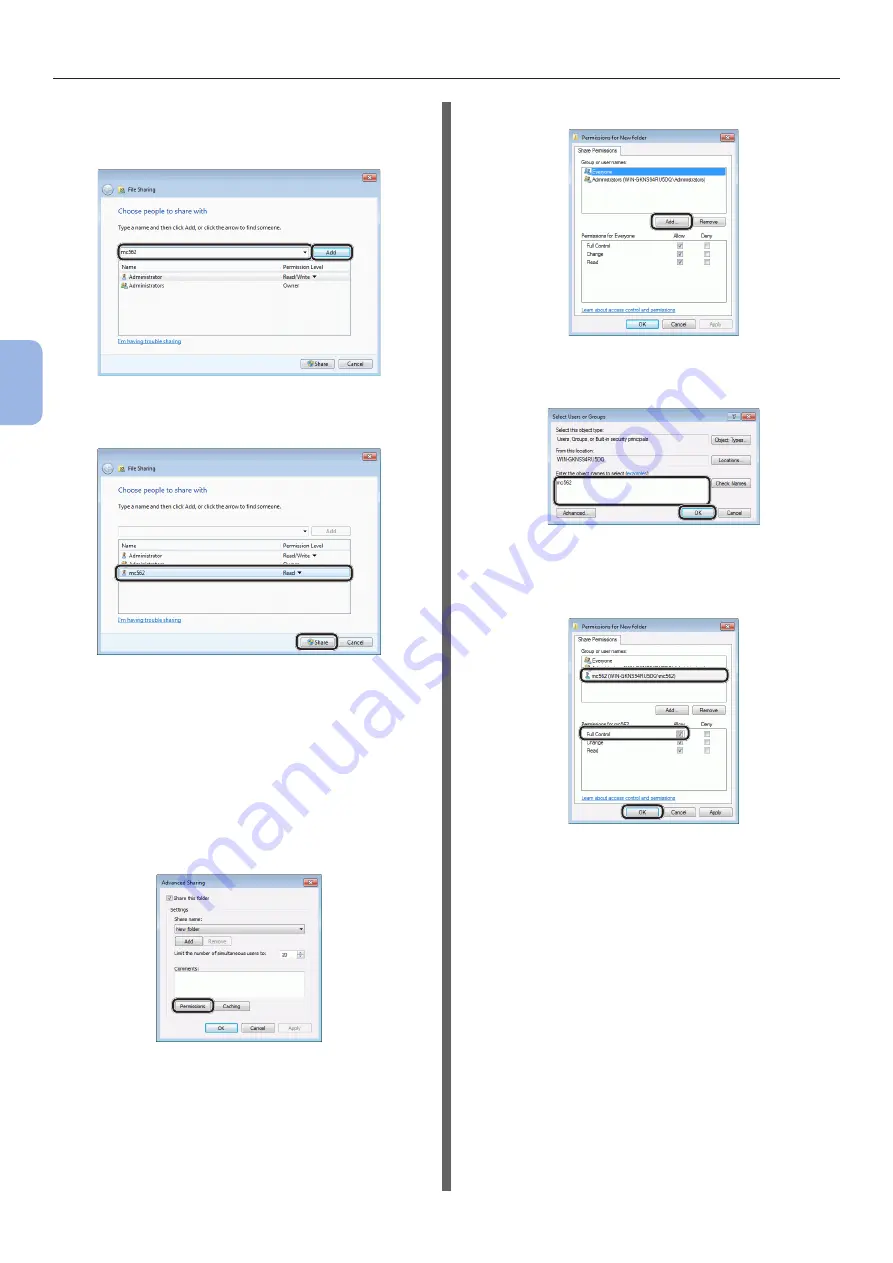
Select the user account created in step 5
from the drop down box, and then click
[Add].
14
Check that the user added in step 13 is
displayed and then click [Share].
After the [
Network discovery and file sharing
]
dialog box is displayed, click [No, make the
network that I am connected to a private
network].
15
Click [Done].
16
Click [Advanced Sharing] on the
[Sharing] tab.
17
Click [Permissions].
For Windows Vista/Windows Server 2008,
proceed to the step 20.
18
Click [Add].
19
Enter the value in C-2 in the entry field
and then click [OK].
20
Select the user added in step 13 and
select the [Allow] checkbox for [Full
Control], and then click [OK].
21
Click [OK].
22
Click [Close].
“Step 2-4 Creating a Profile for Scan
For Windows XP
1
Click [start] > [Control Panel].
2
Double-click [User Accounts].
3
Select [Create a new account].
Summary of Contents for ES3452 MFP
Page 119: ...119...


