background image

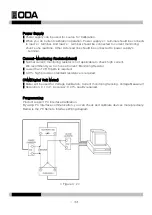
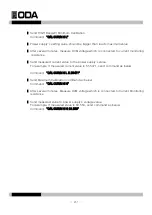
▌Send HIGH Range의 Minimum Calibration.

   Command "CAL:CURR:H:L"

▌Power supply's setting value should be bigger than load's maximum value. 

▌After several minutes, measure DVM voltage which is connected to current monitoring

    resistance. 

▌Send measured current value to the power supply's value. 

   For example, if measured current value is 5.55471, send command as below.

   Command "CAL:CURR:H:L 5.55471"

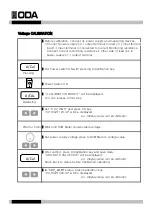
▌Send Maximum Calibration command as below. 

   Command "CAL:CURR:H:H"

▌After several minutes, Measure DVM voltage which is connected to Current Monitoring

   resistance.

▌Send measured value to power supply's voltage value. 

   For example, If measured value is 60.553, send command as below.
   Command "CAL:CURR:H:H 60.553"

 -  61  - 

Summary of Contents for LP Series

Page 1: ...Programmable DC Electronic Load User Manual www odacore com LP Series Manual Part NO 018LP 2 0...

Page 2: ...ontained herein Should ODA and the user have a separate written agreement with warranty terms covering the material in this document that conflict with these terms the warranty terms in the separate a...

Page 3: ...a hazard that could result in personal injury CAUTION notice until the indicated conditions Verify that all safety precautions are taken CAUTION Before Applying Power are fully understood and met saf...

Page 4: ...letely disconnected from ac mains when switch is off In position of a bi stable push switch Direct current Earth ground terminal Frame or chassis terminal Protective earth ground terminal Alternating...

Page 5: ...Electrical Check 1 4 Operating Conditions 3 Check Before Power On 4 Output Terminal Check Input AC Power Line Check 1 6 Check After Power On 4 Display Procedure on the LCD Default Setting Values 1 7 I...

Page 6: ...ge Operating CV 17 3 5 IO Local 18 RS232C Setting RS232C Configuration RS485 Setting RS485 Configuration USB Setting 3 6 Range 23 3 7 Save 24 3 8 Recall 25 3 9 ESC 26 3 10 DYNAMIC ON OFF 27 3 11 SLEW...

Page 7: ...ET 3 22 Error Message Display 48 3 23 Protection 49 3 24 Remote Voltage Sensing 50 4 CALIBRATION 4 1 Characteristics 51 4 2 Preparation for Calibration 51 4 3 Equipment required for Calibration 52 4 4...

Page 8: ...STATE 65 5 5 AUTO KEY LOCK 66 5 6 CAL DEFAULT 67 5 7 CAL RESTORE 68 5 8 CAL BACKUP 69 5 9 LOAD DEFAULD 70 6 1 Commands Syntax 71 6 2 Commands 71 7 1 Operating Error 89 7 2 Hardware Error 89 7 3 Remote...

Page 9: ...ilable up to 10 3U 19inch half Rack Compact Size 300W 600W Remote Interface Characteristics RS232C RS485 USB SCPI Standard Commands for Programmable Instruments adopted High speed setting measurement...

Page 10: ...1 pc Rack mount Voltage Sensing Short bar 2 pc User s Manual 1 pc Option RS232C Cable 1M 2M 4M RS485 Cable 2 4 8 Channel 1M 2M 4M 10M AC Input Cable Special order type Output Cable Special order type...

Page 11: ...Check Check the broken key encoder switch power switch Check the panel surfaces are free of dents and scratches Check the broken rear output terminals Check the cabinet is free of scratches Check the...

Page 12: ...side are lit and go off During displaying above procedure the instrument is initialized by stored in non volatile memory Default Setting Values Last State Mode is under the disable state Remote Inter...

Page 13: ...be installed in a location that allows sufficient space at the sides and rear of the load for adequate air circulation Rack Mounting This product is designed for 3U 19inch Half compact Use bracket to...

Page 14: ...Calibration 8 Cycling Mode Lamp 25 Dynamic Cycling Time Dynamic Duty 9 Remote Interface Lamp 26 Dynamic On Off 10 Protection Lamp 27 Cycling Sequence 11 Error Lamp 28 Cycling Repeat 12 Setting Encoder...

Page 15: ...de Lamp The load is in constant voltage mode 7 Dynamic Mode Lamp The load is in dynamic mode 8 Cycling Mode Lamp The load is in cycling mode 9 Remote Interface Lamp When received the remote control si...

Page 16: ...ss 3 seconds and there will be Error Number and message 20 Short On Off Setting Key Adjust the maximum current that load can take 21 Recall Save Key Click more than 3 seconds and enter to Recall Mode...

Page 17: ...0 0001 4s Press for 3 seconds and set the dynamic mode duty 0 3 97 26 Dynamic On Off Start and Stop the dynamic mode 27 Cycling Sequence setting Set the start step and finish step of cycling mode 28...

Page 18: ...7 RS232C Interface Port 1 Input Bus bar Electric load voltage output bus bar 2 Input Bus bar Electric load voltage output bus bar 3 External Option Input and output port 1 Current analog output 0 10V...

Page 19: ...a RS 232C Serial Port You can use this type in 1 1 communication status 8 RS485 Interface Port In this communication type you can connect many devices to 1 unit parallel Pin Description 1 5V Remote in...

Page 20: ...Explain about remote interface setting local mode changing error message 6 Range Explain about range of setting value 7 Save Explain the method of storing the electric load stat in User Memory chip 8...

Page 21: ...ing step in cycling mode 3 18 REP REPEAT Explain about repeat setting in cycling mode 3 19 SEQ SEQUENCE Explain about sequence setting in cycling mode 3 20 Error Message Display Explain about error me...

Page 22: ...de is Disabled Power Switch ON Turn on load and check load is in OFF MODE Initially IN OFF Status To allow input press IN ON OFF Key To disable input press IN ON OFF Key one more time Related Remote I...

Page 23: ...N OFF key CC Lamp will be on and If range is low LO will be displayed If range is high HI will be displayed Related Remote Interface Command mode VOLT CURR RES CURR current CURR RANG L H INPUT OFF ON...

Page 24: ...r to set the resistance value use the right cursor key and encoder knob After setting Press Input ON OFF Key and automatically CR Lamp will be on If Range setting is low LO will be displayed in the ri...

Page 25: ...ottom on display OFF VSET message will be displayed In order to set the voltage value use the right cursor key and encoder knob To set the voltage use left cursor key and encoder switch Related Remote...

Page 26: ...ut you can not control the instrument Maybe in this case it is under KEY LOCK Press Protection key and unlock RS 232C Setting RS 232C setting procedure Turn on the power supply After turned on check t...

Page 27: ...ype is necessary Below is connection drawing of female type cross cable Refer to chapter 1 2 Accessories Option and then you can Set the communication cable length or other using method If you want to...

Page 28: ...O key in order to set baud rate Baud rate is 9600 19200 38400 768000 2500000bps You must match between remote interface device s baud rate For example Press Right cursor key two times to Set 19200bps...

Page 29: ...ew Pin Description No 1 2 3 4 Figure 3 5 RS485 Configuration To connect RS485 Line to Remote device you need to prepare extra wire for harness Below figure is a wire diagram of connecting remote devic...

Page 30: ...I O key to set USB Interface Following before state appears RS232C RS485 USB and TCP IP on the display If the display is not 3 USB press the cursor key until changing to I O To save the setting value...

Page 31: ...e Range Related Remote Interface Command CURR RANG L H RES RANG L M H Application 1 CURR RANG L CC MODE RANGE LOW CURR RANG H CC MODE RANGE LOW RES RANG L CR MODE RANGE LOW RES RANG M CR MODE RANGE MI...

Page 32: ...TION part Turn on the load Check the load is in OFF MODE To save the settings press REC SAVE Key for 3 seconds Turn the encoder knob to Set the memory location among 01 10 To save the data in the loca...

Page 33: ...and check load is in OFF MODE To recall data press REC SAVE Key shortly Turn the encoder knob to Set the memory location among 01 10 To recall data press REC SAVE Key shortly done will be displayed a...

Page 34: ...SC ERR Key and operate the load Regards to kinds of Protection refer to 3 15 Protection Related Remote Interface Command SYST ERR PROT PROT CLE Application 1 Error Check SYST ERR Return value 222 Out...

Page 35: ...ortly To stop the dynamic mode press DYN A key one more time Related Remote Interface Command DYN INPUT OFF ON DYN INPUT Application Check dynamic mode state and turn dynamic mode on and off DYN INPUT...

Page 36: ...ON Turn on load and check load is in OFF MODE Press Mode Key and Set CC Mode Press SLEW Key and put SLEW Mode ON Use encoder to Set the level of slew To save the slew value press slew key one more ti...

Page 37: ...W mode on Use encoder to Set the level of slew To save the slew value press slew key one more time SLEW SAVE done will be displayed and get back to previous state Related Remote Interface Command VOLT...

Page 38: ...ave the value press A key one more time done message will be displayed and get back to previous state Related Remote Interface Command DYN MEM A mem a_value DYN MEM A Application DYN MEM A 10 Dynamic...

Page 39: ...SLEW B key one more time done will be displayed and get back to previous state Related Remote Interface Command DYN MEM B mem a_value DYN MEM B Application DYN MEM B 20 Dynamic B value Setting DYN MEM...

Page 40: ...encoder to set the value of Dynamic Cycling Time To save Dynamic Cycling Time press CYC TIME DUTY key done will be displayed and get back to previous state Related Remote Interface Command DYN FREQ V...

Page 41: ...ON Turn on load and check load is in OFF MODE Press Dynamic Cycling Time DUTY key Use encoder and set the duty value Press Dynamic Cycling Time DUTY Key to save the setting value done will be displaye...

Page 42: ...ynamic Mode press SHORT key one more time Related Remote Interface Command SHORT ON OFF SHORT Application To check SHORT status and make ON status SHORT Return value 0 SHORT Status check SHORT ON SHOR...

Page 43: ...s CYC RUN key Press CYC RUN key to stop Cycling mode Related Remote Interface Command CYC INPUT OFF ON CYC INPUT Application Check cycling mode and put on off cycling mode CYC INPUT Return value 0 Che...

Page 44: ...LOPE TIME SETTING 6 DELAY TIME SETTING After setting please escape by pressing ESC key 1 STEP NUMBER Power Switch ON Turn on load and check load is in OFF MODE Press STEP Key Set 1 STEP NUMBER by curs...

Page 45: ...et by cursor key Press STEP Key Set STEP mode by cursor key INPUT ON or INPUT OFF Mode Press STEP Key to save setting value Related Remote Interface Command CYC STEP MODE 1 100 OFF Application CYC STE...

Page 46: ...STEP Key Set STEP Mode by cursor Key Press STEP Key to save setting value Related Remote Interface Command CYC STEP MODE 1 CC CV CYC STEP MODE 1 100 Application CYC STEP MODE 1 Return value CC Step 1...

Page 47: ...Press STEP Key Set Cycling Step by encoder Press step key to save setting value ps When you are in CC Mode if one step is high current value Range is high Related Remote Interface Command CYC STEP VA...

Page 48: ...Press STEP Key Set slope time by encoder Press step key to save setting value ps SLOPE TIME SETTING is SLEW SETTING Related Remote Interface Command CYC STEP SLOPE 1 100 1 2 3 4 5 6 7 8 9 10 11 12 CYC...

Page 49: ...IME SETTING by cursor key Press Step Key Set the delay time by encoder Press Step key to save the setting value Related Remote Interface Command CYC STEP DELAY 1 100 VALUE CYC STEP DELAY 1 100 Applica...

Page 50: ...itch ON Turn on load and check load is in OFF MODE Press REP Key Set step repeat time by encoder Press REP Key to save the setting value Related Remote Interface Command CYC REP 1 10000 CYC REP Applic...

Page 51: ...NUMBER Power Switch ON Turn on load and check load is in OFF MODE Press SEQ Key Set 1 START NUMBER by cursor key Press SEQ Key Set START NUMBER by encoder Press SEQ Key to save the setting value Relat...

Page 52: ...SEQ Key Set 2 FINISH NUMBER by cursor key Press SEQ Key Set FINISH NUMBER by encoder Press SEQ Key to save the setting value Related Remote Interface Command CYC SEQ FIN VALUE CYC SEQ FIN Application...

Page 53: ...econds Fuse mode is ON Press CYC RUN to stop the fuse mode Fuse mode is OFF Related Remote Interface Command FUSE INPUT OFF ON FUSE INPUT Application Check FUSE mode status and change OFF Mode to ON M...

Page 54: ...check load is in OFF MODE Press STEP Key for 3 seconds Set 1 FUSE TIME SET by cursor key Press STEP Key Set FUSE TIME by encoder Press STEP Key to save the setting Related Remote Interface Command FU...

Page 55: ...ress STEP Key Set 2 FUSE CURRENT SET by cursor key Press STEP Key Set FUSE CURRENT by encoder Press STEP Key to save the setting Related Remote Interface Command FUSE CURR value FUSE CURR Application...

Page 56: ...Switch ON Turn on load and check load is in OFF MODE Press ERROR Key for 3 seconds If there s no Error NO ERROR will be displayed If there s Error error number will be displayed LCD will display ERROR...

Page 57: ...layed To remove OPP set power supply s setting appropriate to load s spec and press ESC OTP is Over Temperature Protection If load temperature is more than 105 Protection will be on OVER Temp will be...

Page 58: ...ensing function Remote Voltage Sensing Connection Set rear panel switch to Remote and connect Sensing terminal to power supply terminal And S sensing terminal should be connected to terminal power sup...

Page 59: ...le permanent memory Calibration Data Backup Calibration data restoration application Easy to process by inputting Meter value one by one Use measurement device that can measure loads spec Measurement...

Page 60: ...safety Figure 4 1 Voltage Range 80 Vdc Current Range 400 Adc Current Calibration Voltage Monitoring Measure Device Digital Voltmeter Power supply Users Voltage Calibration Current monitoring Resistor...

Page 61: ...ent monitoring resistor is not applicable to check high current We recommend you to choose Current Monitoring Resistor Lower than TCR 10ppm is required 0 01 high precision standard resistance is requi...

Page 62: ...sing front panel key 54 A CAL POWER ON CAL 1 CC Range High_High 2 CC Range High_Low 3 CC Range Low_High 4 CC Range Low_Low 5 CV_HIGH 6 CV_LOW 7 DYN CC High_High 8 DYN CC High_Low 9 DYN CC Low_High 10...

Page 63: ...ed to the load DVM terminal is connected to other side of the Current monitoring resistance s lead line With pressing A Calibration key put power switch on Pressing Power Switch ON CALIBRATION MODE wi...

Page 64: ...ltage is 61 5mV Current value will be 61 5A Set calculated current value to the power supply After setting press A Calibration Key to save the setting value ADC DATA VALUE 0016 will be displayed ps Di...

Page 65: ...e displayed ps Display value can be different Wait for 5 min Wait until DVM Meter shows stable voltage Calculate current value For example if resistance value is 0 01 checked voltage is 61 5mV Current...

Page 66: ...ON CALIBRATION MODE will be displayed You can release A CAL Key Releasing Set 5 CV_HIGH and press CR key CV HIGH 123 4V will be displayed ps Display value can be different Wait for 5min Wait until DVM...

Page 67: ...ey and save the setting value ADC DATA VALUE 0012 will be displayed ps Display value can be different Move back to before Calibration operating PS you can proceed DYN Calibration as same way above Not...

Page 68: ...age and current Send LOW Range Minimum Calibration Command to load Command CAL CURR L L Power supply s setting value should be higher than load s max setting value If power supplies setting value is l...

Page 69: ...rent value to the power supply s value For example if measured current value is 5 55471 send command as below Command CAL CURR H L 5 55471 Send Maximum Calibration command as below Command CAL CURR H...

Page 70: ...eral minutes Send measured voltage value to load s voltage value For example if measured value is 0 1234 send command as below Command CAL VOLT L 0 1234 Send load Voltage s Maximum Calibration command...

Page 71: ...zed If you don t want to use product for a while you can lock the front panel You can restore factory setting value by restoration function 63 5 1 Trait 5 2 FACTORY KEY Structure 5 FACTORY B FACT POWE...

Page 72: ...Y 50 Range Low FREQ 0 0001 SLEW LEVEL 1 Input Mode OFF USER MEM CLEAR Press power switch ON with pressing B FACTORY key Power Switch ON FACTORY MODE will be displayed and release B FACTORY Key Set 1 U...

Page 73: ...st before the OFF mode OUTPUT setting status ON OFF will be set so you have to be sure if this is safe LAST STATE Put power switch ON with pressing B FACTORY key Power Switch ON FACTORY MODE will be d...

Page 74: ...LE Do not use Auto key lock function ENABLE Use Auto key lock function AUTO KEY LOCK Put power switch ON with pressing B FACTORY key Power Switch ON FACTORY MODE will be displayed and release B FACTOR...

Page 75: ...this data In this case Calibration in specialized organization is required for precise operating CAL DEFAULT Press power switch on with pressing B FACTORY Key Pressing Power Switch ON FACTORY MODE wil...

Page 76: ...before calibration by this function CAL RESTORE Put power switch ON with pressing B FACTORY key Power Switch ON FACTORY MODE will be displayed Release B FACTORY Key Releasing Set 4 CAL RESTORE by cur...

Page 77: ...you can back up authorized organization s calibration data If you proceed back up previous back up data will be deleted CAL BACKUP Press power switch ON with pressing B FACTORY key Pressing Power Swit...

Page 78: ...LOAD DEFAULT Put power switch ON with pressing B FACTORY Key Power Switch ON FACTORY MODE will be displayed Release B FACTORY Key Set 6 LOAD DEFAULT by cursor key Press B FACTORY Key LOAD DEFAULT Don...

Page 79: ...ommand in one time You can omit Do not omit parameter in bracket Triangular bracket is changeable by CODE ex MIN MAX Bar means you can choose between several options Delimiter is only LF available You...

Page 80: ...M A MODE DYN MEM B VALUE DYN MEM B DYN MEM B MODE CC CV DYN MEM B MODE DYN FREQ VALUE DYN FREQ DYN DUTY VALUE DYN DUTY Cycling Commands CYC INPUT ON OFF CYC INPUT ON CYC STEP MODE STEP_NUM CC CV OFF C...

Page 81: ...ON FUSE TIME VALUE FUSE TIME FUSE CURR VALUE FUSE CURR Calibration Commands CAL CURR H H L CAL CURR H H VALUE CAL CURR H L VALUE CAL CURR L H L CAL CURR L H VALUE CAL CURR L L VALUE CAL VOLT H L CAL V...

Page 82: ...CAL VOLT DYN H L CAL VOLT DYN H VALUE CAL VOLT DYN L VALUE Factory Commands FACT AUTO LOC ENA DIS FACT AUTO LOC System Commands PROT PROT CLE SYST ERR SYST BEEP IDN RST RCL VALUE SAV VALUE SN 74...

Page 83: ...turn value 0 Disable the input status 1 Able the input status MODE CURR VOLT RES Command for setting load s mode CURR CC Mode VOLT CV Mode RES CR Mode MODE Command for checking load s mode status Retu...

Page 84: ...2 in CC Mode CURR SLEW H L Command for checking CC Mode s SLEW setting value Return value 2 SLEW setting value is 2 in CC Mode RES value Command for setting input resistance value of CR Mode value Inp...

Page 85: ...RES SLEW MID Return value 2 SLEW setting value is 2 in CC Mode VOLT value Command for checking CV Mode Voltage value value Input voltage ex VOLT 10 Set 10V VOLT Command for checking voltage setting v...

Page 86: ...s curr return value 1 0000 Dynamic Commands Command for OEL s dynamic function DYN INPUT ON OFF Command for allowance and disallowance of dynamic mode ON Dynamic Mode ON OFF Dynamic Mode OFF ex1 DYN I...

Page 87: ...king Dynamic A Memory mode Return value mode ex DYN MEM A MODE return value CC DYN MEM B VALUE Command for entering data to Dynamic B Memory value Entering data to Dynamic B Memory ex DYN MEM B 10 Ent...

Page 88: ...FREQ return value 0 05 DYN DUTY VALUE Command for setting Dynamic Mode s Duty Ratio VALUE Setting Duty Ratio ex DYN DUTY 90 Setting Duty Ratio at 90 DYN DUTY Command for checking setting value of Dyna...

Page 89: ...return value OFF CYC STEP VAL STEP_NUM VALUE Command for setting Step number and value VALUE Input value ex CYC STEP VAL 1 10 Save 10 in step 1 CYC STEP VAL STEP_NUM Return value VALUE ex CYC STEP VAL...

Page 90: ...cling VALUE Cycling REPEAT ex CYC REP 100 Cycling REPEAT Time 100 CYC REP Command for checking REPEAT Time of cycling Return value repeat ex CYC REP return value 100 CYC SEQ STA VALUE Command for sett...

Page 91: ...E Command for setting Fuse mode s current value VALUE Input Current value ex FUSECURR 10 Set Fuse mode current value as 10 FUSE CURR Command for checking Fuse mode s current value Return value VALUE e...

Page 92: ...h Range maximum current value VALUE ex CAL CURR H H 60 CAL CURR H L VALUE Command for setting High Range minimum current value VALUE ex CAL CURR H L 6 CAL CURR L H L Command for Current LOW Range Cali...

Page 93: ...voltage value VALUE ex CAL VOLT L 0 6 CAL CURR DYN H H L Command for selecting Dynamic mode Current High Range s High or Low current H High Range s maximum current calibration in dynamic mode L High R...

Page 94: ...ange maximum value VALUE ex CAL CURR DYN L H 6 CAL CURR L L VALUE Command for setting current LOW Range minimum value VALUE ex CAL CURR DYN L L 0 6 CAL VOLT DYN H L Command for selecting range for vol...

Page 95: ...Command for starting to make alarm beep ex syst beep Start Alarm beep SYST ERR Command for checking load s error You can save 10 errors in volatile memory and 11th error and afterwards will be deleted...

Page 96: ...rn value ODA Technologies OEL Series 1 0 1 0 1 0 SAV 1 2 3 4 5 6 7 8 10 Command for saving data at non volatile memory 1 10 Memory number ex sav 2 Save data at memory 2 RCL 1 2 3 4 5 6 7 8 10 Command...

Page 97: ...ating failed Front panel is not operating 255 Error not define Error that is not defined Refer 4 6 REMOTE INTERFACE Calibration for GPIB for further information 20 Ignored min run under volt This erro...

Page 98: ...ure Min VALUE MAX VALUE 28 Ignored min save under curr If you ignore calibration procedure as below this error will occur Procedure Min VALUE MAX VALUE 29 Invalid min value use under curr If you ignor...

Page 99: ...from ADC High limit Error will be checked and saved in non volatile memory If error occurs error lamp will be on 80 Memory limit volt error There s an error in voltage limit value 81 Memory limit cur...

Page 100: ...Invalid data This is an invalid data that have wrong data in wrong spots ex volt 10V Solution volt 10 122 Syntax error There s an syntax error ex volt Solution volt 10 123 Invalid suffix There s an e...

Page 101: ...th single polarity product error 221 will occur 222 Out of data Setting value is out of product spec ex volt 1000 Solution volt 10 223 Incorrect error When you send command consider interval time 100m...

Page 102: ...erating Do not put container with filled with liquid Do not put strong pressure to the product Acquire the space near the ventilation window Do not put heavy things on the product Do not use product i...

Page 103: ...62 Bupyeong daero 329beon gil Bupyeong gu Incheon city 403 858 Korea TEL 82 2 1800 8644 FAX 82 32 715 5456 www odacore com sales2 odacore com ODA TECHNOLOGIES CO LTD...

Reviews: