


Nortel Switched Firewall 2.3.3 User’s Guide and Command Reference
Initial setup
79
213455-L, October 2005
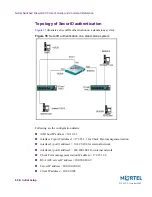
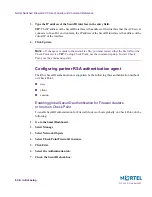
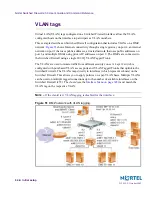
Configuring SecurID on Nortel Switched Firewalls
To configure SecurID on NSF, perform the following steps:
Import the agent configuration file to NSF.
Create the sdopts.rec file.
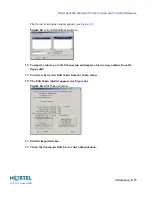
Importing the agent configuration file to NSF
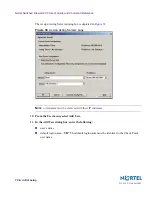
The generated configuration file is copied to the ace/data folder on the ACE server.
To import the generated file to the /var/ace folder on the Firewall, use the following CLI
commands:
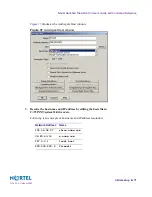
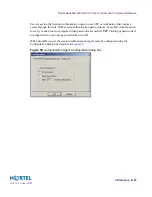
To import the generated file to the /var/ace folder on the Firewall using the Browser-Based
Interface, perform the following steps:
1.
Select Firewall.
2.
Select SecurID.
3.
Click Browse.
4.
Select the filed named sdconf.rec.
5.
Click import to copy the file to the /var/ace folder.
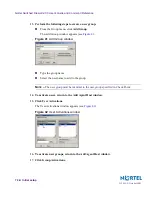
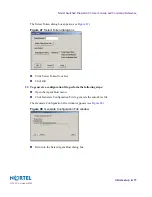
Generating the sdopts.rec file
To generate the sdopts.rec file to the /var/ace folder, use the following CLI command:
/cfg/fw/securid/interface <IP>
To generate the sdopts.rec file to the /var/ace folder using the Browser-Based Interface,
perform the following steps:
1.
Select Firewall.
2.
Select SecurID.
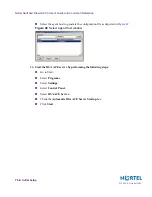
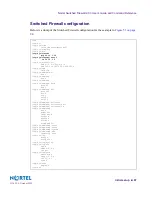
CLI command format
Result
/cfg/fw/securid/remote
import SecurID config file from a remote
server
/cfg/fw/securid/local
import SecurID config file from a USB
memory device or floppy disk