51
www.climacoolcorp.com
Split System Startup
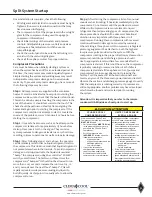
Once installation is complete, check the following:
•
All refrigerant and electrical connections must be tight .
Tighten all loose wire terminal connections that may
have loosened in shipping .
•
The compressor oil is at the proper level in the oil sight
glass for the compressor being used (See page 56 -
Compressor Information) .
•
Check initial settings of thermostats and pressure
controls . All adjustable pressure controls and valves
will require a final adjustment with the use of a
compatible gauge .
•
Check the control panel to be sure that all wiring is in
accord with the unit wiring diagram .
•
Check all three phase motors for proper rotation .
Compressor Precautions
Care must be taken when initially starting a system or
when the system has been off for an extended period. At
this time, the compressor may contain liquid refrigerant .
Simply starting the system and walking away may result
in irreparable compressor damage not covered under
warranty . To prevent compressor damage, one or more of
the following steps may be used:
Step 1:
All compressors are supplied with a crankcase
heater . It must be activated 24 hours prior to starting the
compressor . Be sure to check that the heater is functional .
This can be done by simply touching the compressor in the
area of the heater . It should feel warm to the touch . This
check should be performed shortly after energizing the
heater and again prior to starting the compressor . If the
compressor is cold, do not attempt to start it . Locate the
source of the problem, correct it and wait 24 hours before
starting the compressor .
Step 2
:
Use a safe heat source such as a heat lamp on the
compressor crankcase for approximately 1/2 hour before
startup . Never use a torch or heat gun . They can raise
system pressures to dangerous levels in a very short time
resulting in injury to personnel as well as property damage .
Step 3
:
After following steps 1 and 2 above, the operator
can be relatively certain that no liquid refrigerant is left in
the compressor . This does not mean that liquid refrigerant is
not present elsewhere in the low side . To avoid compressor
damage on startup, deactivate the liquid solenoid and
“bump” the compressor, using the controller “POWER”
switch, several times. The first two or three times the
compressor is “bumped” it should not be allowed to run
more than 2 or 3 seconds . Increase the run time to 5, 10
and 15 seconds over the next three “bumps” . This will
rapidly reduce low side pressure causing any liquid to
boil off quickly. At this point it is usually safe to allow the
compressor to run .
Step 4
:
After starting the compressor, listen for unusual
sounds such as knocking . If heard, immediately stop the
compressor . Do not restart until the problem is resolved .
While scroll compressors are more tolerant to liquid
refrigerant than reciprocating types of compressors, the
above precautions should still be observed . Rotational
direction is very important with three phase scroll
compressors . Running these compressors with reversed
rotation will result in damage not covered by warranty .
When starting a three phase scroll compressor, refrigerant
pressure gauges must be attached to both the high and
low pressure ports provided on the system . With the
compressor rotating in the proper direction, system suction
pressure should drop and discharge pressure should
rise to appropriate levels within a few seconds after the
compressor is started . If this is not the case, the compressor
is probably running in reversed rotation . Each chiller is
computer tested and all three phase motors, (pumps and
compressors) are in proper phase prior to leaving the
factory. Turn the power off at the main disconnect and
reverse any two of the three main power leads and restart .
Observe the suction and discharge pressure gauges to verify
that the compressor is rotating correctly . If pressures are
still not appropriate, another problem may have developed
which must be found and corrected prior to running
the system .
Attention: It is imperative that you refer to the remote
condenser IO&M inside each unit prior to start up.
CAUTION/ATTENTION
3 PHASE SCROLL
COMPRESSOR UNIT
UNITÉ COMPRESSEUR
SCROLL 3-PHASE
If this unit uses a 3 Phase Scroll
Compressor, the following instructions
MUST BE
followed:
• Unit power supply
MUST BE
wired
in the proper sequence to avoid
damage to the 3 Phase Scroll
Compressor;
• Scroll Compressors with
INCORRECT
rotation show the
following characteristics:
- High sound level;
- High suction pressure and low
discharge pressure;
- Low current draw.
• If any of the three above
characteristsics exist, swap
two of the three supply wires
at the disconnect and recheck
compressor for incorrect rotation.
Si cet appareil utilise compresseur
scroll 3-Phase, les instructions
suivantes doivent être suivies:
• L’alimentation de l’appareil doit
être monté dans l’ordre correct
pour éviter endommager le
compresseur scroll 3-Phase;
• Compressuers scroll avec
rotation incorrecte montrent les
caractéristiques suivantes:
- Haut niveau de son;
- Pression d-aspiration élevée
et une faible pression de
décharge;
- Faible ampérage.
• Si l’un des trois éléments
mentionnés ci-dessus sont
remplies, échanger deux des trois
lignes électriques alimen tant la
interrupteur de sécurité et vérifier
la rotation du compresseur.
Summary of Contents for CLIMACOOL UCR 30
Page 19: ...17 www climacoolcorp com Voltage Phase Monitor Wiring Diagram...
Page 29: ...27 www climacoolcorp com Evaporator Water Pressure Drop Charts...
Page 30: ...28 www climacoolcorp com Glycol Performance Adjustments Factor Charts...
Page 78: ...76 www climacoolcorp com Wiring Diagram...
Page 79: ...77 www climacoolcorp com Wiring Diagram...
Page 80: ...78 www climacoolcorp com Wiring Diagram CoolLogic Control Panel...
Page 81: ...79 www climacoolcorp com Wiring Diagram CoolLogic Control Panel...

