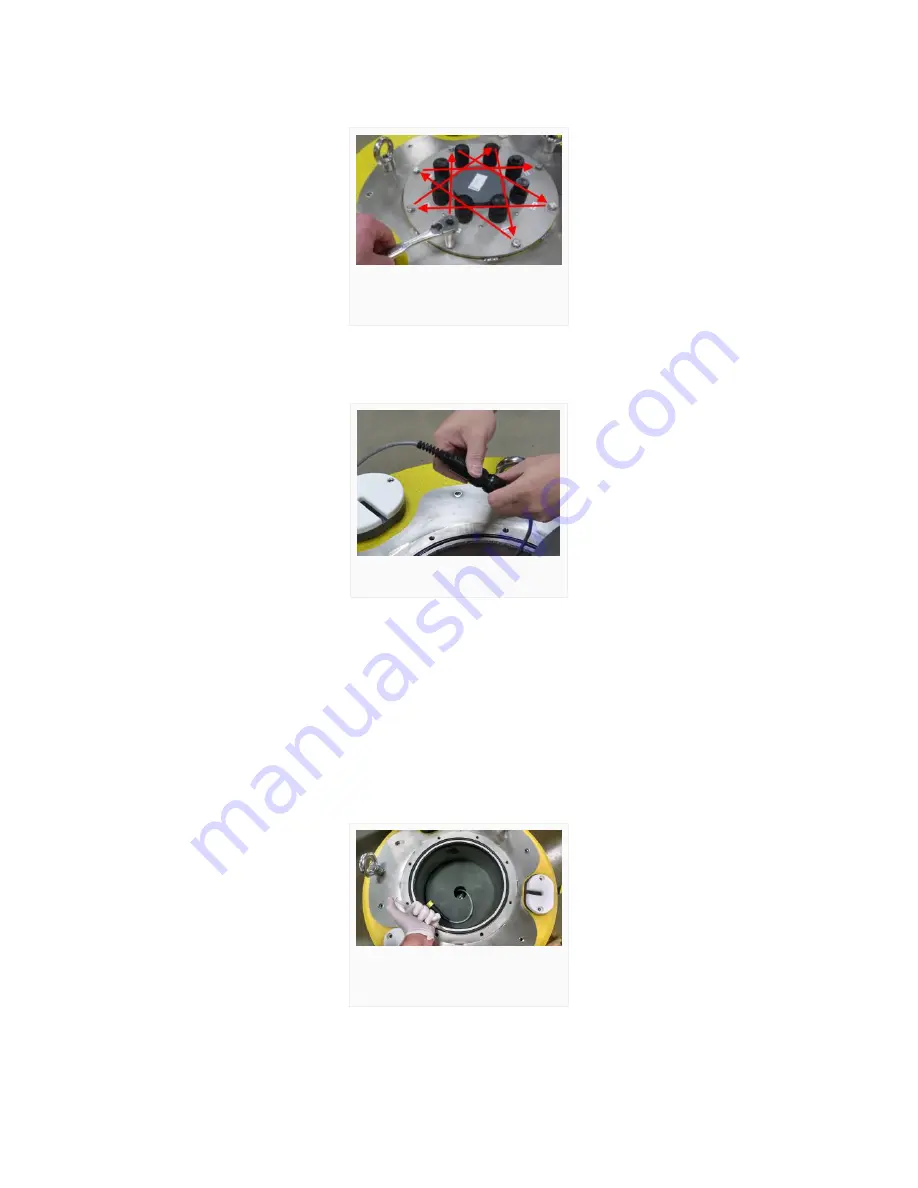
3. Remove the (8) bolts with lock washers from the X2/iSIC-CB or data well pass-through plate using a 9/16″
socket wrench, loosening them in a cross pattern.
4. Lift the X2/iSIC-CB plate off of the data well. Disconnect the 6-pin UW-plug running between the solar
regulator and the X2/iSIC-CB. This will expose the data well where the battery harness is installed.
5. Pack with plenty of protective material and ship the X2/iSIC-CB to NexSens as directed by NexSens
technical support.
6. For deployed systems, it will be necessary to protect the data well and system batteries while the logger is
being evaluated. In most cases, NexSens will provide a blank plate to maintain a water-tight seal.
7. Inspect the large O-ring on top of the data well.
a. Clean any debris that may have accumulated on top.
b. Inspect for any tears or abrasions on the O-ring surface, replacing if damaged.
c. Ensure the O-ring is well greased. Use grease from the buoy maintenance kit as needed.
8. Cap the loose 6-pin solar cable remaining in the data well if possible to keep it clean and dry.
9. It is recommended a new bag of desiccant be inserted into the data well at this time.
10. Install the blank plate.
a. Place the blank plate over top the data well and align the holes.
Loosen X2/iSIC-CB bolts in a
cross-pattern.
Disconnect UW-6 power plug.
Inspect and re-grease data well
O-ring.
86
Summary of Contents for X2-CB
Page 11: ...Select sensors from drop down list 11...
Page 17: ...Cellular X2 C to WQData LIVE 17...
Page 18: ...Iridium X2 I to WQData LIVE 18...
Page 19: ...Radio to Cellular X2 RC to WQData LIVE 19...
Page 48: ...Iridium X2 data flow 48...
Page 94: ...Rotate the antenna bushing counterclockwise to remove the antenna 94...
Page 108: ...13 Remove the Main SD Card Main SD Card Location 108...


