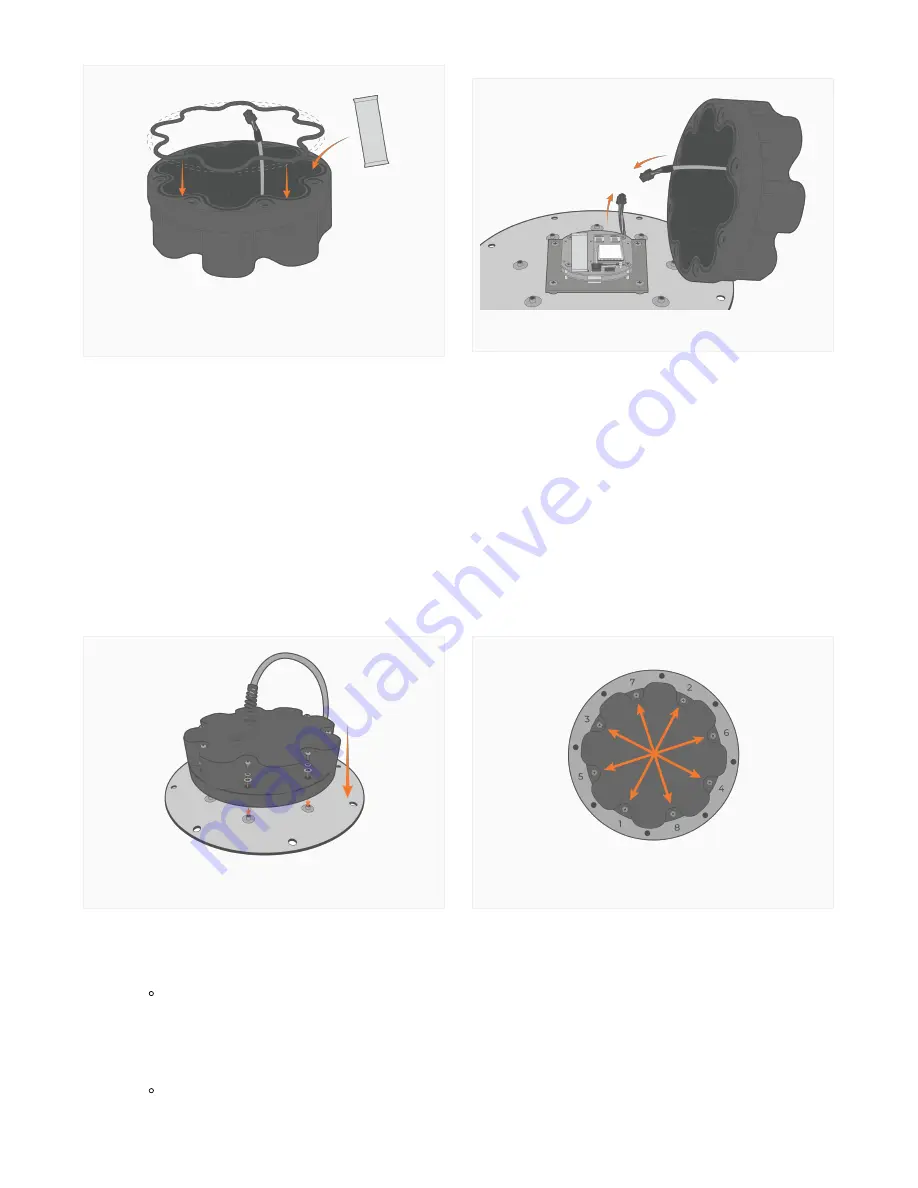
12. Align the holes on the enclosure with the threads on the plate. Ensure the large exterior O-ring is secure in
its grooves and is making proper contact with the bottom of the logger plate.
a. Thread the (8) 8-32 x 1/2 screws in halfway, before tightening in a cross pattern with a Phillips
Screwdriver.
13. Power on the logger using a
. Use the article link
below to ensure the SIM card is read successfully in the software and set up the cellular network.
a.
Set up the cellular connection on an X2 Data Logger Using CONNECT
If the SIM card ID is not read, open the logger enclosure and re-position the SIM card.
14. Place the re-assembled X2-CB/X2-CBMC back on top of the data well.
a. Make sure the primary O-ring is clear of debris and centered in the groove.
It is recommended to replace the desiccant pack within the data well at this time.
Re-align the O-ring and ensure to replace the
desiccant.
Reconnect the Molex power cable.
Re-install the X2-CB-X2-CBMC enclosure.
Evenly tighten the screws in a crisscross pattern
27
Summary of Contents for X2-CB
Page 11: ...Select sensors from drop down list 11...
Page 17: ...Cellular X2 C to WQData LIVE 17...
Page 18: ...Iridium X2 I to WQData LIVE 18...
Page 19: ...Radio to Cellular X2 RC to WQData LIVE 19...
Page 48: ...Iridium X2 data flow 48...
Page 94: ...Rotate the antenna bushing counterclockwise to remove the antenna 94...
Page 108: ...13 Remove the Main SD Card Main SD Card Location 108...


