background image

Data Port Interface Protocol

N-550

95

Printout Source

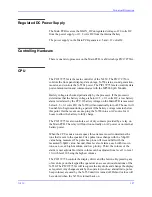
Data in the highlighted box above represents the source of the printout, in this 
case, the N-550.

Software Revision Level

The next data field tells the user the software level (Version 1.0.0.0) and a 
software verification number (CRC XXXX). Neither of these numbers should 
change during normal operation. The numbers will change if the N-550 is 
serviced and receives a software upgrade.

Alarm Limits

The last data field in the top line indicates the upper and the lower alarm 
limits for %SpO

2

, the pulse rate (PR), and the 

SatSeconds

 alarm limit. In the 

example above, the low alarm limit for SpO

2

 is 85% and the upper alarm limit 

is 100%. Pulse rate alarm limits are 40 bpm (lower) and 170 bpm (upper). The 

SatSeconds

 alarm limit is set to Off (0 sec.).

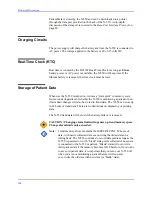
Column Headings

Summary of Contents for OxiMax N-550

Page 1: ...N 550 Pulse Oximeter Service Manual min min SpO2 N 550 SatSeconds SpO2 ...

Page 2: ...r local representative Purchase of this instrument confers no express or implied license under any Nellcor Puritan Bennett patent to use the instrument with any sensor that is not manufactured or licensed by Nellcor Puritan Bennett Covered by one or more of the following U S Patents and foreign equivalents 4 621 643 4 653 498 4 700 708 4 770 179 Re 35 122 4 802 486 4 869 254 4 928 692 4 934 372 5 ...

Page 3: ... Up Performance 8 Power On Self Test POST 9 Power On Defaults and Alarm Limit Ranges 12 General Operation 16 LED Excitation Test 16 Operation with a Live Subject 17 Alarm Volume Control 18 Pulse Tone Volume Control 19 Pulse Oximetry Functional Tests 19 Introduction 20 Initial Setup 21 Test 1 BPM 22 Test 2 SpO2 23 Test 3 Modulation Level 24 Test 4 Light 25 Safety Tests 27 Audible Alarm Settings and...

Page 4: ...yle Select 40 Setting Institutional Defaults Sample 41 Troubleshooting 43 Introduction 43 How To Use This Section 43 Who Should Perform Repairs 43 Troubleshooting Guide 43 Power 44 Buttons 46 Display Alarms 47 Operational Performance 48 Data Port 49 Error Codes 49 Disassembly Guide 55 Introduction 55 Replacement Level Supported 56 Prior to Disassembly 56 Separating Top and Bottom Cases 56 Front Ca...

Page 5: ...lay Pin States 93 Nurse Call Relay Rating 93 Real Time Printout 93 Column Heading 94 Printout Source 95 Software Revision Level 95 Alarm Limits 95 Column Headings 95 Time Tag 96 Patient Data 96 Operating Status 96 Technical Discussion 99 Oximetry Overview 99 Automatic Calibration 100 Functional versus Fractional Saturation 100 Measured versus Calculated Saturation 100 SatSeconds Alarm Management 1...

Page 6: ...Contents iv Storage of Patient Data 108 Front Panel PCB and Controls 109 Front Panel Display 109 Button Interface 109 Index 139 ...

Page 7: ...nt PCB Removed 60 Figure 22 MP 506 Cable Connections 61 Figure 23 MP 506 Removal 62 Figure 24 Front case Wiring 62 Figure 25 Front Case Mounting Screws 63 Figure 26 Main PCB Removal 63 Figure 27 Main PCB Removed 64 Figure 28 Power Supply Wiring 65 Figure 29 Power Supply Screws 65 Figure 30 Power Supply Removed 66 Figure 31 Fan Wires 66 Figure 32 Fan Bracket Removal 67 Figure 33 Fan and Bracket Rem...

Page 8: ...ram 119 Figure 52 Main PCB MCU and Storage Control Schematic Diagram 121 Figure 53 Front Panel 7 Segment Display Schematic Diagram 123 Figure 54 Front Panel LED Display and Buttons Schematic Diagram 125 Figure 55 Front Panel Interface and Drivers Schematic Diagram 127 Figure 56 Main PCB Parts Locator Diagram 129 Figure 57 Front Panel Parts Locator Diagram 131 Figure 58 Power Supply Parts Locator D...

Page 9: ...le 5 Problem Categories 44 Table 6 Power Problems 45 Table 7 Button Problems 46 Table 8 Display Alarms Problems 47 Table 9 Operational Performance Problems 48 Table 10 Data Port Problems 49 Table 11 Error Codes 50 Table 12 Spare Parts and Accessories 73 Table 13 Data Port Pinouts 91 Table 14 Status Codes 97 Table 15 MP 506 J1 Pinouts 103 Table 16 MP 506 J2 Pinouts 104 ...

Page 10: ...Blank Page ...

Page 11: ...t the user to potential serious outcomes death injury or adverse events to the patient or user Cautions Cautions are identified by the CAUTION symbol shown above The word CAUTION and the caution text are boldfaced Cautions alert the user to exercise care necessary for the safe and effective use of the N 550 Notes Notes are identified by the Note symbol shown above Notes provide additional useful i...

Page 12: ...al transport and home environments For prescription use only Note Hospital use typically covers such areas as general care floors operating rooms special procedure areas intensive and critical care areas within the hospital plus hospital type facilities Hospital type facilities include physician office based facilities sleep labs skilled nursing facilities surgicenters and subacute centers Intra h...

Page 13: ...Indicator 15 Sensor Off Indicator 5 Pulse Rate Display 16 Sensor Message Indicator 6 Alarm Silence Button 17 Pulse Search Indicator 7 Alarm Silence Indicator 18 Data In Sensor Indicator 8 Adjust Up Button 19 Low Battery Indicator 9 Adjust Down Button 20 AC Power Indicator 10 Pulse Rate Alarm Limit Button 21 Speaker 11 SatSeconds Display 1 Data Port Connector 3 AC Power Connector 2 Foot Switch Conn...

Page 14: ... manual To understand the various Nellcor sensors that work with the N 550 refer to the individual sensor s directions for use The latest versions of the operator s manual and the service manual are posted on the Internet at http www mallinckrodt com respiratory resp Serv_Supp ProductManuals html Spare parts and accessories are posted on the Internet at http www mallinckrodt com respiratory resp S...

Page 15: ...nsor read the directions for use enclosed with the sensor Each sensor model has cleaning instructions specific to that sensor Periodic Safety Checks The N 550 requires no routine service or calibration other than changing the battery at least every two years See Battery Removal on page 68 The following checks should be performed at least every two years by a qualified service technician 1 Inspect ...

Page 16: ...attery every two years When the N 550 is going to be stored for two months or more remove the battery prior to storage To replace or remove the battery refer to Disassembly Guide on page 55 If the N 550 has been stored for more than 30 days charge the battery as described in Battery Charge on page 8 A fully discharged battery requires 11 hours with the N 550 in standby or 12 hours if it is in use ...

Page 17: ...specified in any test repairs must be made to correct the problem before the N 550 is returned to the user Equipment Needed Table 1 Equipment Needed Equipment Description Digital multimeter DMM Fluke Model 87 or equivalent Durasensor oxygen transducer sensor DS 100A OXIMAX oxygen transducer MAX A Pulse oximeter tester SRC MAX must meet current EN 61326 1 FCC Part 15 and UL 1010 1 or IEC 61010 1 or...

Page 18: ... page 38 The battery should be charged before the N 550 is repaired Battery Charge Perform the following procedure to fully charge the battery 1 Connect the N 550 to an AC power source 2 Verify that the N 550 is off and that the AC Power Battery Charging indicator is lit 3 Charge the battery for at least 11 hours in standby Power Up Performance The power up performance tests verify the following N...

Page 19: ...ould complete the POST function within 12 seconds 1 Turn on the N 550 by pressing the Power On Off button for greater than 0 5 seconds 2 The N 550 displays sounds 1 Power On Off Button 5 Pulse Rate Alarm Limit Button 2 Alarm Silence Button 6 SatSeconds Alarm Limit Button 3 Adjust Up Button 7 SpO2 Alarm Limit Button 4 Adjust Down Button Display Sound 5 in pulse rate left window low priority alarm 5...

Page 20: ...that all display segments and indicators light and the speaker sounds a one second pass tone 4 While performing POST the self test display appears for approximately five seconds During this time All indicators illuminate All segments of all numeric digits light and change from red to green All segments of the Pulse Amplitude Display light All segments of the SatSeconds indicator light ...

Page 21: ...hnical assistance Write down the number and have it available prior to requesting technical assistance 6 If the N 550 detects an internal problem during the POST an alarm tone sounds and the N 550 displays an Error Code and corresponding number See Troubleshooting on page 43 7 Upon successful completion of the POST the N 550 sounds a one second tone indicating that the N 550 has passed the test WA...

Page 22: ...the normal mode 1 Turn the N 550 on by pressing the Power On Off button 2 Wait for POST to be completed 3 Press and release the SpO2 Alarm Limit button 4 Verify that the N 550 emits a single beep and the SpO2 display indicates an upper alarm limit of 100 for about three seconds 5 Verify that HI is displayed in the pulse rate display Note HI in the display window indicates an upper alarm limit that...

Page 23: ...lse rate window Figure 5 Adjusting Low SpO2 Alarm Limit 8 Press the SpO2 Alarm Limit button two times rapidly Within three seconds press and hold the Adjust Down button and verify that the SpO2 display reduces to a minimum of 20 Press and hold the Adjust Up button and verify that the SpO2 display cannot be raised past the upper alarm limit setting minus one point 9 Turn the N 550 off by pressing t...

Page 24: ... pulse rate low limit alarm setting 14 Press the Pulse Rate Alarm Limit button two times twice within 3 seconds Verify that the N 550 emits two beeps and that the pulse rate display indicates an alarm limit of 40 for 3 seconds Verify that LO is displayed in the SpO2 display Figure 7 Adjusting Low Pulse Rate Alarm Limit 15 Press the Pulse Rate Alarm Limit button two times rapidly Within 3 seconds p...

Page 25: ...erify that SAS is displayed in the SpO2 display Figure 8 Adjusting SatSeconds Alarm Limit 21 Press the SatSeconds Alarm Limit button Within three seconds press the Adjust Up button or the Adjust Down button Verify that the pulse rate display changes between 10 25 50 100 and OFF 22 Press the Power On Off button to turn the N 550 off 23 Press the Power On Off button to turn the N 550 on 24 Press and...

Page 26: ...e check overall system performance LED Excitation Test on page 16 Operation with a Live Subject on page 17 LED Excitation Test This procedure uses normal system components to test circuit operation A Nellcor OXIMAX oxygen transducer sensor model MAX A is used to examine LED intensity control The red LED is used to verify intensity modulation caused by the LED intensity control circuit 1 Sensor Por...

Page 27: ...roaches the optical sensor that the LED intensity decreases 8 Open the sensor and notice that the LED intensity increases 9 Repeat step 7 and the intensity will again decrease This variation is an indication that the microprocessor is in proper control of LED intensity 10 Press the Power On Off button to turn the N 550 off Operation with a Live Subject Patient monitoring involves connecting the se...

Page 28: ...he oxygen saturation and pulse rate values are reasonable for the subject Alarm Volume Control 1 Press and hold the Alarm Silence button for more than three seconds Verify the following Alarm Silence Duration Time is displayed for approximately three seconds After three seconds a steady tone is heard at the default volume setting the SpO2 display indicates VOL the pulse rate display indicates the ...

Page 29: ... tone stops Pulse Tone Volume Control 1 When a valid pulse is acquired press the Adjust Up button and verify that the sound level of the beeping pulse tone increases 2 Press the Adjust Down button and verify that the beeping pulse tone decreases until it is no longer audible 3 Press the Adjust Up button to return the beep volume to a comfortable level Pulse Oximetry Functional Tests These tests ut...

Page 30: ... any or all of the SRC MAX tests Test 1 BPM This procedure simulates an OXIMAX sensor attached to a patient indicating 60 bpm and 200 bpm The test setup procedure sets up Test 1 for 60 bpm Test 2 SpO2 This procedure simulates an OXIMAX sensor attached to a patient indicating 75 percent blood oxygen saturation and 90 percent blood oxygen saturation The test setup procedure sets up Test 2 for 75 per...

Page 31: ...r site The test setup procedure sets up Test 4 for low light level Initial Setup 1 Sensor Port 1 With the N 550 turned off connect the DOC 10 pulse oximetry cable to the sensor port 2 Connect the SRC MAX tester to the other end of the DOC 10 cable 3 Turn on the N 550 by pressing the Power On Off button 4 After the N 550 completes POST the N 550 will be in SpO2 alarm display an SpO2 of 75 pass crit...

Page 32: ...ilize at 200 bpm The test pass criteria is 197 to 203 bpm 3 The N 550 will display 75 SpO2 200 bpm pass criteria is 197 to 203 bpm alarm pulse amplitude indicator low level modulation 4 Press the SRC MAX Pulse Rate select button The SRC MAX Pulse Rate 60 LED will light 5 The N 550 pulse rate will decrease to 60 and stabilize at 60 bpm The test pass criteria is 57 to 63 bpm ...

Page 33: ... light 2 The N 550 will display three dashes until the SRC MAX stabilizes at 90 SpO2 The test pass criteria is 88 to 92 SpO2 3 The N 550 will display 90 SpO2 pass criteria is 88 to 92 SpO2 60 bpm no alarm pulse amplitude indicator low level modulation 4 Press the SRC MAX SpO2 select button The SRC MAX SpO2 75 LED will light 5 The N 550 will display three dashes until the SRC MAX stabilizes at 75 S...

Page 34: ...will light 2 The N 550 pulse amplitude indicator will fill 10 bars with each pulse beat 3 The N 550 will display 75 SpO2 test pass criteria is 73 to 77 SpO2 60 bpm test pass criteria is 57 to 63 bpm alarm pulse amplitude indicator high level modulation 4 Perform Test 1 BPM on page 22 The pulse amplitude indicator should indicate high level modulation 5 Perform Test 2 SpO2 on page 23 The pulse ampl...

Page 35: ... pulse beat 8 The N 550 will display 75 SpO2 60 bpm alarm pulse amplitude indicator low level modulation 9 Perform Test 1 BPM on page 22 The pulse amplitude indicator should indicate low level modulation 10 Perform Test 2 SpO2 on page 23 The pulse amplitude indicator should indicate low level modulation Test 4 Light 1 Press the SRC MAX Light Level selection button The SRC MAX Light Level LED will ...

Page 36: ...cator high level modulation 4 Perform Test 1 BPM on page 22 The pulse amplitude indicator should indicate high level modulation 5 Perform Test 2 SpO2 on page 23 The pulse amplitude indicator should indicate high level modulation 6 Press the SRC MAX Light Level selection button The SRC MAX Light Level LED will light 7 The N 550 pulse amplitude indicator will stabilize and illuminate 4 bars with eac...

Page 37: ...Applicable tests for these standards are listed below Technicians must be familiar with the standards applicable to their institution and country Test equipment and its application must comply with the applicable standard Ground Integrity see page 87 for test values Earth Leakage Current see page 87 for test values Enclosure Leakage Current see page 87 for test values Patient Applied Risk Current ...

Page 38: ...Blank Page ...

Page 39: ...hange the behavior of the audible alarm Operators can select the volume of the alarm and the duration of alarm silence Controls for the N 550 are shown in Figure 9 Figure 9 N 550 Controls Alarm Silence State Press the Alarm Silence button to silence the alarm Press the Alarm Silence button a second time to turn the alarm back on 1 Power On Off Button 5 Pulse Rate Alarm Limit Button 2 Alarm Silence...

Page 40: ...arm Silence button until VOL is displayed in the SpO2 window 2 Press the Adjust Up or Adjust Down button to select alarm volumes from 1 to 10 Select a level that is suitable for the N 550 s location N 550 Menu Table 2 lists the menu selections available on the N 550 Items in BOLD are the default settings Table 2 N 550 Menu Selections Menu Number Sub Menu Number Function 1 Trend print tabular N 550...

Page 41: ... XX means Numbers Use Adjust Up Adjust Down buttons to change numbers Use SatSeconds Alarm Limit button to save selection Year 1ST display XX at left numeric display Month 1ST display XX at right numeric display Day 2ND display XX at left numeric display Hour 2ND display XX at right numeric display Minute 3RD display XX at left numeric display Second 3RD display XX at right numeric display 9 Save ...

Page 42: ...n it will begin to use the power on 11 Alarm silence restrictions 0 Allow OFF as a choice for alarm silence duration reminder will be sounded 0 Allows operator to select alarm silence Off but there will be a reminder tone every 3 minutes 1 Allow OFF as a choice for alarm silence duration no reminder will be sounded 1 Alarm silence off there will be no alarm reminder 2 Do not allow OFF as a choice ...

Page 43: ...s displayed in the SpO2 display window Note Service menu items numbered above 5 cannot be accessed if a sensor is connected to the N 550 3 Once adjustments have been made within a menu item the SatSeconds Alarm Limit button can be used to initiate the current selection To save the current settings as power on default values refer to the procedure outlined in Menu Item 9 Save Current Values as Powe...

Page 44: ... setting menu item 5 EPP mode determines the baud rate that can be selected Option 1 ASCII 19 200 Option 2 External equipment communications 2 400 9 600 19 200 When the desired option is indicated in the SpO2 display press the SatSeconds Alarm Limit button to initiate the current selection Menu Item 5 EPP Mode This menu item is used to change the method of sending data to the data port Two options...

Page 45: ...ors that do not have any event data recorded in the sensor If the OXIMAX sensor has event date recorded in it the N 550 will record event data in the same format as the recorded data Use the Adjust Up or Adjust Down button to select the desired option Option 0 record SpO2 event data Option 1 record SpO2 plus pulse rate event data Option 2 do not use in sensor record function When the desired optio...

Page 46: ...g menu item 8 pressing the SatSeconds Alarm Limit button displays the Year and Month setting of the N 550 See Figure 10 The indicates that the Year is selected Pressing the SatSeconds Alarm Limit button will move the to the Month display When an item is selected indicated by the the value may be set by pressing the Adjust Up or Adjust Down button Figure 10 Year Month Display Pressing the SatSecond...

Page 47: ...pulse beep volume audible alarm silence duration alarm silence behavior in sensor event data type RS 232 Nurse Call polarity communications protocol data port language and baud rate are saved as the institutional default settings To save new values as the current institutional default values press the SatSeconds Alarm Limit button Three tones sound to indicate that the changes are accepted The fol...

Page 48: ...ngs as shown in Table 4 three confirmation tones will be heard After menu item 10 has been selected cycle power to the N 550 and verify that the factory default values have been reinstated Alarm silence restrictions None sound reminder do not allow alarms off Blip volume 0 to 10 Language English Serial port baud rate 2400 9600 19200 Serial port mode ASCII external equipment communications Event in...

Page 49: ...ff There will be no reminder tone Option 2 does not allow the operator to select Alarm Silence Off When the desired option is indicated in the SpO2 display press the SatSeconds Alarm Limit button to set the current selection Note The low battery audible alarm cannot be disabled Pulse Rate Lower Alarm Limit 30 bpm to Upper Alarm Limit minus 1 40 bpm Alarm Silence Reminder On or Off On Alarm Silence...

Page 50: ... menu item is used to enable or disable the display of the N 550 With menu item 13 selected press the SatSeconds Alarm Limit button then use the Adjust Up or Adjust Down button to scroll to the desired option Option 0 is On all normal display is enabled Option 1 is Off all normal display is disabled When the desired option is indicated in the SpO2 display press the SatSeconds Alarm Limit button to...

Page 51: ...es may be set Alarm Suspend 30 60 90 120 seconds Alarm Silence Behavior silence off sound reminder do not allow OFF Alarm Volume 1 to 10 Baud Rate 2400 9600 19200 Data Port Mode ASCII Pulse Beep Volume 0 to 10 Pulse Rate Upper Alarm Limit lower limit plus one to 250 bpm Pulse Rate Lower Alarm Limit 30 bpm to upper limit minus one SatSeconds OFF 10 25 50 100 SpO2 Upper Alarm Limit lower limit plus ...

Page 52: ...se Rate Alarm Limit button for over three seconds Menu Item 1 screen appears 6 Press the Adjust Up button until menu Item 9 is displayed 7 Press the SatSeconds Alarm Limit button to save all settings as the institutional default settings 8 The N 550 sounds three beeps indicating that defaults are reset ...

Page 53: ...ion on page 99 offers information on how the N 550 functions Who Should Perform Repairs Only qualified service personnel should open the N 550 housing remove and replace components or make adjustments If your medical facility does not have qualified service personnel contact Nellcor s Technical Services or your local Nellcor representative Troubleshooting Guide Problems with the N 550 are categori...

Page 54: ...rs down without apparent cause Power on page 44 2 Buttons N 550 does not respond properly to buttons being pressed Buttons on page 46 3 Display Alarms Display does not respond properly Alarms and other tones do not sound properly or are generated without apparent cause Display Alarms on page 47 4 Operational Performance Displays appear to be operational but the N 550 shows no readings Suspect read...

Page 55: ...et Check the cable connection between the Top Enclosure and the Front Panel PCB If the connection is good replace the Front Panel PCB See Front Case Disassembly on page 58 The N 550 does not operate when disconnected from AC power The battery may be discharged To recharge the battery refer to Battery Charge on page 8 The N 550 may be used with a less than fully charged battery but with a correspon...

Page 56: ...The voltage measured should be 19 8 VDC to 20 2 VDC and the current should be 50 mA to 210 mA Replace the power supply if the above values are not met See Power Supply Removal on page 64 Table 6 Power Problems Continued Condition Recommended Action Table 7 Button Problems Symptom Recommended Action The N 550 turns on and responds to some but not all buttons Replace Top Housing assembly See Separat...

Page 57: ...PCB Replace the Front Panel PCB See Front Case Disassembly on page 58 All Front Panel LED indicators do not light during POST Check the connection between the Front Panel PCB and the Main PCB Replace the front case See Front Case Disassembly on page 58 Alarm sounds for no apparent reason Moisture or spilled liquid can cause an alarm to sound Allow the N 550 to dry thoroughly before use Replace the...

Page 58: ...ate a pulse but the digital displays show zeroes The sensor may be damaged replace it Replace the Front Panel PCB Refer to Front Case Disassembly on page 58 SpO2 or pulse values change rapidly Pulse Amplitude indicator is erratic The sensor may be damp or may have been reused too many times Replace it An electrosurgical unit ESU may be interfering with performance Move the N 550 and its cables and...

Page 59: ...the power clears these errors Table 11 lists the N 550 error codes and their meanings When one of these errors occur the N 550 sounds a low priority alarm that cannot be silenced except by power down stops measurements Table 10 Data Port Problems Symptom Recommended Action No printout is being received The N 550 is running on battery power Connect the N 550 to AC power The N 550 s baud rate does n...

Page 60: ...O2 front end has tripped 11 SpO2 front end reports incorrect system voltage 12 SpO2 front end reports other hardware problem 14 SpO2 front end reports communication channel overflow 16 SpO2 front end reports watch dog time out 17 SpO2 front end reports that sensor appears defective 18 SpO2 front end reports internal register appears modified from expected value 19 SpO2 front end reports signal out...

Page 61: ...itialized 272 SpO2 back end reports double fault 273 SpO2 back end reports date out of range error 274 SpO2 back end reports incompatible software version 275 SpO2 back end reports incorrect registration number 276 SpO2 back end reports sensor read failure 277 SpO2 back end reports sensor signature verification fails 278 SpO2 back end reports warmed sensor temperature set point failure 279 SpO2 ba...

Page 62: ...for UIF Institutional EEPROM section CRC corrupt 528 Current settings lost e g for UIF Institutional EEPROM section CRC corrupt 529 Critical low battery 530 Low battery error 531 External watchdog failure 532 Power PC watchdog failure 533 Boot NVROM uninitialized error 534 Failed CRC check of application code in flash 535 Failed periodic ram CRC check on application code running in RAM 562 SpO2 fr...

Page 63: ...Troubleshooting N 550 53 569 BOOT application program is corrupt CRC does not match 570 RTC was restarted 574 Excessive restarts within 1 minute Table 11 Error Codes Continued Error Code Meaning ...

Page 64: ...Blank Page ...

Page 65: ...50 readings CAUTION For better electromagnetic compatibility ferrite cores are installed on some wires of the N 550 During reassembly do not move or remove the ferrite cores from their location The N 550 can be disassembled down to all major component parts including PCBs Battery Top Bottom and Front Housing Speaker Power Entry Module PEM The following tools are required Phillips head screwdriver ...

Page 66: ... suspected PCB follow the procedures in Disassembly Guide on page 55 to replace the PCB with a known good PCB Verify that the trouble symptom disappears and that the N 550 passes all performance tests If the trouble symptom persists swap back the replacement PCB with the suspected malfunctioning PCB the original PCB that was installed when you started troubleshooting and continue troubleshooting a...

Page 67: ... the N 550 up side down and remove the five screws holding the cases together See Figure 14 Figure 14 N 550 Case Screws 4 Turn the N 550 right side up 5 Carefully separate the N 550 s top case from its bottom case being careful not to stress the wire harnesses between the cases See Figure 15 Figure 15 Top Case Removal ...

Page 68: ...See Figure 16 items 1 and 2 Figure 16 Separated Cases Front Case Disassembly 1 Perform the procedure Prior to Disassembly on page 56 2 Perform the procedure Separating Top and Bottom Cases on page 56 3 Disconnect the SpO2 cable connector from the MP 506 PCB See Figure 17 item 1 ...

Page 69: ...main PCB 5 Disconnect the ribbon cable connector item 3 from the front case PCB 6 Remove the bracket screw connected to the main PCB See Figure 18 item 1 Figure 18 Front Case Mounting Screws 7 Remove the bracket screw item 2 connected to the front PCB 8 Remove the front panel assembly from the top case assembly ...

Page 70: ...ront PCB See Figure 19 item 1 Figure 19 Front Case Bracket 10 Remove the two screws holding the speaker to the front case See Figure 20 items 1 and 2 Figure 20 Speaker Removal 11 Carefully lift the front PCB out of the front case See Figure 21 Figure 21 Front PCB Removed ...

Page 71: ... Separating Top and Bottom Cases on page 56 3 Disconnect the front case SpO2 cable connector from the MP 506 PCB connector See Figure 22 item 1 Figure 22 MP 506 Cable Connections 4 Disconnect the main PCB cable connector from the MP 506 PCB connector item 2 5 Carefully lift the MP 506 PCB out of the top case See Figure 23 ...

Page 72: ...rocedure Prior to Disassembly on page 56 2 Perform the procedure Separating Top and Bottom Cases on page 56 3 Disconnect the SpO2 cable connector from the MP 506 PCB See Figure 17 item 1 Figure 24 Front case Wiring 4 Disconnect the speaker wire connector item 2 from the main PCB ...

Page 73: ...w connected to the main PCB See Figure 18 item 1 Figure 25 Front Case Mounting Screws 7 Remove the bracket screw item 2 connected to the front PCB 8 Remove the front panel assembly from the top case assembly 9 Disconnect the MP 506 to main PCB cable from the main PCB connector See Figure 26 item 1 Figure 26 Main PCB Removal ...

Page 74: ...Remove the three remaining screws holding the main PCB to the top case 12 Carefully lift the main PCB out of the top case See Figure 27 Figure 27 Main PCB Removed Power Supply Removal 1 Perform the procedure Prior to Disassembly on page 56 2 Perform the procedure Separating Top and Bottom Cases on page 56 ...

Page 75: ...e wiring harness connector from the power supply item 1 4 Disconnect the AC plug ground wire from the AC plug item 2 5 Unscrew the four screws from the power supply See Figure 29 Figure 29 Power Supply Screws 6 Lift the power supply out of the bottom case See Figure 30 ...

Page 76: ... Supply Removed Fan Removal 1 Perform the procedure Prior to Disassembly on page 56 2 Perform the procedure Separating Top and Bottom Cases on page 56 Figure 31 Fan Wires 3 Unwrap the two fan wires Figure 31 item 1 from the wiring harness ...

Page 77: ...lding the fan bracket to the bottom case See Figure 32 Figure 32 Fan Bracket Removal 5 Lift the fan and bracket out of the bottom case See Figure 33 Figure 33 Fan and Bracket Removal 6 Remove the 4 screws attaching the fan to the fan bracket See Figure 34 ...

Page 78: ...form the procedure Prior to Disassembly on page 56 2 Perform the procedure Separating Top and Bottom Cases on page 56 3 Disconnect the battery wires from the battery See Figure 35 Figure 35 Battery Connections 4 Lift the battery out of the bottom case See Figure 36 ...

Page 79: ...oved Equipotential Terminal Removal 1 Perform the procedure Prior to Disassembly on page 56 2 Perform the procedure Separating Top and Bottom Cases on page 56 3 Remove the AC connector ground wire from the equipotential ground terminal See Figure 37 ...

Page 80: ...re 37 Ground Wire 4 Remove the remaining nut and washer from the equipotential ground terminal See Figure 38 Figure 38 Equipotential Ground Terminal 5 Remove the equipotential ground terminal from the bottom case See Figure 39 ...

Page 81: ...Disassembly Guide N 550 71 Figure 39 Equipotential Ground Terminal Removed ...

Page 82: ...Blank Page ...

Page 83: ... Technical Services 1 800 635 5267 or your local Nellcor representative Refer to parts by the part names and part numbers Spare parts and accessories with part numbers for the N 550 are listed on the Internet at http www mallinckrodt com respiratory resp Serv_Supp Apartweb main PartAcceMenu html Parts List and Accessories Table 12 Spare Parts and Accessories Description Item No Shown in Figure 40 ...

Page 84: ...ntry 9 Ground cable ground terminal to serial port Ground Pin Equipotential Terminal 8 Home Use Guide MAIN PCB to front PCB cable 44 pin bus cable 17 Main PCB 55A 23 Membrane USA MP 506 data cable 14 pin bus cable 14 Nellcor SpO2 module MP 506 version 1 8 1 0 19 Operator s manual OPT MCU PIC17C56 LCC version 1 49 OXIMAX sensor neonatal OXIMAX sensor DS 100A adult P1 cable 9 pin flexible PCB cable ...

Page 85: ... 24 Quick Guide Japanese Gray 24 Rubber foot SJ5003 56 each sheet Screw 3 x 12 plastic 2 000 each Serial D sub cable 3 pin wire Service manual Speaker to front PCB 2 pin cable 3 Speaker 30 PI with wing 15 Top case purple color 2 Table 12 Spare Parts and Accessories Continued Description Item No Shown in Figure 40 ...

Page 86: ...Spare Parts 76 Figure 40 Exploded View ...

Page 87: ... during shipping Return the N 550 by any shipping method that provides proof of delivery General Instructions Pack the N 550 carefully Failure to follow the instructions in this section may result in loss or damage not covered by any applicable Nellcor warranty If the original shipping carton is not available use another suitable carton North American customers may call Nellcor s Technical Service...

Page 88: ...N 550 and if necessary accessory items in the original packaging Figure 41 Packing 2 Place the N 550 into the shipping carton and seal the carton with packing tape 3 Label the carton with the shipping address return address and RGA number ...

Page 89: ...rrugated cardboard shipping carton with a bursting strength of at least 200 pounds per square inch psi 3 Fill the bottom of the carton with at least two inches of packing material 4 Place the bagged N 550 on the layer of packing material and fill the box completely with packing material 5 Seal the carton with packing tape 6 Label the carton with the shipping address return address and RGA number ...

Page 90: ...Blank Page ...

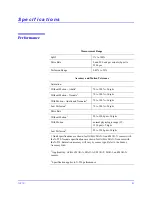
Page 91: ... digits Low Perfusion3 70 to 100 2 digits Pulse Rate Without Motion3 20 to 250 bpm 3 digits With Motion normal physiologic range 55 125 bpm 5 digits Low Perfusion3 20 to 250 bpm 3 digits 1 Adult specifications are shown for OXIMAX MAX A and MAX N sensors with the N 550 Neonate specifications are shown for OXIMAX MAX N sensors with the N 550 Saturation accuracy will vary by sensor type Refer to the...

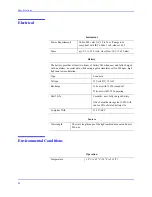
Page 92: ...charged with no alarms no serial data while using a pulse simulator set for 200 bpm high light and low modulation Type Lead acid Voltage 12 Volts DC 1 2 AH Recharge 11 hours with N 550 turned off 12 hours with N 550 operating Shelf Life 2 months new fully charged battery After 2 months storage the N 550 will run for 50 of stated battery life Complies With 91 157 EEC Sensors Wavelength The waveleng...

Page 93: ...ºC to 60 ºC 4 ºF to 140 ºF Altitude Barometric Pressure 390 m to 5 574 m 1 254 ft to 18 288 ft 50 kPa to 106 kPa 31 3 in Hg to 14 in Hg Relative Humidity 10 to 95 non condensing over temperature range of 20 ºC to 60 ºC 4 ºF to 140 ºF Transport and Storage in shipping container Temperature 20 ºC to 70 ºC 4 ºF to 158 ºF Altitude Barometric Pressure 390 m to 4 572 m 1 280 ft to 15 000 ft 50 kPa to 10...

Page 94: ...nd OXI A N 52 5 mW OXIMAX Oxiband OXI P I 52 5 mW OXIMAX Durasensor DS 100A 52 5 mW OXIMAX OxiCliq P 52 5 mW OXIMAX OxiCliq N 52 5 mW OXIMAX OxiCliq I 52 5 mW OXIMAX OxiCliq A 52 5 mW OXIMAX Dura Y D YS 52 5 mW OXIMAX MAX FAST 52 5 mW OXIMAX Softcare SC PR 52 5 mW OXIMAX Softcare SC NEO 52 5 mW OXIMAX Softcare SC A 52 5 mW Weight 3 07 lbs 1 39 kg without pole mount Dimensions 2 87 in x 7 87 in x 5...

Page 95: ...BF applied part IEC 60601 1 Symbol 2 of Table DII of Appendix D Equipotential lug symbol to indicate a potential equalization conductor IEC 60601 1 Symbol 9 of Table DI of Appendix D Attention symbol consult accompanying documentation IEC 60601 1 Symbols 14 of Table DI of Appendix D External case made with non conductive plastic IEC 60601 1 sub clause 16 a No holes in case top IEC 60601 1 sub clau...

Page 96: ...ions EN 55011 Group 1 Class B Electrostatic discharge immunity EN 61000 4 2 level 3 table top equipment contact 2 4 6 air 2 4 6 8 Harmonic emissions IEC 61000 3 2 Voltage fluctuations flicker emissions IEC 61000 3 3 Operation with line voltage variations IEC 61000 4 11 Radiated radio frequency electromagnetic field immunity IEC 61000 4 3 3 V m 1 kHz Electrical fast transient burst immunity IEC 610...

Page 97: ... Closed Closed 500 µA 300 µA Normal Open Closed 1000 µA 500 µA Normal Closed Open 1000 µA 500 µA AC Line Polarity Neutral Line Cord Power Line Ground Cord IEC 60601 1 UL 2601 1 AAMI ANSI ES1 Normal Closed Closed 100 µA 100 µA Normal Closed Open 500 µA 300 µA Normal Open Closed 500 µA 300 µA Reversed Closed Closed 100 µA 100 µA Reversed Open Closed 500 µA 300 µA Reversed Closed Open 500 µA 300 µA A...

Page 98: ...I ES1 Normal Closed Closed 100 µA 10 µA Normal Open Closed 500 µA 50 µA Normal Closed Open 500 µA 50 µA Reversed Closed Closed 100 µA 10 µA Reversed Open Closed 500 µA 50 µA Reversed Closed Open 500 µA 50 µA AC Line Polarity Neutral Line Cord Power Line Ground Cord IEC60601 1 UL 2601 1 AAMI ANSI ES1 Normal Closed Closed 5 mA 50 µA Reversed Closed Closed 5 mA 50 µA ...

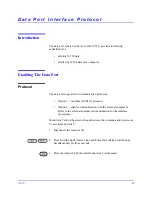
Page 99: ...nication protocols Option 1 real time ASCII for printouts Option 2 enables communication with the external equipment Refer to the external equipment documentation for the interface procedures Menu item 5 allows the user to choose between the communication protocols To access menu item 5 1 Disconnect the sensor cable 2 Press both the SpO2 Alarm Limit and Pulse Rate Alarm Limit buttons simultaneousl...

Page 100: ...e SatSeconds Alarm Limit button to set the selection Baud Rate Menu item 4 is used to select baud rate To access menu item 4 1 Disconnect the sensor cable 2 Press both the SpO2 Alarm Limit and Pulse Rate Alarm Limit buttons simultaneously for 3 seconds 3 Press the Adjust Up button until menu item 4 is displayed 4 Press the SatSeconds Alarm Limit button to select option 4 ...

Page 101: ...219 2 meters The pin outs for the data port are listed in Table 13 TXD and TXD are the differential transmit data pair RXD and RXD are the differential receive pair Table 13 Data Port Pinouts Pin Signal Name 1 RXD RS 422 positive input 2 RXD RS 232 input 3 TXD RS 232 output 4 TXD RS 422 positive output 5 to 12 VDC with no audible alarm 5 to 12 VDC with audible alarm 5 Signal Ground isolated from E...

Page 102: ...ent Connectors at both ends of the serial cable must have the shield terminated to the full 360 degrees of the connector s metal shell CAUTION Do not create sharp bends in the cable this may tear or break the shield Figure 42 Data Port Pin Layout Pins 2 3 and 5 provide data in RS 232 format Pins 1 4 9 and 12 provide data in RS 422 format 10 Signal Ground 11 Nurse Call RS 232 level output 12 TXD RS...

Page 103: ... Voltage at pins 10 to 11 Normally High No alarm or Alarms Silenced 5 to 12 VDC Audible Alarm 5 to 12 VDC Normally Low No alarm or Alarms Silenced 5 to 12 VDC Audible Alarm 5 to 12 VDC Pin No Alarm or Alarm Silenced Audible Alarm N 550 Turned Off 7 N O Open Closed Closed 8 N C Closed Open Open Maximum input voltage 30 VAC or 30 VDC Load current 12 mA continuous peak 300 mA at 100 msec Minimum resi...

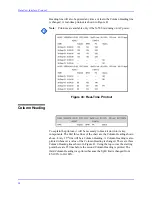
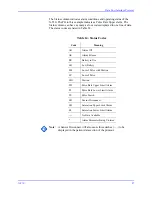
Page 104: ...it will be necessary to break it down to its key components The first three lines of the chart are the Column Heading shown above Every 25th line will be a Column Heading A Column Heading is also printed whenever a value of the Column Heading is changed There are three Column Heading lines shown in Figure 43 Using the top row as the starting point there are 25 lines before the second Column Headin...

Page 105: ... these numbers should change during normal operation The numbers will change if the N 550 is serviced and receives a software upgrade Alarm Limits The last data field in the top line indicates the upper and the lower alarm limits for SpO2 the pulse rate PR and the SatSeconds alarm limit In the example above the low alarm limit for SpO2 is 85 and the upper alarm limit is 100 Pulse rate alarm limits...

Page 106: ...ighlighted in the patient data display Parameter values are displayed directly beneath the heading for each parameter In this example the SpO2 is 100 and the pulse rate PR is 190 beats per minute The asterisk next to the 190 indicates that 190 beats per minute is outside of the alarm limits indicated at the far right end in the top row for pulse rate If no data for a parameter is available three d...

Page 107: ...ble 14 Note A Sensor Disconnect will also cause three dashes to be displayed in the patient data section of the printout Table 14 Status Codes Code Meaning AO Alarm Off AS Alarm Silence BU Battery in Use LB Low Battery LM Loss of Pulse with Motion LP Loss of Pulse MO Motion PH Pulse Rate Upper Limit Alarm PL Pulse Rate Lower Limit Alarm PS Pulse Search SD Sensor Disconnect SH Saturation Upper Limi...

Page 108: ...Blank Page ...

Page 109: ...manual Pulse oximetry is based on two principles that oxyhemoglobin and deoxyhemoglobin differ in their absorption of red and infrared light i e spectrophotometry and that the volume of arterial blood in tissue and hence light absorption by that blood changes during the pulse i e plethysmography A pulse oximeter determines SpO2 by passing red and infrared light into an arteriolar bed and measuring...

Page 110: ...turation oxygenated hemoglobin expressed as a percentage of the hemoglobin that can transport oxygen It does not detect significant amounts of dysfunctional hemoglobin such as carboxyhemoglobin or methemoglobin In contrast hemoximeters such as the IL482 report fractional saturation oxygenated hemoglobin expressed as a percentage of all measured hemoglobin including measured dysfunctional hemoglobi...

Page 111: ...SatSeconds limit that allows monitoring of SpO2 below the selected lower alarm limit for a period of time before an audible alarm sounds Refer to the N 550 Operator s manual for managing SatSeconds Reads Through Motion The N 550 takes advantage of increased microprocessing power with advanced mathematical algorithms OXIMAX advanced signal processing allows the N 550 to read through challenging mot...

Page 112: ...550 will begin monitoring The sensor model number disappears once the N 550 starts tracking the patient s SpO2 and pulse rate Monitors containing OXIMAX technology including the N 550 use calibration data contained in the sensor in calculating the patient s SpO2 By having the calibration in the sensor rather than the N 550 Nellcor is able to improve the published accuracy of many sensors because t...

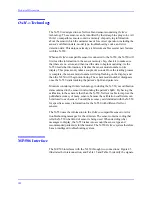
Page 113: ...50 103 Figure 45 MP 506 Interface Table 15 MP 506 J1 Pinouts Pin Signal 1 DETECTOR 2 DIGICAL Ground 3 DIGICAL 1 wire interface 4 DETECTOR 5 Inner Shield Ground 6 No connection 7 LED 8 No connection 9 LED 10 Outer Shield Ground ...

Page 114: ...ropriate schematic diagram at the end of this section as necessary Table 16 MP 506 J2 Pinouts Pin Signal 1 C LOCK Input 2 Ground 3 Ground 4 Reset Input 5 Ground 6 12 V Power Input 7 Analog Output 8 TX Transmit data output from MP 506 9 RX Receive data input to MP 506 10 5 V Analog Power Input 11 CTS Clear to Send input to MP 506 12 Ground 13 5 V Digital Power input 14 Ground ...

Page 115: ...h buttons allowing the user to access information and to select various available parameters The Front Panel PCB contains SpO2 heart rate and pulse amplitude indicator LEDs and SatSeconds Display LEDs Their associated driver circuits are included in the Main PCB AC Input The N 550 allows the user to connect the N 550 to AC power ranging from 100 volts AC to 240 volts AC AC power enters directly th...

Page 116: ... The positive output is the MAIN_DC of 20 volts DC This positive voltage is used for the battery circuit and to power the Main PCB Battery A lead acid battery is used in the N 550 It is rated at 12 volts DC 1 2 amp hours When new and fully charged the battery will operate the N 550 for two hours A new battery will last 15 minutes from the time the low battery alarm is declared until the N 550 is s...

Page 117: ...voltage remains below this point If either event occurs plug the N 550 into an AC source for 11 hours to allow the battery to fully charge The PIC17C756A also controls a set of dry contacts provided by a relay on the Main PCB The relay will function normally on AC power or on internal battery power When the CPU sends a tone request three items are used to determine the tone that is sent to the spe...

Page 118: ...her the N 550 is monitoring a patient or not Alarm limit changes will also be stored in trend data The N 550 can store up to 24 hours of trend data There are no limitations on displaying or printing data The N 550 trend data will be lost if the battery fails or is removed CAUTION Changing alarm limit settings uses up trend memory space Change alarm limits only as needed Note Trend memory always co...

Page 119: ...t display illuminates with SatSecond values The first segment of the 8 segment display indicates the SatSecond alarm on off The number of segments illuminated indicates the relative values of the SatSecond Seven LEDs and icons are also located on the Front Panel Display part An LED illuminated next to an icon indicates a function that is active Functions indicated by the LEDs are AC Battery Chargi...

Page 120: ...Blank Page ...

Page 121: ...15 249K_F CC8 0 1uF LOW X CR6 10K CR13 120 CC6 1nF BAT LED2 LOW CC10 0 1uF CC1 22uF 35VEL CD3 LED2 X CC2 47uF 16VEL FAULT FLASH LOW CR14 51 CR3 2K MAINTENANCE CHARGING BATTERY ABSENT CQ1 B772 Alternative CR10 47K VIN PRE CHARGING CQ2 2N3904 CHARGE PENDING TP28 T POINT M1 1 5VC CR4 10K CR19 1 1_1W_J_SMD HIGH FAST CHARGING CR11 1K CL3 SB3040 CD2 S1B CR8 100K_F CR1 2K CC13 0 1uF X HIGH CL1 10uH CD1 S...

Page 122: ...10 12 14 U8 6N137 1 2 3 4 5 6 7 8 N C ANODE CATHODE N C GND Vout ENABLE Vcc R10 390 TP21 T POINT M2 1 MP506 Connector Isolation DC DC C64 1uF 3216 TX2 U21 NTV0512 1 2 3 4 5 6 7 8 9 10 11 12 13 14 15 16 17 18 19 20 21 22 GND NA VIN NA NA NA NA NA 0V NA V NA NA V NA NA NA NA NA NA NA NA 12VF TP56 T POINT M2 1 5VF2 U7 6N137 1 2 3 4 5 6 7 8 N C ANODE CATHODE N C GND Vout ENABLE Vcc C50 10pF TX2F TX2F ...

Page 123: ...DP1 CONN DSUB 15 P 1 9 2 10 3 11 4 12 5 13 6 14 7 15 8 1 9 2 10 3 11 4 12 5 13 6 14 7 15 8 TP26 T POINT M3 1 TP46 T POINT M3 1 C122 10pF R37 390 C119 10pF 5V C67 120pF Nurse Call 2 5V U19 NTV0505 1 2 3 4 5 6 7 8 9 10 11 12 13 14 15 16 17 18 19 20 21 22 GND NA VIN NA NA NA NA NA 0V NA V NA NA V NA NA NA NA NA NA NA NA N O TP49 T POINT M3 1 TX1F TP48 T POINT M3 1 ITX422EN U14 MAX232S 1 3 13 8 14 7 2...

Page 124: ...1 TIP42C TO 220 5VB PL3 SB3040 PRD1 MBRS340 PRD3 S1B 1 2 E TP9 T POINT M4 1 PRR2 1 5K_F BAT POWER ON PRR3 5 6K_F PRC6 0 1uF INPUT_V F1 50T 250V T2AL TP10 T POINT M4 1 PRR1 680_2012 PQ2 2N3904 TO 92 VIN PRD6 S1B 1 2 B PRC5 100uF 16V TA lowESR BAT PRC2 47uF_16VEL TP13 T POINT M4 1 PRR4 220_2012 PRL1 BDS8040D 330M Power IN 5V TP12 T POINT M4 1 C N 550 Technical Discussion 117 Figure 50 Main PCB DC Ba...

Page 125: ...C111 10pF C114 10pF TP18 T POINT M5 1 C113 10pF C28 47uF_35VEL TP17 T POINT M5 1 C89 10pF C94 10pF C100 10pF U17A LM324 SO 3 2 1 4 11 C110 10pF C102 10pF RB0 C97 10pF C115 10pF SEG c RE3 C87 10pF SEG a Connector C82 120pF U16 TDA7052A 1 2 4 7 3 8 5 6 VCC VI2 VI4 NC GND2 VO2 VO1 GND1 R25 5K POT C106 10pF J7 CON2 1 2 C85 10pF C32 0 47uF 5V SEG b RB5 Alarm SW Foot SW Antenna Phone jack C84 10pF DIGIT...

Page 126: ... SCL TP5 T POINT M6 1 RD5 R4 2k R41 2K TX2 C77 10nF 5V C75 10nF R24 100 RB5 RD1 DIGIT 7 SEG a SCL C61 47uF 16VEL TP1 T POINT M6 1 U5 24LC256 SOIC 1 2 3 4 5 6 7 8 A0 A1 A2 VSS SDA SCL WP VCC RE3 RC7 TP8 T POINT M6 1 R43 2K RC4 RC1 Nurse Call 1 D3 B140 R23 6 2K_F 5V 5VB BT1 3V LITHIUM 1 2 RC1 C73 2 2nF RD1 DIGIT 8 SEG b RD3 Power OUT L26 0 56uH 2012 RD7 D4 B140 1 2 C6 47pF 5VA RB1 R5 2k 5V Main Cont...

Page 127: ...2 1 FQ17 2N2907A 3 2 1 FR22 470 FSEG g FSEG c FSEG e FSEG g FR21 470 FR17 470 FSEG e FR28 470 FRF3 FR23 470 FSEG d FDIGIT 5 FQ19 2N2907A 3 2 1 FR27 470 FR24 470 FDP FDIGIT 1 FR20 470 FU2 BI FND 8 7 3 2 14 12 1 5 6 4 11 10 9 13 A B C D DIG1 AN R DIG2 AN R E F G DP DIG2 AN G DIG3 AN R DIG3 AN G DIG1 AN G FR25 470 FDIGIT 4 FSEG f FSEG b FSEG f FQ20 2N2907A 3 2 1 FDIGIT 6 FDIGIT 2 FSEG a FQ25 2N2907A ...

Page 128: ... FC4 1uF FRB3 TP33 T POINT F2 1 FR42 4 7K FRB0 FSEG d FD2 OLED FC8 1uF TP37 T POINT F2 1 FU1 Bar Graph Array 1 2 3 4 5 6 7 8 9 10 11 12 13 14 15 16 17 18 19 20 a b c d e f g h i j j i h g f e d c b a FR30 470 Motion Orange Indicator FRC6 FSW3 BPM FC6 1uF FD7 1N4148 1 2 FRB4 FRC2 TP38 T POINT F2 1 FSEG e Blip Display BarGraph Array FSD5 GLED 5V FRE3 FD4 OLED FD9 GLED FRC5 FR38 4 7K IN Sensor trend ...

Page 129: ...2 1 FDIGIT 7 FQ12 2N2222A 3 2 1 FRE3 FC3 1uF 5V FRB3 FR4 15 FQ11 2N2222A 3 2 1 FR10 10K FRF2 FRC5 FC2 1uF 5V FQ8 2N2907A 3 2 1 FR9 10K 5V FSEG a FQ2 2N2907A 3 2 1 5V FRB5 FDIGIT 2 FQ9 2N2222A 3 2 1 FDIGIT 1 FRE0 FRE2 5V FR2 15 5V FQ3 2N2907A 3 2 1 FRC6 FR11 10K FSEG d 5V FQ14 2N2222A 3 2 1 5V FSW8 Alarm Silence 5V FR14 10K FQ6 2N2907A 3 2 1 FSEG f FDIGIT 4 FR6 15 5V FDP FRE1 5V FQ15 2N2222A 3 2 1 ...

Page 130: ...Figure 56 Main PCB Parts Locator Diagram 129 Technical Description N 550 ...

Page 131: ...Figure 57 Front Panel Parts Locator Diagram 131 N 550 Technical Description ...

Page 132: ...ical Description TH1 LF C1 C9 250 T2A LF2 INLET F2 L N F1 250 T2A VR21 C25 JP3 JP4 D2 PC1 C6 HS1 C7 R3 JP2 IC1 C5 D1 C8 R1 R2 C4 C3 BD1 C2 JP1 T1 D21 C21 C22 C23 L21 R25 R21 R23 CN1 C24 C21 PB MD15 20 R1 Fine Suntronix Made in Korea PB MD 15 20 R1 COMPONENT SILK ...

Page 133: ...it analysis 104 cleaning 5 connecting to the data port 91 controlling hardware theory 107 CPU theory 107 D data port interface protocol 89 data port problems 49 description of N 550 pulse oximeter 2 disassembly guide 55 display alarms problems 47 E earth leakage current 27 enabling the data port 89 enclosure leakage current 27 equipment needed 7 equipotential terminal removal 69 error codes 49 exp...

Page 134: ...risk current 27 performance tests 8 performance verification 7 periodic safety checks 5 PH 97 PL 97 POST 9 power problems 45 power supply PCB theory of operation 106 power supply removal 64 power on defaults and alarm limit ranges 12 power on self test 9 power up performance 8 prior to disassembly 56 problem categories 44 protocol 89 PS 97 pulse oximetry functional tester 19 pulse rate lower limit...

Page 135: ...ysical 84 safety tests 87 specifications performance 81 SRC MAX 19 storage altitude 83 barometris pressure 83 relative humidity 83 temperature 83 storage of patient data theory 108 T technical discussion 99 test 1 SpO2 23 test 2 BPM 22 test 3 modulation level 24 test 4 light 25 transport altitude 83 barometric pressure 83 relative humidity 83 temperature 83 troubleshooting 43 troubleshooting guide...

Page 136: ...Blank Page ...

Page 137: ... ...

Page 138: ...Division 4280 Hacienda Drive Pleasanton CA 94588 U S A Telephone Toll Free 1 800 635 5267 Authorized Representative Tyco Healthcare UK LTD 154 Fareham Road Gosport PO13 0AS U K 2004 Nellcor Puritan Bennett Inc All rights reserved Rx ONLY 067857A 0204 ...

Reviews: