9-42 Upgrading Your Server
NOTES:
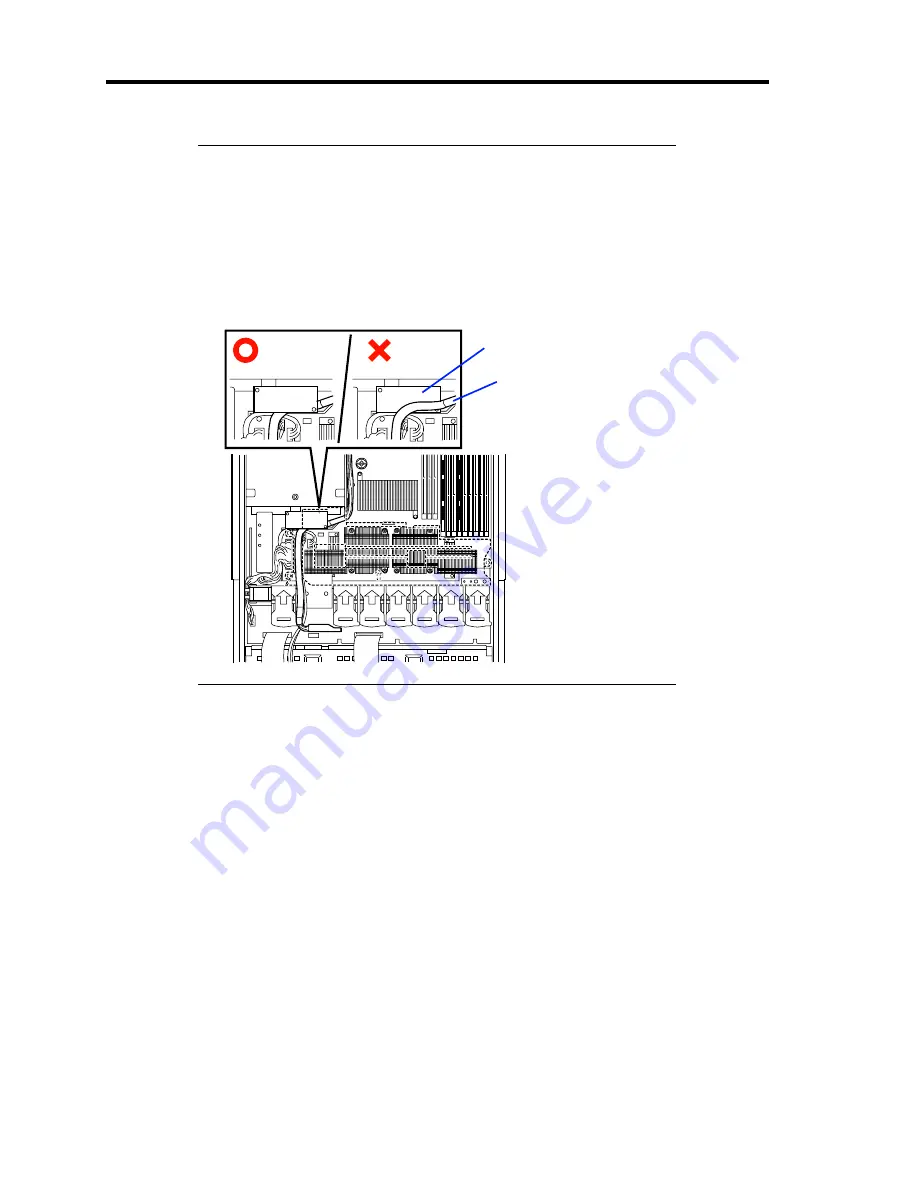
Place the internal USB cables inside the processor duct (see figure
above).
Check to see that the processor duct is firmly installed with no
clearance between the duct and chassis.
Put the hard disk drive signal cable under the sub-board as figure
below.
18.
Install the covers you removed previously.
19.
Power on the server, start the SETUP utility, and set "Processor Retest" of "Processor
Settings" on the Main menu to "Enable".
20.
Verify that POST displays no error messages.
If POST displays an error message, take a note on the message and see the POST error
messages listed in Chapter 8.
21.
Set "Reset Configuration Data" on the Advanced menu to "Yes".
This setting is required to change the hardware configuration data. See Chapter 4 for
details.
22.
To add one or more CPUs to the server in 1-CPU configuration to operate the server with
more than one CPU, change the driver of [Computer] in the device manager to [ACPI
multi-processor PC] and then update the system (see Chapter 5).
Sub-board
Hard disk drive
signal cable
Summary of Contents for N8100- 1241F
Page 68: ...2 36 General Description This page is intentionally left blank...
Page 194: ...6 26 Installing and Using Utilities This page is intentionally left blank...
Page 206: ...7 12 Maintenance This page is intentionally left blank...
Page 296: ...9 56 Upgrading Your Server This page is intentionally left blank...
Page 308: ...C 2 IRQ This page is intentionally left blank...
Page 354: ...E 24 Installing Windows Server 2003 This page is intentionally left blank...
Page 358: ...F 4 Product Configuration Record Table This page is intentionally left blank...


