53
Menu Functions and Settings
The main menu of your DTC 1000 has 5 menu items
to choose from:
A. Camera Setting
B. GSM Setup
C. GPS Input
D. Language
E. Camera Information
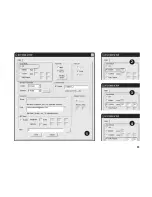
Push MENU (15) to enter the main menu of the cam-
era. In “Camera Setting” (A) you can set the camera
parameters to suit your particular needs. In “GSM
Setup” (B) you can make the settings required to
connect the camera to the mobile phone network.
In “GPS Input” (C) you can set the GPS coordinates
to be integrated into the meta-data of the photos.
In “Language” (D) you can choose the language to
be used to operate the camera. “Camera Informa-
tion” (E) provides you with an overview of relevant
information about your DTC 1000 such as available
storage space, firmware version or camera name.
Manual Release
This option enables you to use your DTC 1000 as a
normal digital camera. As with any common digi-
tal camera, you can view scenes on the display and
capture them as photos or videos. The DTC 1000 is
in Manual Release mode by default after switch-
ing the camera to SET (see “Setup and Operational
Modes”). You can switch between the camera and
video mode using the LEFT/RIGHT arrow buttons
(11). Push MENU (15) to enter the main menu. Push
MENU again to go back to the Manual Release mode.
Camera Mode
The following is visible in the LCD display (8): At
the top left is the camera symbol with the current
resolution setting and the top right the file capacity
[0000/0000]. At the bottom left is the current power
source and battery level. If a SD card has been in-
serted, you will see the SD card symbol at the bottom
right of the display. Push OK (11) to take a picture.
Video Mode
To switch to video mode, push the LEFT arrow button
(11). The following is visible in the LCD display (8):
At the top left is the video camera symbol and at
the upper right the recorded time [00:00:00]. At the


