background image

Printing a Status Page 

57

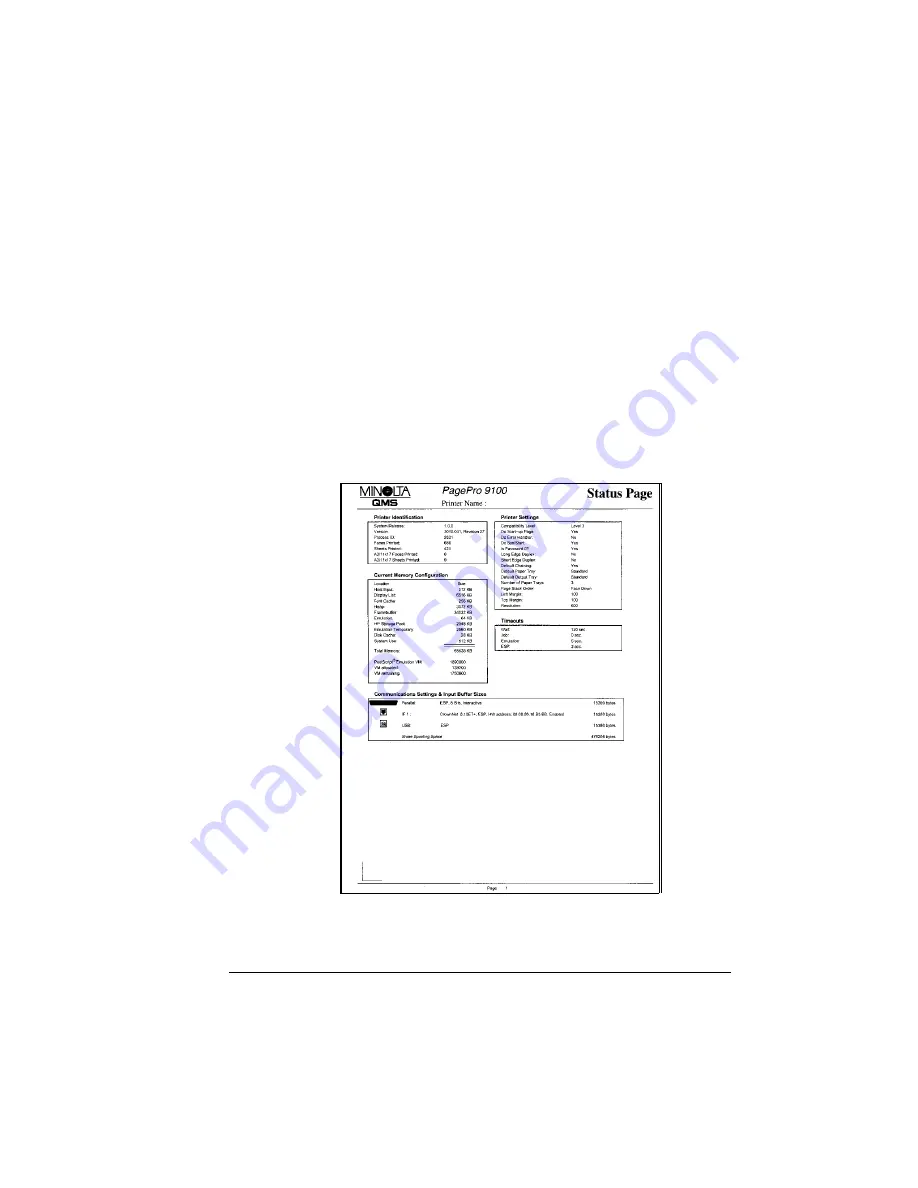
Printing a Status Page

There are two kinds of status pages:

Standard: A one-page overview of the most common printer settings 
used to confirm that your printer is printing.

Advanced: Information about printer parameter settings, fonts, and 
emulations available. The document may have many pages, depending 
on the fonts installed. Print an advanced status page in case you need
to restore any current memory settings, for example, after a DIMM 
installation. 

Select the type of status page through the Administration/Special Pages/
Status Page Type menu on the control panel.

After you have chosen the type you want, press the Status ? Page button on 
the control panel to verify the printer is printing correctly. You can also print a 
status page through the Administration/Special Pages/Print Status menu. 

Summary of Contents for PagePro 9100

Page 1: ...PagePro 9100 User s Guide 1800672 001B ...

Page 2: ...ther media or language without written permission of MINOLTA QMS Inc Notice MINOLTA QMS Inc reserves the right to make changes to this guide and to the equipment described herein without notice Considerable effort has been made to ensure that this guide is free of inaccuracies and omissions However MINOLTA QMS Inc makes no warranty of any kind including but not limited to any implied warranties of...

Page 3: ...es Chart 5 Replacing the Toner Cartridge 7 Replacing the Exhaust Filter 13 Replacing Rollers 14 Replacing the Transfer Roller 20 2 Using Media 23 Introduction 24 Media Storage and Handling 24 Page Margins 32 Image Alignment 32 Output Tray 32 Media 33 Loading Media 35 Using Media Other Than Plain Paper 41 Duplexing 45 ...

Page 4: ...er 60 Printer Optional Tray s Duplexer and 4 bin Mailbox 61 Understanding Media Jam Status Messages 62 Clearing Media Input Jams 62 Clearing Internal Jams 67 Clearing Output Jams 73 Solving Problems 75 Other Problems 79 Printing Quality 83 Status Error and Service Messages 87 Service Messages 93 HP GL Error Codes and PCL Error Codes 94 PostScript Errors 95 Additional Assistance 95 5 Installing Oth...

Page 5: ...lling Accessories 135 Relocating the Printer 139 Repacking the Printer 140 Checklist 140 Packing 141 Strapping and Buckling 142 Shipping the Printer 144 A Technical Specifications 145 Requirements 146 Space Requirements 146 Location Requirements 148 Power Requirements 149 ENERGY STAR Compliance 151 Engine and Controller Specifications 152 Print Speed 152 Engine 152 Controller 154 Electrical 156 Ph...

Page 6: ... Chart Conventions 167 Security Menu 167 Operator Control Menu 168 Administration Menu 169 Administration Communications Optional NIC CrownNet Menu 170 Warranty Considerations 175 Manufacturer s Declaration of Conformity 177 Europe 220 Volt 177 Manufacturer s Declaration of Conformity 178 Latin America 110 Volt 178 Manufacturer s Declaration of Conformity 179 Latin America 220 Volt 179 Index 181 ...

Page 7: ...1 Replacing Consumables ...

Page 8: ...do I order consumables page 5 Where can I get more information page 6 What is the toner cartridge life expectancy page 7 How should I handle a toner cartridge page 8 How do I replace and recycle the toner cartridge page 9 How do I replace the exhaust filter page 13 How do I replace rollers page 14 How do I replace the transfer roller page 20 ...

Page 9: ...media past the toner cartridge A two sided duplex page also called a sheet consists of two passes of the toner cartridge 5 The number of sheets printed statistics shown on the startup page may differ from the sheets printed and faces printed statistics in CrownView a printer based application for accessing printer configurations status and consumables usage information and on the consumables stati...

Page 10: ...printing under specific operating conditions and other printing variables such as ambient temperature humidity media type page size and content of material printed for example text or graphics Attention Failure to follow instructions as outlined in this manual could void your warranty Use of consumables not manufactured by MINOLTA QMS or use of non supported print media may cause damage to your pr...

Page 11: ...xhaust Filter At 5 coverage Starter Cartridge 6 000 Replacement Cartridge 15 000 continuous printing or 12 000 intermittent printing TONER EMPTY displays in the message window Replace the toner cartridge and the exhaust filter at the same time If the optional duplexer is installed the exhaust filter does not need replacement See How do I replace and recycle the toner car tridge on page 9 Media Pic...

Page 12: ...sumables Print Statistics menu on the control panel or use the CrownView printer web page For further information about the consumables statistics page and replacement menus refer to the CrownBooks in PDF on the Documentation CD ROM For information about ordering consumables refer to www minolta qms com or www q shop com If you need more assistance more information can be found on the AnswerBase a...

Page 13: ...tridge life is directly related to the number of rotations of the OPC Longest unit life is achieved with continuous prting which requires a cleaning rotation after every fourth page of an average size job Intermittent printing with small job sizes requires a cleaning rotation after each one page simplex job and therefore impacts OPC life Characters and images are created in your laser printer thro...

Page 14: ...ay from open flames In its packaging until you re ready to install it In a cool dry location away from sunlight due to heat The maximum storage temperature is 95 F 35 C and the maximum storage humidity is 80 without condensation If the toner cartridge is moved from a cold place to a warm humid place condensation may occur degrading print quality Allow the toner to adapt to the environment for abou...

Page 15: ... that are located inside the top cover and under neath the toner cartridge as a printer malfunction can result Be careful not to touch d d d d around the image transfer roller touching certain parts in this area may result in reduced print quality or e e e e around the fusing unit since the inside reaches temperatures of about 392 F 200 C touching any part in this area may result in burns 1 2 1 2 ...

Page 16: ...com for a replacement label 3 Remove the new toner cartridge from its box 5 We strongly suggest that you save the packaging materials in case you ever need to replace the toner cartridge or move or ship the printer 4 Peel off the packing tape Attention Do not open the protective coverc c c c of the OPC the green area d d d d or hold the toner cartridge by the protective cover The OPC is extremely ...

Page 17: ...doctor Material Safety Data Sheets MSDS can be found at www minolta qms com click on Online Help Drivers Sollte Toner in Ihre Augen gelangen die Augen unbedingt sofort mit kaltem Wasser ausspülen und einen Arzt aufsuchen MSDS Material Safety Data Sheets Datenblätter zur Materialsicherheit finden Sie im Internet unter www minolta qms com klicken Sie auf Online Help Drivers 6 Align the tabs on the t...

Page 18: ...e 4 bin mailbox to the back of the printer 2 Open the top cover c d 3 Lower the stopper to support the top cover 4 Replace the toner Refer to How do I replace and recy cle the toner cartridge on page 9 5 Return the stopper to its original position c 6 Close the top cover d 1 2 1 2 ...

Page 19: ... exhaust filter on the back of the printer is replaced when you replace a toner cartridge How do I replace the exhaust filter 1 Remove the used exhaust filter 5 Dispose of it according to your local regulations Attention If you will be installing the optional duplexer it contains a built in exhaust filter that does not need replacement 2 Remove the new filter from its box and insert it into place ...

Page 20: ... from the media trays into the printer When the pickup rollers deteriorate media may not feed correctly resulting in media jams Replace the pickup roller in the multipurpose tray each time you have the fuser replaced and more frequently if the media is not being picked properly The upper and optional media trays media pickup roller needs periodic cleaning but not replacement There are two differen...

Page 21: ...paration roller 5 Dispose of it according to local regulations 5 Remove the new paper separation roller assembly from its packaging 6 Install the new paper separation roller 7 Tighten the two screws 8 Reinsert the media tray into the printer 9 If you have optional media tray s installed repeat steps 3 8 for each one ...

Page 22: ...located inside the top cover and under neath the toner cartridge as a printer malfunction can result Be careful not to touch d d d d around the image transfer roller touching certain parts in this area may result in reduced print quality or e e e e around the fusing unit since the inside reaches temperatures of about 392 F 200 C touching any part in this area may result in burns e 2 1 3 ...

Page 23: ...rtridge and store it in a light free protective bag 4 Open the media feed roller cover 5 Unscrew the screw in the center of the multipurpose tray pickup roller and dispose of the pickup roller 5 Dispose of it according to your local regulations ...

Page 24: ...ler from its packaging Attention Do not touch the two black parts of the roller 7 Align the peg on the bottom of the pickup roller in its hole and replace the pickup roller 8 Tighten the screw 9 Close the media feed roller cover CR_M12K EPS Peg hole ...

Page 25: ...llers 19 10 Align the tabs on the toner cartridge one on each side with the notches in the printer and then insert the cartridge as far as possible into its compartment 11 Close the top cover 12 Turn on the printer ...

Page 26: ...replace the transfer roller 1 Turn off the printer 2 Slide the top cover release lever to the right c and open the top cover d 3 Remove the toner cartridge and store it in a light free protective bag The transfer roller interfaces with the roller in the toner cartridge 2 1 ...

Page 27: ... 6 Remove the new transfer roller from its packaging Attention Do not touch the transfer roller s black surface 7 Lower the new transfer roller straight in c making sure the shaft is well seated 8 Rotate the green tabs downward d so that the metal surface faces you 9 Align the tabs on the toner cartridge one on each side with the notches in the printer and then insert the cartridge as far as possi...

Page 28: ...Replacing the Transfer Roller 22 10 Close the top cover 11 Turn on the printer ...

Page 29: ...2 Using Media ...

Page 30: ...ckaging and store in a cool dark place When storing media avoid Getting Started How do I take care of media page 24 What should I watch out for when handling media page 27 What type and amount of media can I load page 29 What sizes weights of media can I use page 30 What Is the guaranteed imageable printable area page 31 Job Modes and Media Types Why have two different job modes page 33 How do I s...

Page 31: ...se the media types listed below These could cause poor print quality media jams or damage to the printer Do not use media that is Coated with a processed surface such as carbon paper digitally gloss coated media colored paper that has been treated Carbon backed Iron on transfer media heat sensitive paper heat pressure paper heat press transfer paper Cold water transfer paper Pressure sensitive Spe...

Page 32: ...e tray extender and support the media with your hands under neath while it feeds through the multipurpose tray Select plain paper mode in Administration Media Plain Paper menu Set the printer for custom sized media in the Operator Control Multipurpose Sz Custom menu Do not use custom media that does not fit the approved dimensions Width 3 4 inches 86 mm up to 11 7 inches 297 mm Length 5 5 inches 1...

Page 33: ... continuous print and print one sheet at a time Format label data within your application Try printing your data on a plain sheet of paper first to check placement Check your application documenta tion for other information on printing labels Do not use label sheets that Have labels that easily peel off Have the backing sheets that have peeled away or have exposed adhesive Labels may stick to the ...

Page 34: ...he output tray to avoid static buildup If you touch the face of transparencies with your bare hands print quality may be affected Do not handle transparency media too much Do not fan large quantities of transparency media before loading it You can print continuously with transparencies However this could affect the media feed depending on the media quality static buildup and printing envi ronment ...

Page 35: ...ill limit mark inside the tray or the media may not be fed correctly Media Source Maximum Amount Based on 16 20 lb bond 75 g m Media Type Input Capacity Upper Media Tray Multi purpose MPT Tray Optional Media Trays Optional1 2 or 3 Plain Paper 16 24 lbs 60 90 g m2 500 FU A5 media 350 FU 200 FD 500 FU Special Media Custom Media Not supported 50 FD Not supported Envelopes 100 FU Label Stock letter or...

Page 36: ...4 Varies M Top No Custom Sizes Maximum 11 7x17 0 297 0x 432 0 International DL Envelope 4 3x8 7 110 0x220 0 N A SEF M Top No Executive 7 3x10 5 184 0x267 0 16 24 LEF M Top Mbox Yes Folio Govt Legal 8 5x13 0 216 0x330 0 SEF M Top Mbox Yes Government Letter 8 0x10 5 203 2x267 0 LEF UO M Top Mbox Yes Japanese Postcard 3 9x5 8 100 0x148 0 N A SEF M Top No Ledger 11 0x17 0 279 4x432 0 16 24 SEF UO M To...

Page 37: ...1 Enable edge to edge printing through the printer s control panel Administration Engine Edge to Edge menu 2 From the PagePro 9100 Windows printer driver select PostScript custom page size and set it to match the actual media size From the PagePro 9100 Macintosh printer driver select custom page size and set it to match the actual media size 3 Set your margins to 0 from the appropriate application...

Page 38: ...ou need to change the image alignment you can do so in several different ways Adjust the margins or page size through your application recommended method Use the printer s control panel Administration Engine Image Alignment or the Administration Engine Edge to Edge menu Use the PostScript translate and scale operators to reduce image size and change its placement on the page requires PostScript pr...

Page 39: ...ork Mode if special media is not selected in both the driver and from the printer s control panel the printer uses plain paper settings Select the media type Why have two different job modes Network mode is designed for printing on the network so that print jobs are not held up by requested media changes If the requested media type from the driver matches the media type set for the inputbin the jo...

Page 40: ...s most important use single user mode How do I select the job mode In network mode you must select a specific media type from the printer driver and Network Mode from the printer s control panel Operator Control Media Mode Network Mode In single user mode you only have to specify the type of media that you are printing on in the driver How do I select the media type For example in the printer driv...

Page 41: ...antities of transparency media A fill limit mark is provided on the inside right side of the tray The upper and optional media tray s hold approximately 500 sheets of 20 lb bond 75 g m paper How do I refill a media tray 1 Pull out the media tray until it stops 5 The illustration only shows the upper media tray The following instructions are also valid for the optional media trays Check www minolta...

Page 42: ...one on each side c remove the tray d 3 Remove the media tray cover 4 Lift up the gray lever on the right end of the paper retainer c and then slide the paper retainer to the right d 5 Lift up on the left end of the paper retainer c to remove it d 1 2 1 2 1 2 ...

Page 43: ...er to the left c and then press down on the gray lever d to secure the paper retainer Attention Make sure the paper retainer is seated properly 8 Align the four edges of the paper and then load the paper printing side up A maximum of 500 sheets 20 lb bond 75 g m2 plain paper can be loaded If media is loaded past the triangular mark it may not be fed correctly 1 2 Do not load media on this side A4 ...

Page 44: ... against the edge of the paper d Attention The media should fit easily between the guides Improperly adjusted guides may cause poor print quality media jams or printer damage 10 Install the media tray cover 11 Install the media tray inserting it as far as possible into the printer 1 2 ...

Page 45: ...d with the printer to the media tray s in order to indicate the size of the loaded paper How do I refill a multipurpose media tray 1 Open the multipurpose tray For information about approved media refer to page 29 The multipurpose tray is used for all media types especially envelopes labels Japanese sized postcards and thick stock ...

Page 46: ...m2 plain paper can be loaded If media is loaded past the triangular mark it may not be fed correctly 4 Align the four edges of the media and then lightly slide the media as much as possible into the feed slot printing side up Often an arrow on the package label indicates the printing side of the media Attention Make sure the media fits easily between the guides Improperly adjusted guides may cause...

Page 47: ... before you load media How do I load and print envelopes 5 Envelope printing is supported only from the multipurpose tray 1 In the printer driver Paper tab Media Type option select Envelope 2 If you are in Network Mode on the control panel select Operator Control MPT Media and select Thick Stock 3 Select the size of envelope either a Press the MP Size Select key and scroll to the required envelope...

Page 48: ...d flap Anything printed in these layered regions may be lost or faded 5 Check your application documentation to determine if the flap should be placed on the left or on the right You can also print a single envelope to check the orientation before printing multiple copies 10 Recheck the media guides to make sure they are adjusted to the width of the envelopes 11 Print the envelopes 12 Open the fla...

Page 49: ...djust the media guides to the width of the label media 6 Print the labels How do I load and print postcards 5 Postcard printing is only supported from the multipurpose tray 1 In the printer driver Paper tab Media Type option select Postcard 2 If you are in Network Mode on the control panel select Operator Control MPT Media and select Thick Stock 3 Select postcard a Press the MP Size Select key and...

Page 50: ...approved media To order approved media go to www q shop com 1 In the printer driver Paper tab Media Type option select Transparency and select either Letter or A4 2 If you are in Network Mode on the control panel select Operator Control MPT Media and select Transparency 3 Press the MP Size Select key and scroll to the required transpar ency size and select it 4 Fan a few transparencies 5 Fanning a...

Page 51: ...rint the Even Numbered Pages How do I autoduplex 5 Only plain paper 16 24 lb bond 60 90 g m can be autoduplexed Autoduplexing envelopes labels postcards thick stock over 24 lb 90 g m or transparencies is not supported You should verify that the duplexer is physically installed on the printer to have the job duplex successfully Otherwise the print job will print as simplex even if you selected dupl...

Page 52: ...ayout tab Duplex Options select Long Edge flipped horizontally as in a loose leaf notebook or Short Edge flipped vertically as on a clipboard as the Duplex option 4 Click OK Where can I order MINOLTA QMS approved media or get more information See your application documentation for specific information on formatting data and printing Check www minolta qms com support click on Answer Base for curren...

Page 53: ...3 Maintaining the Printer ...

Page 54: ...ch the transfer roller cartridge electrical contacts gears or laser beam devices Doing so may damage the printer and cause the print quality to deteriorate Do not place anything on the top of the printer Always close the printer covers gently Do not leave the printer s cover open for any length of time especially in well lit places light may damage the toner cartridge Be careful when cleaning the ...

Page 55: ...ce Support Guide for a MINOLTA QMS authorized service provider near you Exterior Use Exterior Avoid A soft dry cloth to clean the control panel Sharp or rough implements such as wire or plastic cleaning pads or brushes liquids A soft wrung out damp cloth to clean the outside of the printer Aerosol or pump sprayed cleaners too much dampness in the cloth Mild neutral detergent to clean the outside o...

Page 56: ...n Wasser oder andere Flüssigkeiten auf dem Drucker da das Gerät sonst beschädigt wird oder die Gefahr eines elektrischen Schlages besteht Read all caution and warning labels carefully making sure to follow any instructions contained in them These labels are located on the printer s interior Media Tray Pickup Rollers The printer s pickup rollers contain a sensor to detect the density of media passi...

Page 57: ...Cleaning 51 2 Remove the media tray 3 Wipe the pickup roller with a soft dry cloth 4 Reinsert the media tray into the printer How do I clean the multipurpose tray pickup rollers 1 Turn off the printer ...

Page 58: ...printer malfunction can result Be careful not to touch d d d d around the image transfer roller touching certain parts in this area may result in reduced print quality or e e e e around the fusing unit since the inside reaches temperatures of about 392 F 200 C touching any part in this area may result in burns 3 Remove the toner cartridge and store it in a light protected bag 1 2 d c e 1 2 3 ...

Page 59: ...feed rollers with a soft dry cloth 6 Close the media feed roller cover 7 Align the tabs on the cartridge one on each side with the notches in the printer and then insert the cartridge as far as possible into its compartment 8 Close the top cover Cover Media feed rollers ...

Page 60: ...Cleaning 54 9 Turn on the printer ...

Page 61: ...4 Troubleshooting ...

Page 62: ...ge 58 Preventing Media Jams Page 59 Automatic Jam Recovery Page 60 Understanding the Media Path Page 60 Understanding Media Jam Status Messages Page 62 Clearing Media Input Jams Page 62 Solving Problems Page 75 Status Error and Service Messages Page 87 Additional Assistance Page 95 ...

Page 63: ...ny pages depending on the fonts installed Print an advanced status page in case you need to restore any current memory settings for example after a DIMM installation Select the type of status page through the Administration Special Pages Status Page Type menu on the control panel After you have chosen the type you want press the Status Page button on the control panel to verify the printer is prin...

Page 64: ...dd 10 to this number and this becomes your required Host Input memory size In the event that you experience problems you may want to increase the Host Input memory size further The maximum size of PDF files which may be printed is determined by the amount of installed memory Direct printing of complex or large PDF files may require additional memory RAM and or a hard disk Attention We recommend an...

Page 65: ...surface Allowing buildup of static electricity from fanning large quantities of transparencies or buildup of transparencies in the output tray You have the correct media type selected if you re printing on envelopes labels thick stock or transparencies Loading more than one type size weight of media in a tray at the same time You store media in a dry location away from moisture and humidity Overfi...

Page 66: ...red 5 For automatic jam recovery to work it is necessary to leave the printer turned on when you remove the jammed media After the jam is cleared open and close the top cover before printing Printing will not resume until you do this Understanding the Media Path Understanding the printer s media path will help you locate media jams Media is picked from the tray passed under the toner cartridge and...

Page 67: ...Understanding the Media Path 61 Printer Optional Tray s Duplexer and 4 bin Mailbox ...

Page 68: ...Y MEDIA JAM OPTIONAL1 OR 2 OR 3 TRAY MEDIA JAM MPT To avoid damage always remove jammed media gently without tearing it Any pieces of media left in the printer whether large or small can obstruct the media path and cause further jams To avoid damage to rollers always remove jammed media gently Do not reload media that has jammed Attention The image is not fixed on the media before the fusing proce...

Page 69: ...ww minolta qms com click on Online Help Drivers ACTUNG Sollte Toner in Ihre Augen gelangen die Augen unbedingt sofort mit kaltem Wasser ausspülen und einen Arzt aufsuchen MSDS Material Safety Data Sheets Datenblätter zur Materialsicherheit finden Sie im Internet unter www minolta qms com klicken Sie auf Online Help Drivers How do I remove a media jam in the upper or optional media tray s 1 Pull ou...

Page 70: ...ler and then pull out the media d After removing the misfed media be sure to return the green lever to its original position e Do not use force to remove jammed media 5 If you have optional media tray s repeat steps 1 4 for each optional media tray installed 5 At times the media may be stopped inside the optional media tray s in back along the media path Check inside the trays from the front of th...

Page 71: ...ia remaining in the media tray s is loaded correctly before installing the tray s Make sure no media remains misfed under the roller in the tray 7 If necessary open and close the top cover to cancel the error message How do I remove a media jam in the multipurpose media tray MPT 1 Remove all media from the multipurpose tray 1 3 2 ...

Page 72: ...Clearing Media Input Jams 66 2 Pull out the misfed media 3 Correctly load the media into the multipurpose tray 4 If necessary open and close the top cover to cancel the error message 1 3 2 ...

Page 73: ...e copper or brass electrodes c c c c or electrical parts that are located inside the top cover and under neath the toner cartridge as a printer malfunction can result Be careful not to touch d d d d around the image transfer roller touching certain parts in this area may result in reduced print quality or e e e e around the fusing unit since the inside reaches temperatures of about 392 F 200 C tou...

Page 74: ...ag 3 If the media is stopped by the fuser lift the green levers on each side and then slowly pull out the media from below the roller Attention Do not pull out the media from above the roller otherwise decreased print quality may result 4 After removing the misfed media lower the two levers 1 1 2 ...

Page 75: ...Clearing Internal Jams 69 5 Open the media feed roller cover 6 Pull out the jammed media 7 Close the media feed roller cover ...

Page 76: ...en insert the cartridge as far as possible Attention Do not touch the rollers or gears within the printer otherwise the printer may be damaged 9 Close the top cover How do I remove a media jam inside the duplex unit 1 Open the upper cover c of the duplex unit remove the jammed media d and then close the upper covere 1 2 3 ...

Page 77: ...o the previous procedure remove the duplexer from the printer Refer to Failure to follow instructions as outlined in this chapter could result in voiding your warranty on page 138 4 Remove any media in the feed slot at the bottom of the back of the printer 5 Reinstall the duplexer Refer to Installing a Duplexer on page 115 6 If necessary open and close the top cover to cancel the error message 1 2...

Page 78: ...m inside the printer with the 4 bin mailbox installed 1 Slide the mailbox as far as possible to the back of the printer 2 Open the top cover 3 Fully lower the stopper to support the top cover 4 Follow the procedure for removing a media jam on Page 71 1 2 ...

Page 79: ... and then close the top cover d 6 Slide the mailbox forward to its original position Clearing Output Jams Output media jams message MEDIA JAM MAIL BIN How do I remove a media jam inside the 4 bin mailbox 1 Open the back cover c and then remove the jammed media d 1 2 1 2 3 ...

Page 80: ...k cover of the mailbox 3 If necessary open and close the top cover to cancel the error message How do I remove a media jam in the output bin 1 Remove the media from the output bin 2 If necessary gently pull out any media that is still jammed ...

Page 81: ...al sheets are being feed at the same time Remove the media from the tray and check for static electricity Fan plain paper or other media but not transparencies and replace it in the tray Media is not set properly in the media tray s Remove the media tap it to straighten it out return it to the media tray and realign the media guides The printer is set up on a stand smaller than the bottom area of ...

Page 82: ...d it in the tray one sheet at a time Do not fan large quantities of transparencies before loading them Transparency OHP media being fed from the upper or optional trays is not feeding correctly Envelopes labels postcards special stock thick stock and transparencies can be printed only from the multi purpose tray Multiple sheets of transparency OHP media are collecting static electricity in the tra...

Page 83: ... media is loaded in the tray Remove the warped or wrinkled media and replace it with new media The media is moist from humidity Remove the moist media and replace it with new dry media Unsupported media wrong size thickness coating type etc is being used Use media that is approved for your printer The recommended transparency OHP or label media are facing the wrong way in the tray Load the transpa...

Page 84: ... the exception see Transparency OHP media being fed from the upper or optional trays is not feeding correctly on page 80 Media may still be jammed Recheck the media path and make sure you have removed all of the media jams If you are manually duplexing media jams may occur if the printed sheet s reinserted are not entirely flat Remove the jammed media from the tray flatten it out and reload it 4 b...

Page 85: ...o an outlet with a voltage or fre quency that does not match the printer specifications Use a power source with the specifica tions listed in appendix A Technical Specifications Printer is not responding is displayed in the Print Monitor The printer is in energy saving mode It takes a little time for printing to start if the printer is in energy saving mode You can change the number of minutes bef...

Page 86: ...use Network Mode Operator Control Media Mode menu You are experi encing problems duplexing Media or settings are not correct Make sure that you are using the correct media Do not duplex envelopes glossy stock heavier than 28 lb bond 105 g m labels postcards thick stock heavier than 28 lb bond 105 g m or transparencies Make sure that your document has more than one page In the printer driver Proper...

Page 87: ...for the office closest to you The printer goes into power saving mode The printer automati cally switches to power saving mode after 30 minutes of inactivity default You can change the number of minutes before the printer switches to power sav ing mode in the Administration Engine Energy Saver menu You are unable to access Accounting in Crown View The printer is not turned on and IDLE Make sure th...

Page 88: ... active the default and the parallel cable is unplugged then plugged back in communication was lost Set the parallel cable to Non Interactive mode in the Administration Communications Parallel Mode menu Too many status pages print Your printer is set to print the multiple page Advanced Status Page instead of the one page Standard Status Page Select the type of status page through the Administratio...

Page 89: ...nted page looks like this Toner Cartridge Image Transfer Roller Media Feed Roller or Media If printed page looks like this Toner Cartridge Image Transfer Roller Media Feed Roller or Media Page 84 Page 85 Page 85 Page 84 Page 85 Page 84 Page 86 Page 84 Page 86 Page 85 Page 86 ...

Page 90: ...l vendor or refer to the Service Support Guide or www minolta qms com for further information Print too light The toner cartridge may running out of toner Remove the toner cartridge and shake it left and right a few times to distribute remaining toner If the problem persists replace the toner cartridge The toner cartridge may be defective Remove the toner cartridge and check it for damage Replace ...

Page 91: ...ing toner The toner cartridge may be defective Remove the toner cartridge and check it for damage Replace the toner cartridge if necessary The image transfer roller may be defective Remove the image transfer roller and check it for damage Replace the image transfer roller if necessary Irregularities The media may have absorbed some moisture due to high humidity or because of direct contact with wa...

Page 92: ...ove the toner cartridge and shake it left and right a few times to distribute remaining toner The toner cartridge may be defective Remove the toner cartridge and check it for damage Replace the toner cartridge if necessary Smudges on the back of the media indicate a dirty media feed roller Remove the media feed roller and check it for debris Replace the media feed roller with a new one if necessar...

Page 93: ...this ACC DISABLED The accounting option selected is now in effect No action needed ACC ENABLED ACC FILE 95 FULL ACC FILE 90 FULL ACC FILE 85 FULL ACC FILE 80 FULL The Job Accounting File is 80 85 90 or 95 full This message should be taken care of immediately because it may be masking another problem Once the accounting message is cleared can you see IDLE If IDLE is not there you will see another e...

Page 94: ...unting and paper accounting files to floppy disk s or trans fer them to your host computer using ftp if available Then reset the accounting files so that new jobs can be accepted If you don t want to use accounting you can disable it ADJUST X BIN The specified inputbin X is not inserted correctly and needs attention Readjust the media and media guides and reinstall the inputbin media tray if neces...

Page 95: ...s an internal or external hard disk error For example when both an internal hard disk and Jaz drive are installed disk1 Disk Status shows 0 zero K for the Jaz drive size preventing backup of the hard disk to the Jaz drive In order to back up the hard disk contents to a Jaz drive you must increase the Disk Cache manually to at least 1 MB For more information about increasing the memory in the Disk ...

Page 96: ...he printer remains in deep sleep until a print job is received or until the printer is manually switched from offline to online No action needed X COVER OPEN The specified cover X is not closed properly Close the cover X BIN FULL The specified outputbin X is full and needs to be emptied Remove the media from the outputbin X BIN JAM The specified outputbin X has jammed media Locate and remove the j...

Page 97: ...ftware Wait The system software update will abort without operator intervention if the system software on the CD ROM is the same as or older than the one currently installed on the printer controller MAILBIN X The specified message X in the 4 bin mailbox needs attention Locate and resolve the message MEDIA JAM X A media jam in the specified location X may mean that media has jammed that a sheet of...

Page 98: ...r action needed SYS UPDATE ERROR X The indicated error X has been reported Verify the update file and send it again or check with www minolta qms com support and click on the Answer Base for the latest code update TONER CART MISINSTALLED The toner cartridge is not seated properly in the printer Reinstall the approved MINOLTA QMS toner cartridge TONER EMPTY The toner cartridge is empty Replace the ...

Page 99: ...r If you cannot get service from your vendor check the Service Support Guide for additional contact information or MINOLTA QMS authorized service providers X MISINSTALLED The specified item X such as the toner cartridge is misinstalled Reinstall the item WARMING UP The printer is getting ready to print Wait No other action needed This service message means do this SERVICE CALL X An error has been ...

Page 100: ...ob 0 Not enough memory for job 1 Too many transformations 1 State lost 2 Math error 2 Math error 3 Job aborted 3 Job aborted 4 Instruction not recognized 4 Out of memory for macros 5 Wrong number of para meters 5 Disk full Cannot store fonts 6 Out of range parameter or illegal character 6 13 Internal error 1 8 7 Not used 8 Unknown character set 9 Position overflow 10 Buffer overflow 11 Not used PC...

Page 101: ... Answer Base at www minolta qms com support for a solution You can also refer to the Service Support Guide or visit our web site at www minolta qms com for current information on getting help Menu Administration Startup Options Do Error Handler Choices Yes Load the Error Handler on reboot No Don t load the Error Handler on reboot Default No Notes Refer to the PostScript Language Reference Manual T...

Page 102: ......

Page 103: ...5 Installing Other Accessories ...

Page 104: ...hase information 4 bin Mailbox Optional BuzzBox Via parallel connection for 100 120 and 220 volts Dual In Line Memory Modules DIMMs two available slots Additional memory must be 32 64 128 or 256 MB PC 100 Compliant SDRAM DIMMs up to a maxi mum of 512 MB in the two DIMM slots Duplexer With built in exhaust filter Emulations Fonts Forms and Other Software ImageServer VMS Host Software CGM Kanji Font...

Page 105: ... will not repair the printer free of charge In this case standard time and material charges will be applied to service your printer for that particular failure or damage Optional media tray s Up to three optional 500 sheet media trays may be added Purchasing extra trays may be convenient when changing media formats and or when media qualities vary Time of Day Clock Optional 4 bin Mailbox Up to Thr...

Page 106: ...ephones are not acceptable grounding points The printer isn t an acceptable grounding point either because it must be unplugged before you perform this task If you don t have an antistatic wrist strap discharge your body s static electric charge by touching a grounded surface before you handle any printer boards or components and before removing the controller board Also avoid walking around after...

Page 107: ...nter and unplug the power supply cord and interface cable 2 Open the top cover Attention Never touch the copper or brass electrodes c c c c or electrical parts that are located inside the top cover and under neath the toner cartridge as a printer malfunction can result Be careful not to touch d d d d around the image transfer roller touching certain parts in this area may result in reduced print q...

Page 108: ...ove the brackets one on each side at the rear of the top cover 5 Keep the removed back section of the top cover and the brackets in a safe place for future use 6 Lower the stopper at the back left of the top cover The stopper prevents the top cover from closing when the 4 bin mailbox is installed Attention Before using the printer after removing the 4 bin mailbox make sure that the stopper lowered...

Page 109: ...in mailbox secure the left and right brackets on the transport unit to the printer 5 After using the wrench keep it in a safe place for future use 11 Attach the 4 bin mailbox to the transport unit 12 Insert the extensions one on each side at the bottom of the 4 bin mail box into the holes in the transport unit pushing down until they lock into place 13 Using a screwdriver remove the connector cove...

Page 110: ...7 Reconnect the power cord and turn on the printer 5 In compliance with UL guide lines The appliance inlet is considered to be the main dis connect device 5 Before moving the printer even just a small distance be sure to disconnect and remove the 4 bin mailbox from the printer Refer to How do I remove a duplexer on page 135 BuzzBox BuzzBox is a printer accessory that warns you with a buzzer and or...

Page 111: ...ephone numbers Installing the BuzzBox 1 If you have a cable attached to the printer s parallel port unplug it from the printer 2 Attach one end of the parallel cable on the interface box to the printer s parallel port 5 The BuzzBox s ribbon cable is designed to be directly attached to the printer s parallel port not to an adapter or an additional cable 3 Use the RJ 11 cable to connect the BuzzBox ...

Page 112: ...nline key to take the printer off line 5 You can use the BuzzBox switches to enable or disable the buzzer the light or both When the printer goes off line the light flashes and the buzzer sounds until the printer is placed back on line or until the light and buzzer switches are turned off Using the BuzzBox When the BuzzBox lights or buzzes check the printer message window to find out what has inte...

Page 113: ...ance For increased spooling performance How much memory do you need Check the startup page to make sure the printer has enough RAM installed To allocate the default amount of memory to the memory clients use the Memory Quick Config menu to choose the correct resolution and media size for your printing refer to the CrownBooks in PDF on the Documentation CD ROM for further information Print Type Sim...

Page 114: ...lation 5 Installing DIMMs automatically restores memory defaults If your memory settings are specific to your environment print an advanced status page before installing DIMMs so you can recover the current memory settings 2 Turn off the printer and disconnect the power cord and all interface cables 3 Remove the controller board Loosen four screws and pull the controller board from the printer 4 P...

Page 115: ...oller board into the printer s tracks until it is fully seated and then tighten the four screws 8 Reconnect all interface cables 9 Reconnect the power cord and turn on the printer 5 In compliance with UL guidelines The appliance inlet is considered to be the main disconnect device IIIIIIIIIIIIIIIIIIIIIIIIIIIIIIIIIIIIIIIIIIIIIII IIIIIIIIIIIIIIIIIIIIIIIIIIIIIIIIIII IIIIIIIII IIIIIIIIIIIIIIIIIIIIIIII...

Page 116: ...Dual In Line Memory Modules DIMMs 110 10 Print a startup page or an advanced status page and verify that the total size of the RAM installed in your printer is listed ...

Page 117: ...ow instructions as outlined in this chapter could result in voiding your warranty on page 134 1 Turn off the printer and unplug the power supply cord and interface cable 2 Remove the cover from the back of the printer Since the back cover is secured with a screw use the wrench supplied with the duplexer to loosen it 5 Keep the removed cover in a safe place for future use Duplex 2 sided printing ca...

Page 118: ...to keep the top of the duplexer supported until the screws are tightened b Using the wrench supplied with the duplexer tighten the two screws on the duplexer to secure it to the printer The two screws are attached to the duplexer and cannot be removed 5 After using the wrench keep it in a safe place for future use 3 Reconnect all interface cables 4 Reconnect the power cord and turn on the printer ...

Page 119: ...ty which provides access to printer manage ment functions including status monitoring and network printer parameter settings We recommend that you use PageScope to download an emulation Refer to the PageScope online help on the Software Utilities CD ROM for instructions about downloading applets for telnet and ftp CrownView Many of the configuration choices that can be made at the control panel ca...

Page 120: ...a UNIX workstation copy the installation file from the emulation CD ROM or disk to a temporary directory on your UNIX workstation then change to that directory 4 Open an ftp session on your PC or workstation by typing one of the following commands ftp printername for example ftp pctdev6 ftp ipaddress for example ftp 161 33 130 45 5 When prompted for a user name and password press Enter for both An...

Page 121: ...documentation that comes with the ImageServer option TIFF CALS A CCITT emulation Group 4 monochrome only is available through the MINOLTA QMS ImageServer option which image enables your printer allowing it to print many images at or near the rated engine speed and eliminating the need for a computer dedicated to rasterizing images Fonts and Forms MINOLTA QMS Font Form Center The MINOLTA QMS Font F...

Page 122: ...nt application gives you the ability to store PostScript forms on the printer s hard disk and fill those forms with your application s ASCII print stream Refer to the documentation that comes in the QFORM kit for installation and usage instructions PlanetPress PlanetPress is an electronic forms package that allows the creation and modification of business forms MICR checks bar codes and other prep...

Page 123: ...ns CID fonts Adobe Morisawa Enfour and Fontworks are supported on the PagePro 9100 Kanji Font Internal IDE Hard Disk The preformatted Kanji font internal IDE hard disk contains Kanji fonts and other files These fonts can be printed at a variety of point sizes and in differ ent styles and resolutions After the Kanji hard disk is installed in your PagePro 9100 the Kanji fonts are available for use j...

Page 124: ...atted hard disk drive DO NOT reformat or initialize the Kanji internal IDE hard disk drive Reformatting erases all data fonts and files on the disk Your warranty does not cover this error The Kanji font internal IDE hard disk is installed on the controller board in the same way any internal hard disk is installed See Internal IDE Hard Disk Drive on page 123 for detailed steps on installing an inte...

Page 125: ...hree ports with three hosts either computers or networks but if installing other optional interface cards you must remove the Ethernet card first to install another NIC See the Notices section in the Installation Guide for FCC compliance classification information What s in the interface kit An optional interface kit includes the following An interface card Interface documentation in hardcopy and ...

Page 126: ...terface panel and that its 80 pin connector aligns with the 80 pin connector on the controller board b Gently press the interface card down until its connector is fully seated and the card is secured by the plastic support post s Attention Make sure that the connectors on the interface card and controller board are properly aligned Damage to the interface card and or controller board could result ...

Page 127: ...Interface The optional SCSI interface allows you to connect an optional SCSI devices including a hard disk and Jaz and Zip drives These devices provide storage for fonts emulations and other files increase the number of pages that can be collated and provide a secondary storage area for spooled data while providing virtual memory capabilities In order to back up the hard disk contents to a Jaz dri...

Page 128: ...e SCSI interface opening You can dispose of the metal plate and screws according to local regulations 5 Attach the ribbon cable to its connector on the SCSI interface card a Position the SCSI interface card so that its ribbon cable connector aligns with the SCSI connector on the controller board b Gently press the ribbon cable connector down until it s fully seated Attention Make sure that the con...

Page 129: ...e startup page lists the interface SCSI just installed under Options Internal IDE Hard Disk Drive Attention Make sure that the printer and all accessories are turned off before installing accessories involving the controller board One optional internal IDE hard disk is supported What s in the internal IDE hard disk drive kit The internal IDE hard disk drive kit includes the following IDE hard disk...

Page 130: ... interface cables from the printer 2 Remove the controller board Loosen four screws and pull the controller board from the printer 3 Position the controller board on a flat surface so it lies flat and the I O connector panel is facing you 4 Position the controller board on a flat surface so the con troller board lies flat and the interface panel is facing you 5 Attach the internal IDE hard disk dr...

Page 131: ... the cable connector until it is fully seated Attention Do not push or pull with the ribbon cable Use the cable connector 9 Align the support posts with the holes on the controller board and then press down to secure the hard disk to the controller board So that you don t stress the board press one corner at a time to secure the hard disk to the controller board 10 Reinstall the controller board i...

Page 132: ...e shipping carton and place it on a table or flat surface near the printer 3 Remove any tape and packing material 5 We strongly suggest that you save the packaging materials in case you ever need to move or ship the printer 4 If multiple 500 sheet media trays are to be installed stack them on top of each other at the desired setup location for the printer Each optional media tray increases your pr...

Page 133: ...erbrauchsmaterial ca 28 kg Bitte versuchen Sie niemals den Drucker alleine anzuheben oder zu transportieren 6 Align the positioning pins on the media tray with the holes in the bottom of the upper media tray and the printer to stack them correctly 7 Using the mounting parts four screws and two brackets secure the printer to the media tray a Using the enclosed screws attach the enclosed brackets to...

Page 134: ...nce inlet is considered to be the main disconnect device Media Trays The printer comes with a 200 sheet multipurpose tray inputbin 1 and a 500 sheet upper media tray inputbin 2 You may install up to three 500 sheet optional media trays inputbins 5 through 7 Additional trays may be purchased The replacement trays provide these benefits Expanded flexibility to switch media size color and type withou...

Page 135: ...lock is incorrectly installed or replaced Replace it only with a supported MINOLTA QMS time of day clock Dispose of any used time of day clock in accordance with local laws and regulations ACHTUNG Da der Uhrenbaustein eine interne Batterie enthält besteht Explosionsgefahr falls dieser falsch eingesetzt oder ersetzt wird Er darf nur durch einen unterstützten Baustein ersetzt werden Bitte entsorgen ...

Page 136: ...clock c Align this indicator mark with the pin 1 notch or printed label on the controller board d Gently press down on the time of day clock until it s firmly seated 4 Reinstall the controller board Gently slide the controller board into the printer s tracks until it is fully seated and then tighten the four screws 5 Reconnect all interface cables 6 Reconnect the power cord and turn on the printer...

Page 137: ... listed under Installed Options on the startup page but the time does appear as System Date in the Printer Information column Using the Time of Day Clock For instructions about setting and using the time of day clock refer to the CrownBooks in PDF on the Documentation CD ROM ...

Page 138: ......

Page 139: ...6 Storing Deinstalling Relocating Repacking and Shipping ...

Page 140: ... cartridge from light and from spilling toner 4 Remove the media from all media tray s Storing the Printer What do I do when storing the printer for an extended period page 134 How do I care for media page 135 Deinstalling Accessories How do I remove a duplexer page 135 How do I remove a 4 bin mailbox page 135 How do I remove an optional media tray page 137 Relocating the Printer How do I relocate...

Page 141: ... 86 F 30 C Dust Leaning against other objects or placed in an upright position Store the media in a dust free area protected from humidity Deinstalling Accessories Attention Before transporting the printer remove the toner cartridge put the cartridge in its original package or in a plastic bag and then transport it without subjecting it to strong impacts How do I remove a duplexer 5 If both the op...

Page 142: ...plexer loosen the two screws on the duplexer The two screws are attached to the duplexer and cannot be removed 5 After using the wrench keep it in a safe place for future use b Unhook the two tabs at the bottom of the duplexer from the notches on the back of the printer c Store the duplexer in its original packaging 4 Replace the cover on the back of the printer Use the wrench supplied with the du...

Page 143: ...rter up off the transport unit d 4 Remove the two screws securing the transport unit and then remove the transport unit from the printer 5 Return the stopper to its original position 6 Install the two brackets the back section of the top cover and the connector cover removed during installation of the 4 bin mailbox 7 If you are going to use the printer without the 4 bin mailbox reconnect the print...

Page 144: ...e each using the same procedure 5 After loosening the screws lift the printer away from the optional media tray s WARNING Your printer weighs approximately 61 7 lbs 28 kg without consumables Be sure to have help when lifting and moving it ACHTUNG Das Gewicht dieses Druckers beträgt ohne Verbrauchsmaterial ca 28 kg Bitte versuchen Sie niemals den Drucker alleine anzuheben oder zu transportieren 6 R...

Page 145: ...e to your printer we advise you to follow the next instructions very carefully 1 Turn off the printer 2 If the printer has accessories such as a 4 bin mailbox remove them 3 If you are moving to a distant location follow the instructions for repacking the printer on page 140 4 Relocate the printer WARNING Your printer weighs approximately 61 7 lbs 28 kg without consumables Be sure to have help when...

Page 146: ...cking the printer and strapping it verify that the actions described in the following list have been completed 5 If you re returning the printer for service you don t need to return the accessories toner cartridges imaging unit documentation or power and interface cables Checklist 9 Item Should be Additional information RMA number Received and placed prominently on the outside of the carton page 1...

Page 147: ...its original shipping carton with the original packing materials These supplies must be replaced prior to shipping the printer If you need replacement packaging in the United States call MINOLTA QMS Spares at 251 633 4300 x2530 and request catalog number 2600713 100 For locations outside the United States refer to the Service Support Guide or www minolta qms com 5 Do not tilt it more than 1 in any...

Page 148: ...with the printer place them in the shipping carton 5 Don t ship these items if you re returning the printer for service 9 Ensure that the top of the carton is securely taped 10 Secure the shipping carton using proper strapping and buckling Contact your local dealer for strapping and buckling supplies Strapping and Buckling 2 lengths of strapping precut to the appropriate length 2 buckles to secure...

Page 149: ...e buckle 4 Weave the slack of one end through the buckle 5 Pull the slack on that end so that the strapping is taut in the buckle 6 Weave the slack of the other end through the buckle 7 Pull all of the remaining slack of the strapping through this side of the buckle until the buckle is taut against the carton 8 Pull the buckle against the carton as tightly as possible Some slack may still exist ...

Page 150: ...r cable or toner cartridge Attention If you return the printer for service be sure to write the RMA Return Merchandise Authorization number you received from your customer support representative on the outside of the carton before shipping the printer If the RMA number is not prominently visible on the outside of the return inventory we will not accept receipt You can also have a MINOLTA QMS autho...

Page 151: ...A Technical Specifications ...

Page 152: ...d removing media jams 5 Allow enough space around the printer to allow adequate ventilation and easy servicing For best output quality and longest consumables life install the printer on a hard flat level within 1 slant surface Top View Base Printer Clearance not shown 18 457 mm on top of printer 7 9 200 m m 7 9 200 mm 7 9 200 mm 21 7 551 mm 21 2 539 m m ...

Page 153: ...31 5 800 mm 17 423 m m 18 457 m m 17 423 m m 4 bin Mailbox Printer Duplexer 17 423 m m Up to Three Optional Media Trays Clearances Printer and optional media trays Additional clearance for duplexer Printer optional media trays duplexer and 4 bin mailbox 18 457 m m 96 9 2 462 mm 70 1 760 m m ...

Page 154: ...achine Direct sunlight Heating and cooling sources extreme temperature or humidity changes wind and dust Open flames or items that can easily burn Close to an easily accessible grounded power supply on an exclusively dedicated power outlet that meets printer specifications Near your computer At the length 6 5 2 m or less for an IEEE 1284 bidirectional parallel connection A connection to the same e...

Page 155: ... to gas or water pipes or grounding for telephones WARNING Obstructing the ventilation grilles could present a fire hazard ACHTUNG Abdeckung der Ventilator Schlitze kann ein Feuer auslösen Power Requirements WARNING Connect the power plug to an outlet with the same rated voltage as the printer 120 or 240 V and fused for at least 15 amperes 4 amperes for 240 V No other devices should be connected t...

Page 156: ...AC 60 Hz 8 amps 230 VAC 50 60 Hz 4 amps Notes Amperage capacity at least 1 2 times that used by the printer Voltage Fluctuation Rate and Rated Line Voltage Japan 100 VAC 10 North America 120 VAC 10 Europe 220 240 VAC 10 Latin America 120 VAC 10 220 240 VAC 10 Notes 10 of the rated line voltage for proper operation Frequency Variation Rate Within 50 60 3 Hz Fused For at least 15 amperes 8 amperes f...

Page 157: ...is compliant with US Environmental Protection Agency EPA ENERGY STAR regulations After a user configurable period of inactivity the printer changes to a low power state the engine remains on but the fuser turns off When a print job is received the printer returns to normal power ...

Page 158: ...ages per minute ipm images per minute SEF Short Edge Feed LEF Long Edge Feed Duplexing is supported only up to 28 lb 105 g m bond Duplexing envelopes Japanese postcards labels thick stock and transparencies is not supported Engine Minolta NC A611 Standard average duty cycle 150 000 simplex letter A4 sheets maximum per month The duty cycle is affected by the media type and percent coverage Printer ...

Page 159: ...re available from your local vendor or from www q shop com See the Service Support Guide or www minolta qms com for information Warm up time Typical 70 seconds from power on assuming normal temperature and humidity Input sources Upper 200 sheet multipurpose tray 500 sheet upper tray Optional Up to three 500 sheet optional trays may be added Output 500 sheet output tray on top of printer 50 sheet o...

Page 160: ...rom 4 points upward and rotated to any angle in 1 increments all typefaces have multi lingual character sets HP PCL 5e 5c 45 scalable and 9 bitmap fonts PCL XL 45 scalable and 9 bitmap typefaces HP GL 40 resident HP GL symbol sets Type 1 Type 3 Support Support for Type 1 and Type 3 host resident downloadable PostScript fonts TrueType Support for Type 42 PostScript format host resident downloadable...

Page 161: ... SDRAM DIMMs up to a maximum of 512 MB For information about DIMMs recommended for your printer see the PagePro 9100 Answer Base through the Internet at www minolta qms com support or contact Support See the Service Support Guide for more information System software Softloadable stored in Flash ROM Optional internal IDE hard disk Up to 2 2 GB 5 For information about hard disks recommended for your...

Page 162: ... at 50 Hz 2 Hz Phase Single Power consumption Mode Average Maximum Operation Standby Power saver 450 watts 180 watts 850 watts 850 watts 45 watts Certification ENERGY STAR compliant Mode Average Maximum Operation 100 120 V Operation 220 240 V Standby Power saver mode 100 120 V Standby Power saver mode 220 240 V 4 amperes 0 75 amperes 1 7 amperes 0 2 amperes 8 amperes 4 amperes 8 amperes 4 amperes ...

Page 163: ... 27779 Relative humidity Operating 20 80 RH without condensation Transportation Storage 10 90 RH without condensation Temperature range Operating 50 90 5 F 10 32 5 C Transportation Storage 32 95 F 0 35 C Altitude Operating 0 8202 ft 0 2500 m Inclination Operating 1 or less slant at any point around the machine 80 60 40 70 50 30 20 0 10 10 20 30 17 5 27 32 5 Optimal Operating Range Acceptable Opera...

Page 164: ...415 mm W 20 16 in 512 mm H 5 28 in 134 mm D 21 69 in 551 mm W 18 31 in 465 mm H 11 22 in 285 mm D 15 55 in 395 mm Weight without consum ables Unpacked 61 7 lbs 28 kg Packed for shipment 82 7 lbs 37 5 kg 4 50 lbs 2 04 kg 20 25 lbs 9 19 kg each up to three available 18 50 lbs 8 39 kg Weight with consumables duplexer three optional media trays 4 bin mailbox manuals but not media 151 lbs 68 49 kg Medi...

Page 165: ...ray s Approximately 200 000 and each time you have the fuser replaced User replaces after fuser replaced more frequently if the media is not being picked properly and after every 200 000 pages See Paper Separation Roller on page 14 Toner Cartridge and Exhaust Filter Starter Cartridge 6 000 Replacement Cartridge 15 000 continuous printing or 12 000 intermittent printing REPLACE TONER CARTRIDGE disp...

Page 166: ...d to be directly attributable to the use of non MINOLTA QMS consumables and or accessories MINOLTA QMS will not repair the printer free of charge In this case standard time and material charges will be applied to service your printer for that particular failure or damage To order consumables and accessories go to www q shop com or check www minolta qms com or the Service Support Guide for the MINO...

Page 167: ...nternet printers IPP which is case sensitive is built on top of HTTP which in turn runs over TCP IP a After the driver is installed select Start Settings Printers Add Printer b Click Next then select Network Printer then click Next c Select Connect to a printer on the Inter net or on your intranet d Enter the URL for example http iphostname 80 printer_name iphostname 80 printer name in the host ta...

Page 168: ...l fields to populate a No User name is required b Password is admin all lower case without the quotes c URL is the web address of the file you wish to print to the printer for example http newsite test com testfile ps 5 The Use Proxy check box and the DNS PROXY Settings are fields that will best be addressed by your System Administrator according to your network environment d Once the password and...

Page 169: ...t owner For Print document host Host Pages Job completion notification via email Notify Select page order PageOrder Save job for reprinting proof and print Reprint Print routing information Routing Print document title Title Print version and revision Version Print header page IncludeFeature header Print trailer page IncludeFeature trailer HP GL Emulation Commands Select enhanced resolution Includ...

Page 170: ...y character map type IncludeFeature map Number lines IncludeFeature number Set tabs IncludeFeature tabs Set linefeed to CR LF IncludeFeature lfiscrlf Set carriage return to CR LF IncludeFeature criscrlf Set formfeed to CR FF IncludeFeature ffiscrff Wrap lines IncludeFeature autowrap Set number of lines per page IncludeFeature linesperpage Set margins IncludeFeature lpmargins Set orientation Includ...

Page 171: ...ure pagesize Select number of copies IncludeFeature numcopies Select paper IncludeFeature input Select paper IncludeFeature output Select orientation IncludeFeature orientation Select emulation IncludeFeature emulation Logical margins IncludeFeature margins New page layout IncludeFeature newlayout Select color or monochrome IncludeFeature colormodel Media type such as thick stock IncludeFeature me...

Page 172: ...ent Option Commands 166 Annotation IncludeFeature annotation Reverse image control IncludeFeature reverse Control disk scratchfile size IncludeFeature scratchfile Set annotation tag number IncludeFeature tag ...

Page 173: ...These charts show only the top level menus See the CrownBooks in PDF on the Documentation CD ROM for detailed information on menu options Security Menu Operator Control Configuration Administration Security Set Password Enable Password Admin Menu Security Passwrd Operator Menu Set Password Enable Password Note For more menu detai and printer configuration information refer to the CrownBooks in PDF...

Page 174: ...nal media tray s installed Only with an optional hard disk installed Multipurpose Sz Accounting Mode Disk Space ResetAccounting File Segment MPT Media Plain Paper Transparency Thick Stock Bold Default Letter Legal A4 A3 B4 Folio Ledger Executive B5 JIS A5 Statement B5 ISO C5 DL Com10 C6 Custom Government Letter Monarch Postcard 32 Kai 16 Kai 8 Kai Outputbin Upper Mailbin 1 Mailbin 2 Mailbin 3 Mail...

Page 175: ...me Inputbin 7 Name Outputbin 1 Name Outputbin 2 Name Outputbin 3 Name Outputbin 4 Name Outputbin 5 Name Def Resolution Operator Control Miscellaneous Disk Operations Save Defaults Restore Defaults Reboot System New System Image Format Disk Backup Hard Disk Capture PrintJob Keypad Language Clock Operations Restore Disk Consumables Start Period Service Page Recovery Energy Saver Toner Low Action Edg...

Page 176: ... PS Protocol Spooling HW Config Factory Soft On Idle Address Yes Yes Yes Address Page Reset Reset Ring Speed Source Routing Auto Single All Off Ethernet Speed Auto 10 Half Duplex 100 Half Duplex 4 Mbps 16 Mbps No No No 10 Full Duplex 100 Full Duplex On Input Idle On Optional Token Ring only Note For more menu details and printer configuration information refer to the CrownBooks in PDF on the Docum...

Page 177: ...nabled LaserWriter MINOLTA QMS Conventional Spooling Zone Part 1 Zone Part 2 HP Zoner Res Both Default Administration Communications Optional NIC CrownNet Disabled Common Optional Note For more menu details and printer configuration information refer to the CrownBooks in PDF on the Documentation CD ROM RC Res ...

Page 178: ... TCP IP Protocol Printer Name Default Enabled Yes No Administration Communications Optional NIC CrownNet Name Disabled Common Optional Note For more menu details and printer configuration information refer to the CrownBooks in PDF on the Documentation CD ROM ...

Page 179: ...s 802 3 IPX Addr ETHER2 IPX Addr 802 2 IPX Addr Default PServer Name 1 PServer Name 2 PServer Name 3 Job Check Delay Conf Check Delay Burst Mode PServer Name 3 Default Default SNAP IPX Addr Administration Communications Optional NIC CrownNet 802 3 IPX Addr Configure NDS Common Protocol Enabled Optional Token Ring only Note For more menu details and printer configuration information refer to the Cr...

Page 180: ...bled Disabled Enabled Pri WINS Sec WINS NBT Protocol Addr Addr Scope ID Optional Pri and Sec WINS Addr are IP addresses of the Primary and Secondary WINS servers default 0 0 0 0 Default for DHCP and WINS is disabled NBT Scope ID is any valid DNS domain name consisting of 2 dot separated parts or a default blank An empty string blank value is ignored SNMP NMS 1 5 Read Write Trap Read Trap None Writ...

Page 181: ...in the User s Guide Check www minolta qms com for current approved media To order approved transparency media go to www q shop com Electrostatic Discharge Failure to protect the printer controller board and any associated daughterboard or module from electrostatic discharge or damage while performing any task involving the controller board Instructions Failure to follow instructions in the printer...

Page 182: ...without calling for a Return Merchandise Authorization RMA number Refer to the Service Support Guide for the Support telephone number where you can obtain an RMA number If the RMA number is not prominently visible on the outside carton of items returned MINOLTA QMS will not accept receipt ...

Page 183: ...n relates is in conformity with the following EN 60950 2000 CB scheme in accordance with IEC 60950 1991 A1 A2 A3 A4 CB Certificate number JPTUV 003718 IEC 60825 1 1993 A1 EN 55022 1994 1995 A1 1997 A2 Class A ITE EN 61000 3 2 1995 1998 A1 A2 IEC 61000 4 2 1995 IEC 61000 4 3 1995 IEC 61000 4 4 1995 IEC 61000 4 5 1995 IEC 61000 4 6 1995 IEC 61000 4 8 1993 IEC 61000 4 11 1994 title and or and number ...

Page 184: ...claration relates is in conformity with the following standard s or other normative document s UL 60950 Third Edition CAN CSA C22 2 No 60950 00 FCC Class A Digital Device Title 47 CFR Ch I Part 15 Industry Canada ICES 003 Issue 3 Class A Digital Device EPA ENERGY STAR Office Equipment Program CDRH Laser Safety Title 21 CFR Ch I Subchapter J MSDS Title 29 CFR Ch XVII Part 910 1200 title and or and ...

Page 185: ...rmity with the following standard s or other normative document s EN 60950 2000 CB scheme in accordance with IEC 60950 1991 A1 A2 A3 A4 CB Certificate number JPTUV 003718 IEC 60825 1 1993 A1 EN 55022 1994 1995 A1 1997 A2 Class A ITE EN 61000 3 2 1995 1998 A1 A2 IEC 61000 4 2 1995 IEC 61000 4 3 1995 IEC 61000 4 4 1995 IEC 61000 4 5 1995 IEC 61000 4 6 1995 IEC 61000 4 8 1993 IEC 61000 4 11 1994 titl...

Page 186: ......

Page 187: ...ine Memory Modules DIMMs 98 Emulations 98 Fonts 98 Hard disk 123 ImageServer 98 Interfaces 98 Internal IDE hard disk drive 98 Kanji font internal IDE hard disk 98 LocalTalk 98 Other software 98 PlanetPress 98 QFORM 98 SCSI 98 Time of Day clock 99 Additional memory 106 Administration menu 169 Advanced printing features Memory 107 Antistatic protection 100 Authorized Service Provider deinstall and r...

Page 188: ...e Document Options Commands Document Option Commands Header trailer page 163 HP PCL 5e emulation commands 163 HP GL emulation commands 163 Job and subjob boundary commands 165 Lineprinter emulation commands 164 Downloading Emulation 113 Via CrownNet 113 Via Ethernet interface 113 Via parallel interface 113 Dual In Line Memory Modules See DIMMs 106 108 Duplex Printing 45 Manual duplexing 45 Duplexi...

Page 189: ... recovery automatic 60 Jams 77 Locating 62 Media path 60 Messages 62 Preventing 59 Removing 62 67 73 Status messages 62 Jaz drive 121 Job and subjob boundary DOC 165 K Kanji Option kit 118 Software requirements 117 Keypad locked message 75 Keys Security 105 Kit BuzzBox 105 IDE hard disk 123 Kanji font internal IDE hard disk 117 PlanetPress 116 QFORM 116 SCSI 121 L Labels Continuous printing 27 LAN...

Page 190: ...8 Trays 118 Optional SCSI devices Hard disk Jaz drive Zip drive 121 output 32 Output tray 32 P Page margins 32 PageScope 113 Paper Jams 77 Path media 60 PDF file printing 58 Physical specifications 158 PlanetPress 116 Please wait message 89 Plus 98 PostScript files 113 115 Power requirements 149 ENERGY Star compliance 151 Power saving mode 81 Power switch 81 Preventing paper jams 59 Print area Edg...

Page 191: ... 153 Interfaces 154 Lineprinter 154 Memory 155 Network interface 155 Optional emulations 154 Optional interfaces 155 Options 155 Output 153 Parallel 154 Physical 158 Print method 153 Print speed 152 Resolution 153 SCSI interface 155 System software 155 Temperature 157 Toner 153 Toner cartridges 4 159 Warm up time 153 Spool memory 58 Static electricity discharge 100 Status message Acc disabled 87 A...

Page 192: ...roubleshooting 56 Duplexing 80 Error codes 94 Media jams 77 Nothing is printed 75 Printer resets 79 Printer takes too much time 80 Status service and error messages 87 U UNIX 114 V Ventilation grilles 149 W Warming up message 93 Warm up time 153 Warranty 175 Wrist strap for antistatic protection 100 Z Zip drive 121 ...

Reviews: