


32
MaxPac Dual/Triple-Screen 8230 XRA2/3-Series User Operation and Maintenance Guide
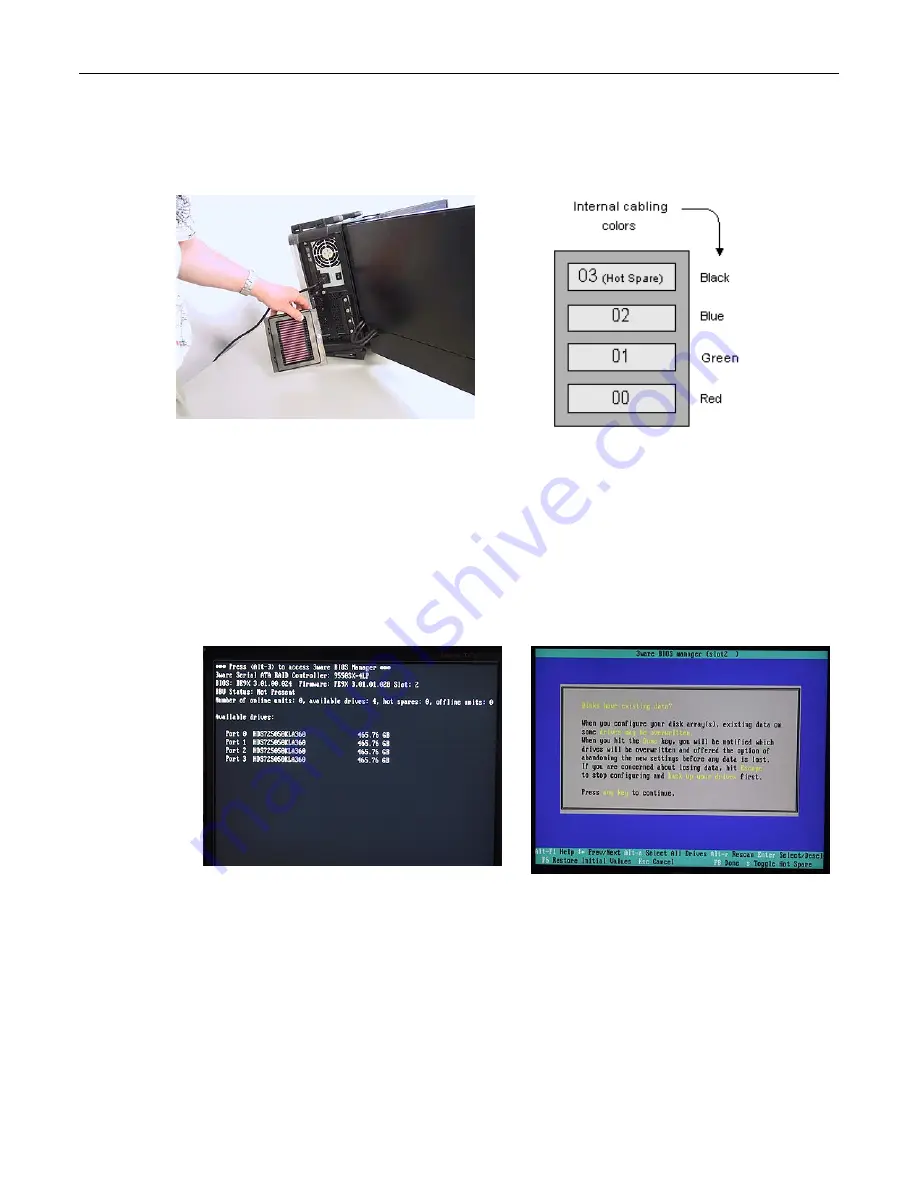
and 02, leaving disk 03 as the hot-spare (note that this is the initial/default configuration; once the hot-
spare disk has been deployed as discussed below, the failed-and-replaced disk will assume the role
of the new hot-spare).
Figure 2-44
Establishing the Array and Reloading the System Image
These discussions assume that you are reestablishing a system from the ground up, and that you
have four new disks in your disk caddy.
1) Start to power-up the system. When you see the BIOS message
"<Alt-3> to access 3ware BIOS
Manager"
(Figure 2-45) press and hold the <ALT> (alternate) key and – while still holding this key
– press the number "3" key. This will invoke the 3ware BIOS manager; in most cases, you will be
presented with a warning screen as shown in Figure 2-46.
Figure 2-45
Figure 2-46
2) Press any key to continue, which will take you fully into the
3ware BIOS Manager
. Observe that
the four disks are shown on the screen, but no drives are initially selected (Figure 2-47).
Summary of Contents for 8230 XRA2 series
Page 6: ......


