


MaxPac Dual/Triple-Screen 8230 XRA2/3-Series User Operation and Maintenance Guide
17
Configuring the RAID Array (with Separate System Drive)
Note that these discussions reflect system configurations with a separate system drive as illustrated
in Figures 2-7 and 2-8). Configurations that have the system partition established on the RAID array
itself (leaving a hot-spare drive) are discussed later in this chapter.
When you take possession of your MaxPac 8230 XRA2/3, the RAID system will already have been
established, initialized, and verified. The instructions in this section are intended to address those rare
situations where you need to replace a degraded/failed drive or you wish to rebuild the RAID system
from the ground up.
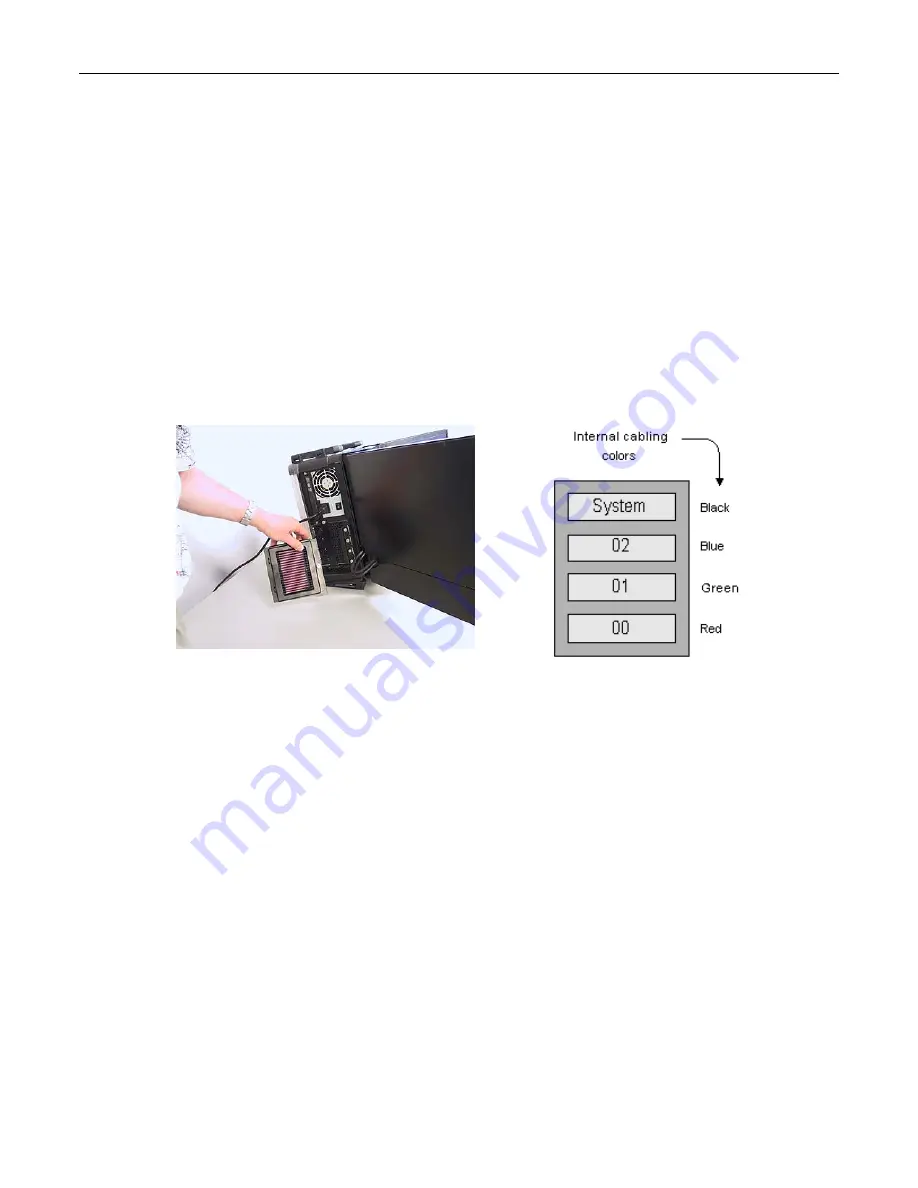
Your MaxPac system can contain up to four SATA hot-swappable hard disk drives presented in a
4-drive disk caddy. This caddy is located on the lower left-hand side of the main chassis under the
"Baghdad Filter" assembly as shown in Figure 2-7 (the numbering of the disks is as shown in
Figure 2-8). In the case of a typical RAID 5 system, the upper disk is the system disk, while the
lower three disks are used to implement the RAID data array.
Figure 2-7
Figure 2-8
Installing the Web-Based 3ware Software
If you reload your operating system, then you will also need to reload the appropriate RAID driver
followed by 3ware's
3DM 2
web-based RAID management application as follows:
1) Power-up the system. The operating system will see the RAID controller as a new device and will
therefore prompt you to load the appropriate driver from the 3ware CD, which is provided with
your system.
2) Insert the 3ware CD. The auto-play function will bring up the
3ware Escalade Menu
as shown in
Figure 2-9. Initially you should ignore this menu; don’t dismiss it, but instead use the operating
system's
Device Manager
utility to look for the 3ware driver on the CD and install it.
3) Once the 3ware driver has been loaded, return to the
3ware Escalade Menu
and click the
Install
3DM 2
button.
4) Approve the license agreement in the ensuing pop-up dialog.
5) Following acceptance of the license agreement, you may be presented with the operating
system's standard
Welcome to New Connection Wizard
dialog. In this case, use this dialog to
setup your network connection.
6) Following this wizard, 3ware's 3DM 2 software will be installed (when prompted to do so, allow
the installation script to place a 3DM 2 icon on your desktop).
Summary of Contents for 8230 XRA2 series
Page 6: ......


