Luma Recorders
|
Additional Installation
Jump to Additional Installation
Prepare the Recorder
In the local interface, click on the Settings icon
, then choose
Shutdown > Shutdown. The unit powers down.
Turn the power switch (located on the back of the unit) to the off
position. Unplug the power cord from the rear of the unit.
If necessary, disconnect all cabling and remove the recorder from the
rack.
Warning!
Moving the recorder while it is powered can damage the
hard drive.
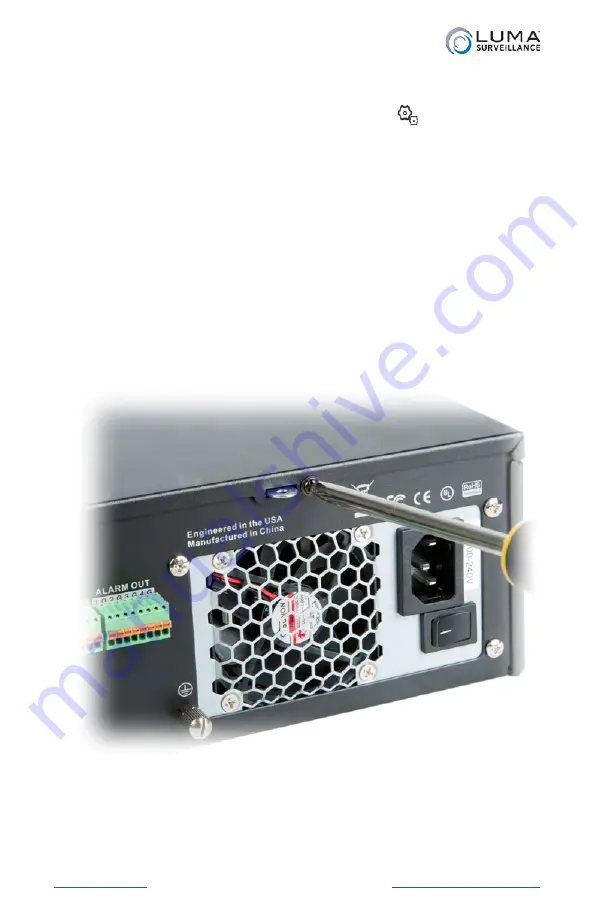
Remove the Cover
Remove the two small black screws located along the top of the rear
panel of the recorder. (Do not remove the larger silver screws around
the fan.)
Summary of Contents for LUM-500-DVR-16CH
Page 3: ...LUM 500 501 Series Surveillance Recorders Additional Installation...
Page 23: ...LUM 500 501 Series Surveillance Recorders FAQ...
Page 59: ...LUM 500 501 Series Surveillance Recorders Live View Screen...
Page 76: ...LUM 500 501 Series Surveillance Recorders Remote Control...
Page 88: ...LUM 500 501 Series Surveillance Recorders Web Interface...
Page 149: ...LUM 500 501 Series Surveillance Recorders Local Interface...
Page 204: ...LUM 500 501 Series Surveillance Recorders Installing Network Cameras on an NVR...
Page 210: ...LUM 500 501 Series Surveillance Recorders Installing with the Local UI Wizard...


