86
4.
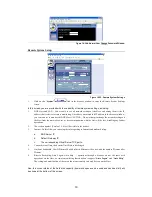
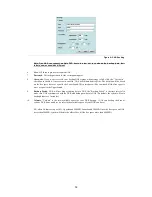
NTP Server
: Fill in the ‘’NTP Server’’ and click the ‘’Add’’ button to put the NTP server into the list.
DVR can have their own time server added for keeping DVR synchronized. (Several NTP servers have
been added by default)
5.
Active
: Active the selected NTP server.
6.
De-active
: Not to active the selected NTP server.
7.
Delete
: Delete the selected NTP server in the list.
8.
Sync Period
: Click the “Hourly’’, “Daily”, “Weekly”, or “Monthly”, you can have DVR be timed every
hour, day, week or month.
(Note: DVR will only connect with the top one acted NTP server within the list, but if the connection
failed, DVR will connect the second one and so on.)
9.
Time Adjust
: manually correct the clock on NAS.
10.
Log
: keep track on the status of every time correction

