34
ALARM SETTINGS
The Alarm Settings area allows the administrator of the DVR to set alarms for a number of alarm types.
The most important is setting alarms for motion detection and digital input on different cameras. This is a
complex task, so in order to understand this area please read over this part carefully. There are also
alarms for disk failure, disk capacity limitation, and no camera signals. Take a look at the detailed
descriptions below to understand alarm settings.
Motion Detection on each camera can be configured under the first setting screen (Cam). However,
users may not be aware when motion detection is triggered. Under “
Alarms
”, periods of time can be set
up so as to trigger an alarm when motion is sensed. There are four areas of configuration:
Camera
,
Pre-alarm recording
,
Enable-Trigger Period
, and
Alarm Triggering Device
.
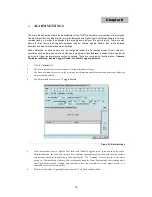
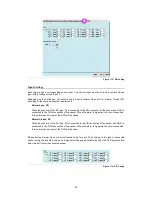
1.
Click the “
Alarm
” Tab.
2.
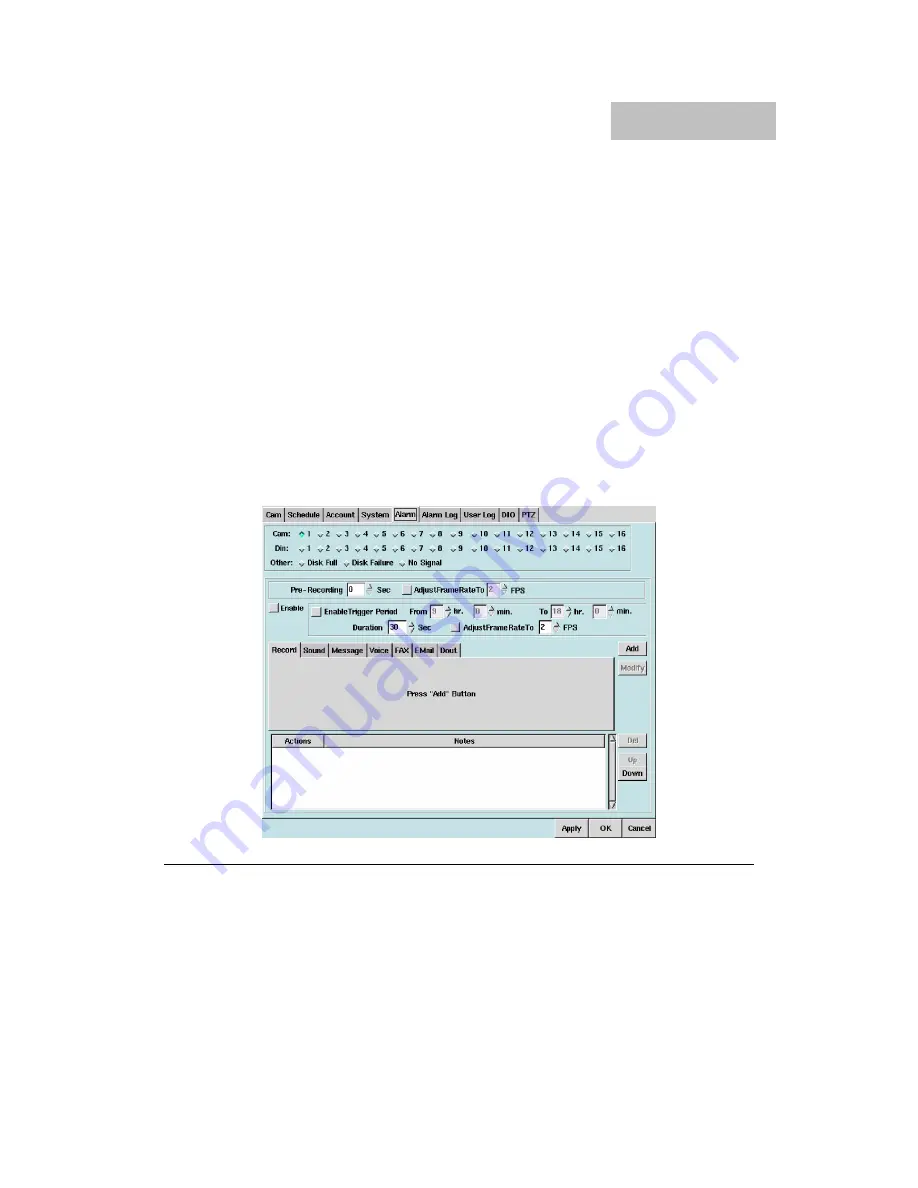
The first column for user to select cameras, DI and other alarm settings.
3.
The second column for user to set the pre-alarm recording time and alarm recording frame rate. (Function
only for camera and DI).
4.
The third column for user to set “
Trigger Period
”.
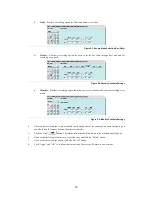
Figure 8-1: Alarm Settings
5.
Click the checkbox next to “Enable” first, then click “Enable Trigger Period” again and enter the period.
With this function, the users don’t need to be in an alarm environment all day long, and they can set their
own desired alarm period according to their actual needs. The “Duration” is for setting the active alarm
period (ex: The same kind of alarm will be overleaped during the Alarm Duration) and the recording frame
rate when alarm-received. (Which only functions when you selected the record trigger mode) It is
adjustable for each is camera and DI.
6.
Then select one of the Triggering Devices from the “Tab” field windows below.
Chapter 8

