11
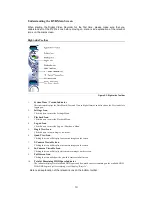
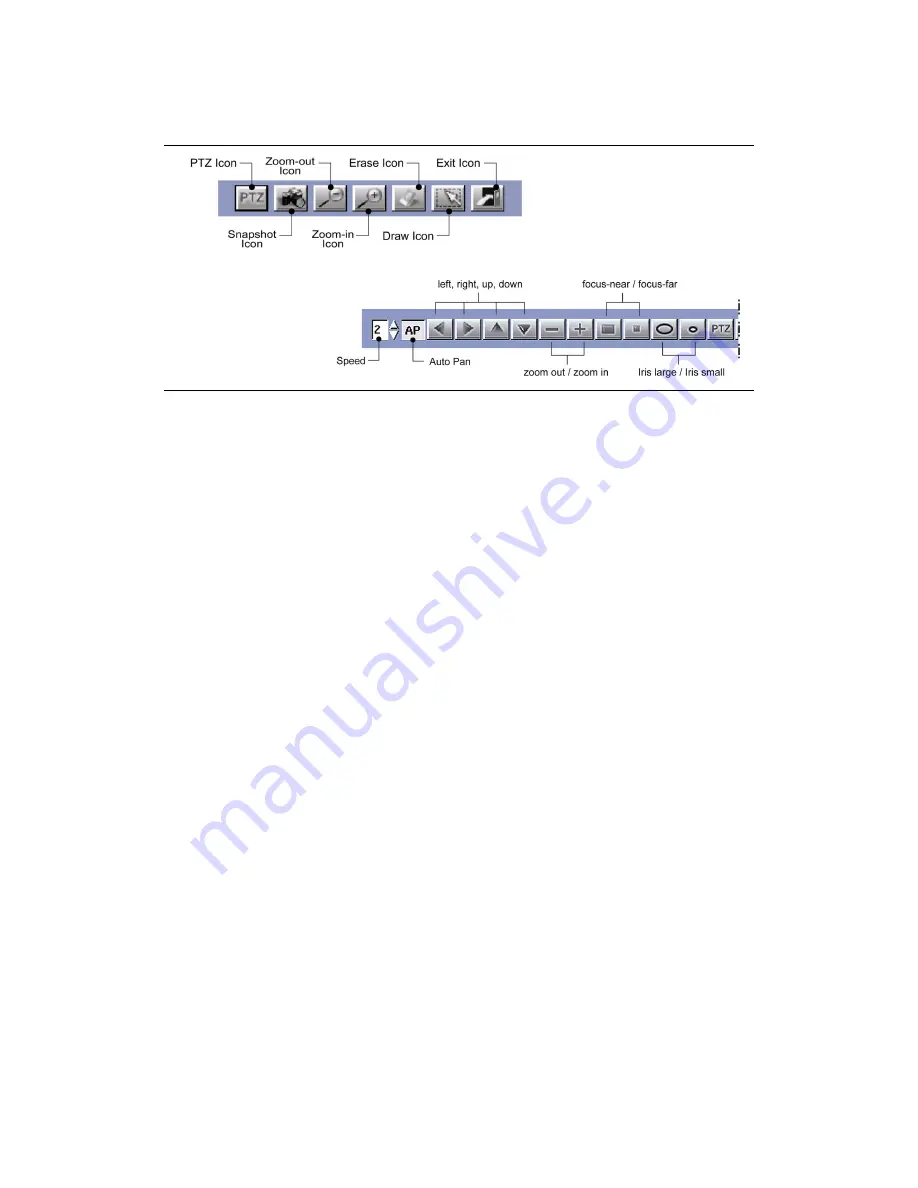
Bottom Toolbar
Figure 2-4: Bottom Toolbar
1.
Exit Icon
Click this icon to exit the Main Screen.
2.
Detection Frame Drawing Icon
Clicking this icon will allow users to draw a specified motion detection frame in the viewing camera area.
At most, 6 detection regions may be drawn. If any object is found moving in the detection regions, red
frames will appear to flash. If you don’t wish the detection frames to appear, click this icon to hide all the
frames.
3.
Detection Frame Erasing Icon
Choose and click the specified motion detection frame to remove the detection regions that have been
drawn.
4.
Zoom-in Icon
Clicking this icon will zoom in the selected camera images or, just double-click the respective camera
image on the main screen.
5.
Zoom-out Icon
Clicking this icon will zoom out the selected camera images. Or you can just click the right key of the
mouse to zoom the images out.
6.
Snapshot Icon
Clicking this icon will save a single picture of the camera image into the database or for printing.
7.
PTZ Icon
Clicking this icon will allow users to view more icons that will help in controlling the PTZ camera more
effectively.
Power the DVR on and off
Only “admin” can be login to the DVR while the DVR is operated at first time. Because there are no
other users admitted by the system.
First time operating the system, it will auto-login to the DVR main screen. Enable/ Disable the “auto-
login”, please read Chapter 7: System Settings. Adding DVR users, please read Chapter 6: Account
Settings. Meanwhile, please shutdown the DVR as following:


