Simple-swap drive backplate assembly replacement
Use this information to remove and install the simple-swap drive backplate assembly.
Remove the simple-swap drive backplate assembly
Use this information to remove the simple-swap drive backplate assembly.
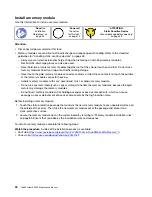
Ground package before opening”
Before removing the simple-swap drive backplate assembly:
1. Remove the top cover. See “Remove the top cover” on page 57.
2. Record the cable connections and disconnect cables of the simple-swap drive backplate assembly.
3. Remove all the installed drives and drive fillers (if any) from the drive bays. See “Remove a simple-swap
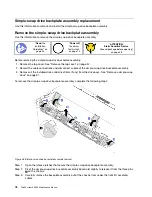
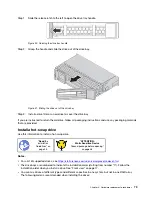
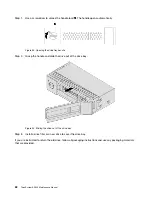
To remove the simple-swap drive backplate assembly, complete the following steps:
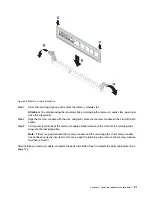
Figure 48. Simple-swap drive backplate assembly removal
Step 1. Open the release latches that secure the simple-swap drive backplate assembly.
Step 2. Pivot the simple-swap drive backplate assembly backward slightly to release it from the three pins
1
on the chassis.
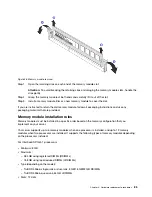
Step 3. Carefully remove the backplate assembly out of the chassis from under the front I/O assembly
cables.
76
ThinkSystem SR530 Maintenance Manual
Summary of Contents for ThinkSystem SR530
Page 1: ...ThinkSystem SR530 Maintenance Manual Machine Types 7X07 and 7X08 ...
Page 8: ...vi ThinkSystem SR530 Maintenance Manual ...
Page 24: ...16 ThinkSystem SR530 Maintenance Manual ...
Page 52: ...44 ThinkSystem SR530 Maintenance Manual ...
Page 72: ...64 ThinkSystem SR530 Maintenance Manual ...
Page 74: ...66 ThinkSystem SR530 Maintenance Manual ...
Page 170: ...162 ThinkSystem SR530 Maintenance Manual ...
Page 174: ...166 ThinkSystem SR530 Maintenance Manual ...
Page 178: ...170 ThinkSystem SR530 Maintenance Manual ...
Page 183: ......
Page 184: ......


