


14. STATUS DISPLAY (STATUS)
166
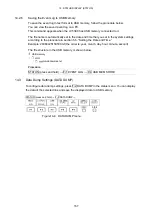
14.2.2
Scrolling through the Event Log
To scroll through the event log and view parts of the list that are outside of the display,
follow the procedure below. The event log entries are listed in order with the most recent
events listed first. To view earlier events, turn F•D 1 to the right. To view later events, turn it
to the left. If you press F•D 1, the most recent events appear.
Procedure
STATUS (press and hold)
→
F•1 EVENT LOG
→
F•D 1 SCROLL
14.2.3
Starting Event Logging
To start event logging, follow the procedure below.
Procedure
STATUS (press and hold)
→
F•1 EVENT LOG
→
F•1 LOG
Settings
START:
Event logging starts.
“NOW LOGGING” appears in the event log and the status display.
STOP:
Event logging stops.
“LOGGING STOPPED” appears in the event log and the status display.
This is the default setting.
14.2.4
Deleting the Event Log
To delete the event log that is displayed on the screen, follow the procedure below. The log
is also deleted when you turn the power off.
Procedure
STATUS (press and hold)
→
F•1 EVENT LOG
→
F•2 CLEAR
14.2.5
Setting the Event Log Overwrite Mode
To set the event log overwrite mode, follow the procedure below. The event log can record
up to 1000 events. When the same error occurs successively, it is treated as a single event
in the event log.
Procedure
STATUS (press and hold)
→
F•1 EVENT LOG
→
F•3 LOG MODE
Settings
OVER WR: Events after the 1000
th
event are written over the oldest logged events. This
is the default setting.
STOP:
Events after the 1000
th
event are not logged.