5-15
Operation on the Machine > Registering Shortcuts (Copy, Send, and Document Box Settings)
Registering Shortcuts
(Copy, Send, and Document Box Settings)
You can register shortcuts in the Quick Setup screen for easy access to the frequently used functions. The settings for the
selected function can also be registered. A function name linked to a registered shortcut can be changed as necessary.
You can register up to 6 shortcuts for copying functions, sending functions, and functions set for document box.
Adding Shortcuts
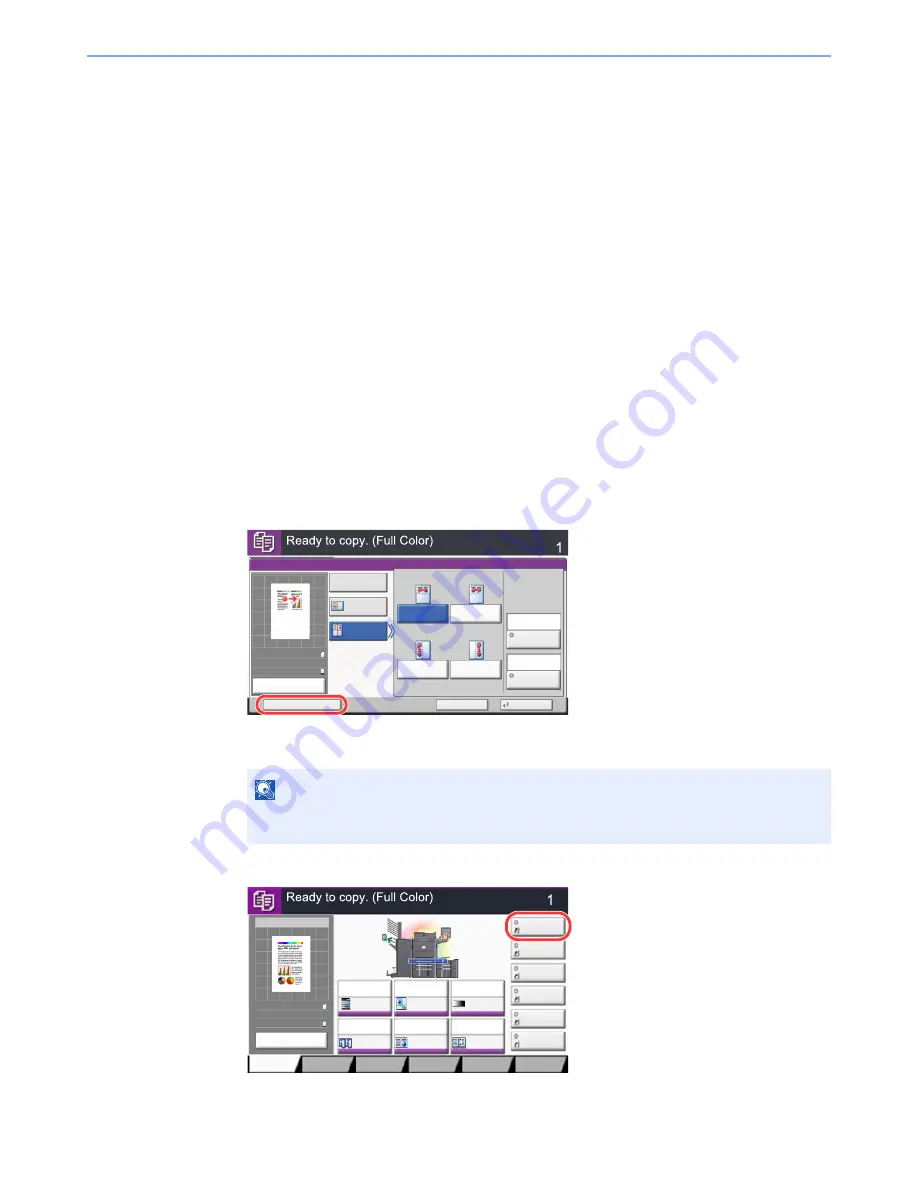
Shortcut registration is performed in the setup screen of each function. Shortcuts can be registered for all functions in
which [Add Shortcut] appears on the screen.
Use the procedure below to register a shortcut.
1
In each function, display the configuration screen you want to
register.
2
Register the shortcuts.
1
Select the setting you want to add.
2
Press [Add Shortcut].
3
Press the keys corresponding to the shortcut number (01 to 06) to register.
4
Enter the shortcut name and press [Save].
The shortcut is registered.
NOTE
If you select a shortcut number already registered, the currently registered shortcut can be
replaced with a new one.
Copies
Cancel
OK
Memo Page
Add Shortcut
Off
Layout B
Original
Orientation
Layout A
Border Line
Top
R to L
Top
R to B
Top
L to B
Top
L to R
Layout
None
Top Edge
on Top
50%
A4
A4
Preview
Original
Zoom
Paper
:
:
:
Copy Image
Preview
Copies
Color/
Image Quality
Org./Paper/
Finishing
Quick Setup
Layout/Edit
Advanced
Setup
Memo Page
Shortcut 4
Shortcut 3
Shortcut 2
Shortcut 6
Shortcut 5
Original
Zoom
Paper
100%
---
:
:
:
---
Place original.
Program
100%
A4
A4
Preview
Original
Zoom
Paper
:
:
:
Normal 0
Auto
100%
Off
1-sided
>>1-sided
Off
Paper
Selection
Staple
/Punch
Density
Zoom
Duplex
Combine
Preview
Summary of Contents for TASKalfa 6551ci
Page 1: ...OPERATION GUIDE 6551ci 7551ci ...
Page 17: ...xvi About the Operation Guide this Guide ...
Page 44: ...xliii Menu Map ...
Page 62: ...1 18 Legal and Safety Information Notice ...
Page 112: ...2 50 Installing and Setting up the Machine Transferring data from our other products ...
Page 184: ...4 18 Printing from PC Printing Data Saved on the Printer ...
Page 461: ...10 7 Troubleshooting Regular Maintenance 3 4 5 6 CLICK ...
Page 500: ...10 46 Troubleshooting Troubleshooting Cassettes 3 and 4 1 2 3 4 2 1 B1 B2 ...
Page 501: ...10 47 Troubleshooting Troubleshooting Multi Purpose Tray 1 2 3 4 ...
Page 503: ...10 49 Troubleshooting Troubleshooting Duplex unit 1 2 ...
Page 504: ...10 50 Troubleshooting Troubleshooting Duplex Unit and Cassette 1 1 2 3 CLICK ...
Page 506: ...10 52 Troubleshooting Troubleshooting Fixing unit 1 2 A1 ...
Page 508: ...10 54 Troubleshooting Troubleshooting Right tray 1 2 3 A1 ...
Page 509: ...10 55 Troubleshooting Troubleshooting Bridge Unit 1 2 ...
Page 512: ...10 58 Troubleshooting Troubleshooting Tray B 1 2 3 Tray C 1 D2 D3 ...
Page 513: ...10 59 Troubleshooting Troubleshooting Conveyor 1 2 Mailbox Option 1 D2 D3 1 2 ...
Page 516: ...10 62 Troubleshooting Troubleshooting 5 Cassette 5 Option Side Feeder 3 000 sheet 1 2 2 1 ...
Page 522: ...10 68 Troubleshooting Troubleshooting Staple cartridge holder B C 1 2 3 4 2 1 CLICK ...
Page 556: ...11 34 Appendix Glossary ...
Page 566: ...Index 10 ...
Page 567: ......
Page 570: ...Rev 3 2014 1 2N2KDEN103 ...


