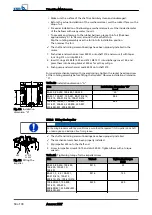
4. Fit the pump casing including O-ring 412.15 using hexagon head bolts 901.14.
Use a torque wrench to tighten the bolts to a tightening torque of 60 Nm.
5. Insert O-ring 412.16 in suction cover 162.
6. Fasten ring 500.02 with socket head cap screw 914.07 in the suction cover.
7. Insert the suction cover into the pump casing, making sure the suction cover
touches the impeller vanes.
(Make sure that socket head cap screws 914.15 do not protrude from the
threaded holes in the suction cover.)
8. Screw in hexagon head bolt 901.15 to hold the suction cover in place. Do not
tighten the bolt yet.
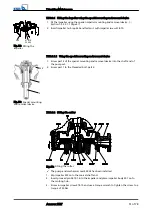
9. Measure the distance between the pump casing and the suction cover.
Distance S should measure approximately 0.2 ± 0.1 mm.
10. If required, adjust the position of the suction cover in relation to the pump
casing using socket head cap screw 914.15.
11. Tighten hexagon head bolt 901.15 to a torque of 30 Nm.
12. Rotate the impeller body to check that the impeller turns smoothly.
Make sure that the suction cover and impeller do not touch each other.
7.5.2.3 Installing the back pull-out unit
7.5.2.3.1 Design with axial clearance
NOTE
After casing wear rings with a radial clearance have been fitted in pump casing 101, they
have the required inner diameter and do not need to be readjusted.
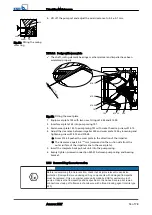
1. Use a rubber mallet to push casing wear ring 502 into pump casing 101 as far as
it will go.
2. Insert the complete back pull-out unit in the pump casing.
3. Evenly tighten screwed connection 920.01 between pump casing and bearing
bracket.
CAUTION
Axial displacement of the rotor
Damage to shaft seal and bearings!
▷
Always adjust and check the axial clearance with the pump set in vertical
position.
4. Use a rubber mallet to push casing wear ring 502 in until it is close to impeller
230.
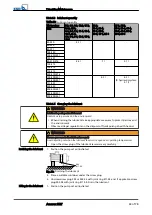
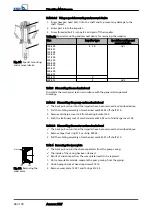
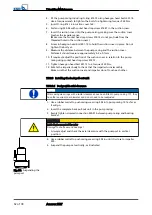
5. Suspend the pump set vertically, as illustrated.
Fig. 31: Suspending the
pump set
7 Servicing/Maintenance
52 of 78
Amarex KRT
Summary of Contents for Amarex KRT
Page 77: ......

