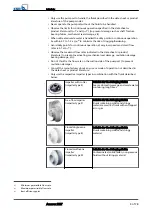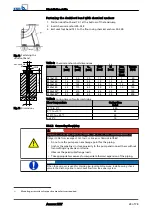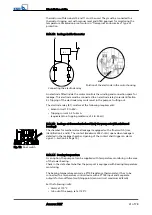
Fastening the duckfoot bend with chemical anchors
1. Position duckfoot bend 72-1 at the bottom of the tank/sump.
2. Insert chemical anchors 90-3.38.
3. Bolt duckfoot bend 72-1 to the floor using chemical anchors 90-3.38.
Table 8: Chemical anchors bolt dimensions
Bolt size
d
o
[mm]
t=h
req
[mm]
t
fix
[mm]
WAF
[mm]
M
[mm]
Hex.
head
WAF
[mm]
Torque
[Nm]
M 10x130
12
90
20
17
10
7
20
M 12x160
14
110
25
19
12
8
40
M 16x190
18
125
35
24
16
12
60
M 20x260
25
170
65
30
20
12
120
M 24x300
5)
28
210
65
36
24
-
150
M 30x380
5)
35
280
65
46
30
-
300
Table 9: Curing times of mortar cartridge
Floor temperature
Curing time
[min]
-5
℃
to 0
℃
240
0
℃
to +10
℃
45
+10
℃
to +20
℃
20
> +20 °C
10
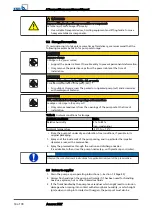
5.3.1.2 Connecting the piping
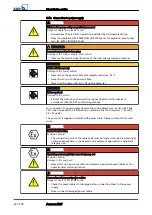
DANGER
Impermissible loads acting on the flange of the duckfoot bend have been exceeded
Danger to life from leakage of hot, toxic, corrosive or flammable fluids!
▷
Do not use the pump as an anchorage point for the piping.
▷
Anchor the pipelines in close proximity to the pump and connect them without
transmitting any stresses or strains.
▷
Observe the permissible flange loads.
▷
Take appropriate measures to compensate thermal expansion of the piping.
NOTE
When the pump set is used for draining low-level building areas, install a swing check
valve in the discharge line to avoid backflow from the sewer system.
Fig. 6: Fastening the
duckfoot bend
t
=
h
req
t
fix
WAF
M
Hex. Head WAF
do
l
Fig. 7: Dimensions
5)
Mounting accessories of respective manufacturer required.
5 Installation at Site
Amarex KRT
23 of 78
Summary of Contents for Amarex KRT
Page 77: ......

