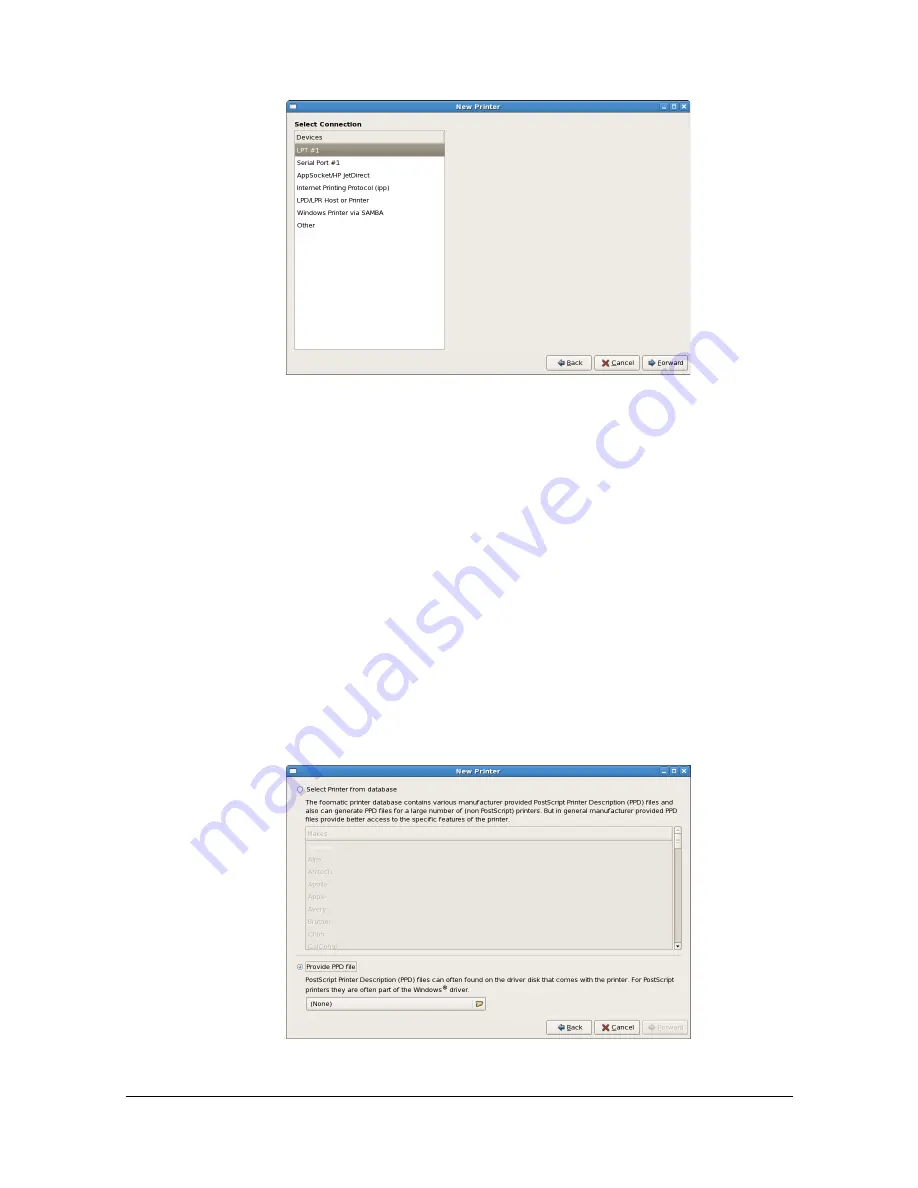
Adding the Printer Using Printer configuration
2-5
The printers that can be used are automatically searched for and listed in
the left pane of the dialog box.
6
From the left pane of the dialog box, select the port for the printer to be
installed.
- For a USB connection, select
KONICA MINOLTA magicolor 4750 USB
#1
.
- For a printer connected to the network, select
KONICA MINOLTA magi-
color 4750
<IP address>.
- If the desired printer is not listed, select a device port from the
Devices
list. In the right pane of the dialog box, type in the host name or IP
address for the printer.
"
- TCP/IP:
AppSocket/HP jetDirect, Internet Printing Protocol (ipp)
or
LPD/LPR Host or Printer
- Host name of Internet Printing Protocol (ipp): <IP address>/ipp
7
Click
Forward
.
8
Select
Provide PPD file
.
Summary of Contents for Magicolor 4750DN
Page 1: ...magicolor 4750EN 4750DN Reference Guide A0VD 9562 12A ...
Page 26: ...Operation on Mac OS X ...
Page 29: ...Installing the Printer Driver 1 4 3 Click Continue 4 Click Continue ...
Page 132: ...Specifying the Color Profile 1 107 7 Click OK 8 Select Simulation ...
Page 133: ...Specifying the Color Profile 1 108 9 Select the added color profile before printing ...
Page 136: ...Operation on Linux ...
Page 153: ...Printing a Document 2 18 4 Select the name of the printer 5 Click Print to print the document ...
Page 156: ...Operation on NetWare ...
Page 165: ...Printing With NetWare 3 10 ...
Page 166: ...Printer Utilities ...
Page 168: ...Understanding the Ethernet Configuration Menus ...
Page 180: ...Network Printing ...
Page 198: ...Network Printing 6 19 7 Click OK 8 Click OK ...
Page 203: ...Network Printing 6 24 11 Click Next 12 Click Finish ...
Page 214: ...Network Printing 6 35 19 Click Finish This completes the installation of the printer driver ...
Page 220: ...Using PageScope Web Connection ...
Page 401: ...Configuring the Printer 7 182 ...
Page 402: ...Appendix ...
Page 408: ...Appendix A 7 X XPS settings PageScope Web Connection 7 38 7 103 ...
Page 409: ...Appendix A 8 ...


