background image

54

Manual Structure

This manual is divided into sections as shown below according to the contents.

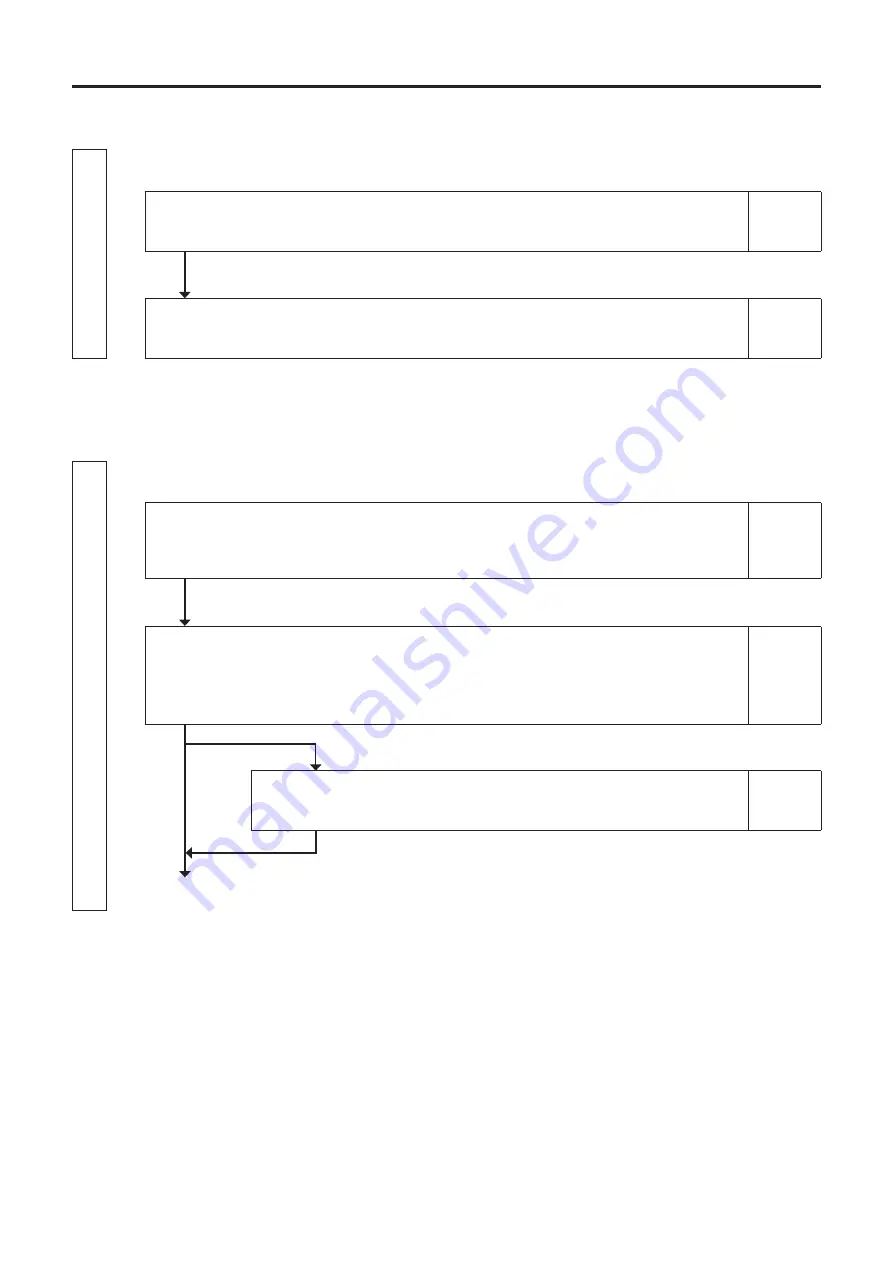
Connection pages 58–64

This section explains how to connect a probe, AC power, turn the power ON ( | )/OFF (

), and input the vertical 

synchronization signal.

Connections

Explains how to connect probes and the power cord, and how to input the vertical 
synchronization signal.

P. 59

* Before turning on the power: Refer to pages 121–131 if using RS-232C or USB communication.

Turning the Power ON ( | )/OFF (

)

Explains how to turn the power ON ( | )/OFF (

) and the instrument status at Power-ON ( | ).

P. 63

• 

The Measurement Preparation, Calibration/Settings, and Measurement sections explain the procedure up to 
measurement.

Measur

ement Pr

epar

ation pages 65–79

The Measurement Preparation section explains preparations (instrument setting, zero calibration) that are 
required prior to measurement.

Zero calibration

Explains the zero calibration method.
(Measurement cannot be performed if zero calibration is not completed.)

P. 66

Measurement Condition Settings

Explains the various settings according to the purpose of measurement

Sync Mode / Meas Speed / Trigger Mode / Interval Meas /
Interval Alert / JEITA freq resolution

P. 68

Selecting a Probe No.

Explains how to select the probe whose measured value is to be displayed.

P. 79

To Calibration/Settings section

* Go to the Measurement section if performing measurement using Konica Minolta’s calibration standard.

Summary of Contents for CA-410 Series

Page 1: ...Display Color Analyzer CA 410 Probe Data Processor CA DP40 Instruction Manual Please read before using the instrument...

Page 2: ...AC This symbol indicates direct current DC This symbol indicates class II protection against electric shock Notes on this Manual Copying or reproduction of all or part of the contents of this manual w...

Page 3: ...on the cables Doing so may damage the cable and cause a fire or electric shock Do not disassemble or modify the instrument or the AC adapter Doing so may cause a fire or electric shock Take special c...

Page 4: ...ry in this condition may cause the batteries to overheat rupture or catch fire If the battery is found to be leaking or emitting an unusual odor keep the battery away from any open flames The electrol...

Page 5: ...uipment can cause the internal temperature of the instrument to become much higher than the ambient temperature resulting in malfunction Do not use the instrument in such areas Also use the instrument...

Page 6: ...period Charge it for at least one hour using the charger supplied with a data processor at least semiannually After using up the battery do not leave it uncharged Charging should be performed at betwe...

Page 7: ...ion To maintain measurement accuracy the instrument should be inspected once a year For information on inspection contact the nearest KONICA MINOLTA authorized service facility Disposal Method Make su...

Page 8: ...easurement Functions of Probes 24 1 Measurement Speeds 24 2 Measurement Synchronization Modes 25 3 Measurement Modes 27 User Memory 28 1 About Calibration Channels 28 2 About Targets 28 3 About User C...

Page 9: ...0 5 Setting an ID 92 Deleting Calibration Data 94 Setting Changing the Target 96 1 Target 96 2 By Measurement and Registration 96 3 By Entering Values 98 Measurement 100 Measurement 101 1 Performing M...

Page 10: ...ously to perform measurement Can be connected to a PC so that it can be controlled from the PC using PC software z zPC software CA S40 Can control a probe connected to a PC to perform measurement Can...

Page 11: ...r RS Cable for Probe DP 2 m IF A30 RS Cable for Probe DP IF A31 5 m IF A32 10 m D sub BNC AC Adapter AC A312F Conversion Cable IF A29 miniDIN USB Cable for DP PC 2 m IF A34 Lithium IonBattery CM A223...

Page 12: ......

Page 13: ...e Dimensions 16 7 How to Set a Probe 21 8 How to Connect Cables 21 About Zero Calibration 23 1 How to Check Zero Calibration 23 Measurement Functions of Probes 24 1 Measurement Speeds 24 2 Measurement...

Page 14: ...rocessor and control it from the data processor to perform measurement Multiple probes can be controlled simultaneously to perform measurement Display Mini DIN cable connection or USB cable connection...

Page 15: ...cylinder Lens cap Model Name Model Name For a 27 probe CA H12 Hood for 27 Probe CA H13 Lens Cap for 27 Probe For a 10 probe CA H14 Hood for 10 Probe CA H15 Lens Cap for 10 Probe For a 10 mini probe CA...

Page 16: ...r details refer to the dimensions Note Mini probes have screws for jigs and cable clamps For details refer to the dimensions 1 Receptor Make this part face perpendicular to a display to perform measur...

Page 17: ...e optical axis in the height direction is the same as that for a CA 310 series probe 5 Status indicator Located on the rear of all probes to indicate the status of the probe No power supply Off During...

Page 18: ...P427H 27 Probe for High Luminance High luminance probe with a measurement area of 27 mm Tripod mount screw depth 6 mm Tripod mount screw depth 6 mm ISO 5 mm screw depth 6 mm ISO 5 mm screw depth 6 mm...

Page 19: ...P410H 10 Probe for High Luminance High luminance probe with a measurement area of 10 mm unit mm Tripod mount screw depth 6 mm Tripod mount screw depth 6 mm ISO 5 mm screw depth 6 mm ISO 5 mm screw dep...

Page 20: ...rew depth 6 mm ISO 5 mm screw depth 6 mm ISO 5 mm screw depth 6 mm When a light shielding cylinder is mounted Viewed from A A unit mm CA VP427 27 High Sensitivity Probe High sensitivity probe with a m...

Page 21: ...6 mm ISO 5 mm screw depth 6 mm ISO 5 mm screw depth 6 mm Viewed from A When a light shielding cylinder is mounted unit mm CA VP410 10 High Sensitivity Probe High sensitivity probe with a measurement...

Page 22: ...ISO 5 mm screw depth 6 mm ISO 5 mm screw depth 6 mm When a light shielding cylinder is mounted Tripod mount screw depth 6 mm CA MP410 10 Mini Probe Compact probe with a measurement area of 10 mm CA MP...

Page 23: ...h is 30 mm 10 mm For a 10 probe the specification range of the length is 30 mm 5 mm For a mini probe the specification range of the length is 10 mm 5 mm When strict low luminance measurement is requir...

Page 24: ...connector External synchronization signal 5 V DC 300 mA Red Black PC RS 232C connector RS 232C connector pin No and functions Mini DIN 8 pin female Pin No Pin function Details 1 ExSync or Trigger IN...

Page 25: ...ero Calibration Zero calibration performs zero point adjustment while blocking entry of light into the probe s receptor Be sure to perform zero calibration whenever the instrument is started Notes on...

Page 26: ...compromise measurement repeatability for low luminance measurements SLOW mode Repeats FAST mode measurements several times Use this mode when you want to perform measurement with high repeatability A...

Page 27: ...2 0 50 to 240 00 Hz For FMA 0 50 to 130 00 Hz Required UNIV Mode used when the display s vertical scanning frequency is unknown or cannot be input a mode that can measure any display 100 ms Not requir...

Page 28: ...nt synchronization mode Also the measurement speed number of measurements outputs possible per second is determined by the measurement synchronization mode and the following conditions Luminance of th...

Page 29: ...v Lv mode Mode for displaying and outputting u v chromaticity diagram coordinates CIE1976 UCS chromaticity diagram and luminance Lv Flicker mode Displays the flicker amount in the contrast method AC D...

Page 30: ...fference display Targets can be set for each probe of each calibration channel Targets are set after the following operations 1 User calibration After user calibration the calibration value is set as...

Page 31: ...he difference in the reading due to the deviation of spectral response from the CIE 1931 color matching function 2 Corrects the difference in the readings between probes when multiple probes are used...

Page 32: ...white 1 3 0 01 cd m2 0 003 0 1 cd m2 0 002 0 003 1 cd m2 0 002 0 002 10 cd m2 0 002 0 002 100 cd m2 0 002 0 002 In100cd m2 formonochrome 2 100 cd m2 0 003 0 003 Repeatability 2 1 AUTO 0 01 cd m2 0 00...

Page 33: ...0 5 to 240 Hz luminance and chromaticity 0 5 to 130 Hz flicker 0 5 to 240 Hz luminance and chromaticity 0 5 to 130 Hz flicker User calibration channel 99 channels 99 channels Interface Communication...

Page 34: ...0 006 1 cd m2 0 002 0 002 10 cd m2 0 002 0 002 100 cd m2 0 002 0 002 In100cd m2 formonochrome 2 100 cd m2 0 003 0 003 Repeatability 2 1 AUTO 0 01 cd m2 0 0070 0 1 cd m2 0 0020 0 0070 1 cd m2 0 0008 0...

Page 35: ...0 5 to 240 Hz luminance and chromaticity 0 5 to 130 Hz flicker 0 5 to 240 Hz luminance and chromaticity 0 5 to 130 Hz flicker User calibration channel 99 channels 99 channels Interface Communication...

Page 36: ...002 0 006 1 cd m2 0 002 0 002 10 cd m2 0 002 0 002 100 cd m2 0 002 0 002 In100cd m2 formonochrome 2 100 cd m2 0 003 0 003 Repeatability 2 1 AUTO 0 01 cd m2 0 0085 0 1 cd m2 0 0025 0 0085 1 cd m2 0 001...

Page 37: ...ency 0 5 to 240 Hz luminance and chromaticity 0 5 to 130 Hz flicker 0 5 to 240 Hz luminance and chromaticity 0 5 to 130 Hz flicker User calibration channel 99 channels 99 channels Interface Communicat...

Page 38: ...guaranteed luminance range 0 01 to 3000 cd m2 0 01 to 3000 cd m2 Accuracy for white 1 3 0 01 cd m2 0 003 0 003 0 1 cd m2 0 002 0 002 1 cd m2 0 002 0 002 10 cd m2 0 002 0 002 100 cd m2 0 002 0 002 In10...

Page 39: ...inance and chromaticity User calibration channel 99 channels 99 channels Interface Communication USB 2 0 RS 232C USB 2 0 RS 232C Trigger In Out 5 V In Out 5 V Size 47 x 47 x 190 5 47 x 47 x 226 5 Weig...

Page 40: ......

Page 41: ...44 Operations on Each Screen 49 1 Measurement screen 49 2 Zero calibration screen 50 3 Screen in remote mode 50 4 Changing color modes 51 5 Graph 52 6 Menu screen 53 Manual Structure 54 Connection 58...

Page 42: ...rd Accessories z zAC adapter AC A312F AST036T A120 Supplies power through connection to an AC outlet via an AC cable Input 100 to 240 V 50 60 Hz 31 to 43 VA 0 31 to 0 18 A Output 12 V 3 A Plug design...

Page 43: ...to connect Refer to page 124 z zLithium ion battery CM A223 Drives the data processor Description in this manual How to connect Refer to page 60 z zBluetooth module CM A219 Wirelessly connects the dat...

Page 44: ...v x y 5 CAL CH key On the measurement screen press this key to display the screen for selecting a calibration channel Refer to page 101 1 Performing Measurement in the Measurement section 6 MENU key T...

Page 45: ...same function as the HOLD key 5 AC adapter connector Used to connect the AC adapter 6 PC Ethernet connector Used to connect to a PC or network using a LAN cable 7 PC USB connector Used to connect a P...

Page 46: ...Status information 0 cal Auto Trigger mode Battery level display Status icon Connect to display Key lock Data save Measurement speed Sync Mode 2 Settings area 1 Status display area Displays the opera...

Page 47: ...uring communication via RS 232C During communication via Ethernet During communication via Bluetooth No display Communication yet to be started Battery level display Operating off battery power with t...

Page 48: ...play the synchronization mode menu The menu for selecting NTSC PAL UNIV INT Hz EXT MANU msec is displayed is the currently set value However the mode is switched to UNIV if the external trigger mode i...

Page 49: ...Probe selection area White text Ports with probes connected Focused position Grayed out Ports with no probes connected Trigger mode 0 cal AUTO 1 0 y 0 0 0 2 0 4 0 6 0 8 1 0 x 0 2 0 6 0 4 0 8 Measurin...

Page 50: ...GB W matrix calibration c user custom User calibration with specified calibration coefficients ID ID set for the probe half width alphanumerics and symbols 10 characters max blank when not set 3 3 Mul...

Page 51: ...is to be displayed Pressing the Enter key switches to the single probe display for the currently selected probe Operations in each measurement mode Generally measurement is performed continuously and...

Page 52: ...the menu screen Pressing the SAVE icon to save the data Pressing the MODE key to change the color space Pressing the 0 Cal key to perform zero calibration Pressing the DATA key to check saved data Pre...

Page 53: ...d CA VP410 probes cannot measure flicker The displayed color mode screens are only those checked in Color Space under Menu Option Color modes cannot be changed in interval measurement mode Transition...

Page 54: ...e is Lv x y Lv Tcp duv X Y Z Lv Tcp duv or Lv d Pe An xy chromaticity diagram is displayed When the color mode is Lv u v A u v chromaticity diagram is displayed 1 0 y 0 0 0 2 0 4 0 6 0 8 1 0 x 0 2 0 6...

Page 55: ...nd pressing the RIGHT or ENTER key the settings are displayed or an item in area 3 can be selected Pressing the LEFT or ESC key returns to item selection in area 1 After selecting an item in area 3 us...

Page 56: ...on Settings and Measurement sections explain the procedure up to measurement Measurement Preparation pages 65 79 The Measurement Preparation section explains preparations instrument setting zero calib...

Page 57: ...82 When performing measurement using Konica Minolta s calibration standard When performing measurement using user calibration Setting Changing the Target 1 Explains how to set change the target value...

Page 58: ...via USB P 124 Connection to a PC via Ethernet Explains how to connect a cable and set the DHCP to enable communication with a PC via Ethernet P 125 Connection to a PC via Bluetooth Explains how to con...

Page 59: ...Explanation pages 132 135 This section explains the following items Dimensions P 133 Error Messages Please read when an error message appears on the LCD display P 134 Main Specifications P 135 CA DP4...

Page 60: ...ion signal Connections Explains how to connect probes and the power cord and how to input the vertical synchronization signal P 59 Before turning on the power Refer to pages 121 131 if using RS 232C o...

Page 61: ...firmly When disconnecting the probe set the POWER switch to OFF first and pull the probe by holding the plug Never pull the cable by its cord Notes on Connecting Probes Never connect or remove a prob...

Page 62: ...e terminals in the battery compartment Doing so may damage the instrument How to Attach 1 Turn the power OFF Power switch 2 Open the battery compartment cover located on the back of the data processor...

Page 63: ...rectly to a probe or to the data processor For how to input the signal directly to a probe refer to the description of probe setting P 21 To input the signal to the data processor connect an input cab...

Page 64: ...mote switch serves the same function as the HOLD key CAUTION Before connecting or disconnecting the AC adapter jack or plug make sure that the instrument is turned OFF Operating Procedure 1 Turn the p...

Page 65: ...ud rate P 123 To communicate with a PC via USB 1 Connect the instrument to the PC using a USB cable P 124 To communicate with a PC via Ethernet 1 Connect the instrument to the PC using a LAN cable P 1...

Page 66: ...the ENTER key for more than five seconds A beep will sound followed by a long beep when the settings are saved The instrument will start with the new settings when the power is turned ON next time The...

Page 67: ...s not completed P 66 Measurement Condition Settings Explains the various settings according to the purpose of measurement Sync Mode Meas Speed Trigger Mode Interval Meas Interval Alert JEITA freq reso...

Page 68: ...en the ambient temperature has changed Refer to Option 0 Cal Perform zero calibration at any time by pressing the 0 Cal key Just in case do not direct the end of the probe toward an illuminant with hi...

Page 69: ...receptor on the tip of the probe the light shield built into the probe is faulty In either case contact a KONICA MINOLTA authorized service facility 2 How to Check Zero Calibration To check whether ze...

Page 70: ...olution 4 The screen for selecting a Sync mode is displayed Press the UP or DOWN key to select a Sync mode When selecting NTSC sampling is performed using a frequency of 59 94 Hz and an integration ti...

Page 71: ...ib Target Option System NTSC PAL UNIV INT 400 00 Hz EXT MANU 1000 0 ms Sync Mode Meas Speed Trigger Mode Interval Meas Interval Alert JEITA freq resolution MENU Trigger mode 0 cal AUTO Meas Cond User...

Page 72: ...n for selecting a measurement speed is displayed Press the UP or DOWN key to select a measurement speed Selecting FAST can shorten measurement time but may compromise measurement repeatability for low...

Page 73: ...erval Meas Interval Alert JEITA freq resolution 3 Press the UP or DOWN key to select Trigger Mode and then press the ENTER key MENU Trigger mode 0 cal AUTO Meas Cond User Calib Target Option System NT...

Page 74: ...value Press the ESC key to cancel configuration of the setting and restore the original value MENU Trigger mode 0 cal AUTO Meas Cond User Calib Target Option System ON Delay 100 0 ms OFF Sync Mode Mea...

Page 75: ...ode Interval Meas Interval Alert JEITA freq resolution 4 The screen for turning the interval measurement ON OFF is displayed Press the UP or DOWN key to select ON or OFF MENU Trigger mode 0 cal AUTO M...

Page 76: ...ange an alert screen is displayed Press the ENTER key to return to the previous screen and reset the value Press the ESC key to cancel configuration of the setting and restore the original value Input...

Page 77: ...0 cal AUTO Meas Cond User Calib Target Option System NTSC AUTO OFF OFF OFF 0 07 Hz Sync Mode Meas Speed Trigger Mode Interval Meas Interval Alert JEITA freq resolution 3 Press the UP or DOWN key to s...

Page 78: ...ESC key to cancel configuration of the setting and restore the original value MENU Trigger mode 0 cal AUTO Meas Cond User Calib Target Option System ON 50 OFF Sync Mode Meas Speed Trigger Mode Interv...

Page 79: ...ion 4 The screen for selecting a frequency setting range is displayed Press the UP or DOWN key to select 0 01 Hz 0 1 Hz or 1 Hz and then press the ENTER key MENU Trigger mode 0 cal AUTO Meas Cond User...

Page 80: ...78 JEITA Freq Resolution Setting 6 Press the ESC key twice The measurement screen is displayed on the LCD screen The JEITA freq resolution setting will be kept even if the POWER switch is set to OFF...

Page 81: ...xample probes are connected to probe connectors P1 P3 and P5 P5 P3 P1 How to Select On the measurement screen press the UP or DOWN key to display the probe No to be selected Each time the key is press...

Page 82: ...ming measurement using Konica Minolta s calibration standard When performing measurement using user calibration Setting Changing the Target 1 Explains how to set change the target value 1 Setting Chan...

Page 83: ...or difference display section can show the deviation of the measured values from the target value User calibration must be performed in the following cases However it is not possible to perform user c...

Page 84: ...ration standard The channel is preset with coefficients for Konica Minolta calibration which cannot be changed by the user The following can be set for each channel between CH01 to CH99 Correction coe...

Page 85: ...bration light source with a measurement reference device be sure to set the reference device and the instrument at the same position and angle from the calibration light source and measure the same me...

Page 86: ...Edit Correction Coef Set ID Delete Calib Data 4 The screen for selecting a probe is displayed Press the UP or DOWN key to select the probe to register and then press the RIGHT or ENTER key MENU Trigge...

Page 87: ...OWN key and the RIGHT LEFT keys to set a calibration value and then press the ENTER key Press the ESC key to cancel configuration of the setting and restore the original value 10 Repeat steps 8 and 9...

Page 88: ...Edit Correction Coef Set ID Delete Calib Data 4 The screen for selecting a probe is displayed Press the UP or DOWN key to select the probe to register and then press the RIGHT or ENTER key MENU Trigge...

Page 89: ...e UP or DOWN key and the RIGHT LEFT keys to set a calibration value and then press the ENTER key Press the ESC key to cancel configuration of the setting and restore the original value 11 Repeat steps...

Page 90: ...MENU Trigger mode 0 cal AUTO Meas Cond User Calib Target Option System Measure and Register Copy and Register Edit Correction Coef Set ID Delete Calib Data 4 The screen for selecting a probe is displa...

Page 91: ...the RIGHT or ENTER key User Calib Select Source Probe 01 02 03 04 05 06 07 08 09 10 MENU 8 The screen for selecting a calibration channel is displayed Press the UP or DOWN key to select the channel to...

Page 92: ...Target Option System Measure and Register Copy and Register Edit Correction Coef Set ID Delete Calib Data 4 The screen for selecting a probe is displayed Press the UP or DOWN key to select the probe...

Page 93: ...Complete 8 Move to Complete on the confirmation screen and press the ENTER key to return to the menu screen The correction coefficient can be set to between 0 00001 to 9999999 If the entered value is...

Page 94: ...UP or DOWN key to select Set ID and then press the RIGHT or ENTER key MENU Trigger mode 0 cal AUTO Meas Cond User Calib Target Option System Measure and Register Copy and Register Edit Correction Coef...

Page 95: ...01 MENU ID 7 Repeat step 6 to input the required number of characters To delete the character on the left of the cursor in the text box move the cursor to and press the ENTER key 8 When character inpu...

Page 96: ...then press the RIGHT or ENTER key MENU Trigger mode 0 cal AUTO Meas Cond User Calib Target Option System Measure and Register Copy and Register Edit Correction Coef Set ID Delete Calib Data 4 The scr...

Page 97: ...UP or DOWN key to select the channel with data to delete User Calib Delete MENU All CH Select CH User Calib Delete Select CH CH00 CH01 CH02 CH03 CH04 CH05 CH06 CH07 CH08 CH09 01 MENU 7 When you press...

Page 98: ...e MENU key The setting screen is displayed on the LCD screen 2 Press the UP or DOWN key to select Target and then press the RIGHT or ENTER key MENU Trigger mode 0 cal AUTO Meas Cond User Calib Target...

Page 99: ...Target Value Lv x y 160 2 0 3132 0 3257 8 Press the UP or DOWN key and the RIGHT LEFT keys to select the field of a target and then press the ENTER key 9 Press the UP or DOWN key and the RIGHT LEFT ke...

Page 100: ...al AUTO Meas Cond User Calib Target Option System Measure and Register Enter Value 4 The screen for selecting a probe is displayed Press the UP or DOWN key to select the probe to register and then pre...

Page 101: ...DOWN key and the RIGHT LEFT key to set values and then press the ENTER key 9 Repeat steps 7 and 8 After setting is completed press the UP or DOWN key to select the Complete button and then press the...

Page 102: ...100 Measurement This section explains measuring methods From the Settings section Measurement Explains measuring methods how to hold the measured values how to read them and how to clear them P 101...

Page 103: ...0 3 1 0 0 0 3 1 2 9 a b c d e f g f C H 0 9 1 6 0 0 0 3 1 0 0 0 3 1 2 9 a b c d e f g f 1 Press the CAL CH key 2 Press the UP DOWN key to select a probe 01 to 10 and then press the ENTER key Select P...

Page 104: ...sured values that are currently held will be re calculated according to the new conditions and then displayed Measured values can be saved in a hold state Refer to page 46 for information on saving da...

Page 105: ...n be input is between 0 50 and 130 00 Hz 3 If inputting the appropriate vertical synchronization signal is difficult change the measurement frequency mode to a mode other than EXT When measuring with...

Page 106: ...e UP DOWN key to select a menu and then press the ENTER key Measurement data Check Saved Data Select Data DATA001 2017 01 01 00 00 00 DATA002 2017 01 01 00 00 00 DATA003 2017 01 01 00 00 00 DATA004 20...

Page 107: ...ete all Saved Data No Yes Delete Interval Log DATA All Logs Select Log Delete Interval Log Select Log ID Delete Interval Log Delete all interval logs No Yes Delete Saved Data Select Data Delete Saved...

Page 108: ...e Absolute Value Color Difference Display 109 Setting the Display Brightness 110 Setting Operation Sounds 111 Auto 0 Cal Settings 112 Save Destination Setting 113 Selecting Luminance Units 114 Setting...

Page 109: ...ey to select Color Space and then press the ENTER key MENU Trigger mode 0 cal AUTO Meas Cond User Calib Target Option System Absolute 3 Normal ON ON AUTO cd Color Space Absolute di erence Brightness B...

Page 110: ...minant wavelength 1 Excitation purity Mode for displaying and outputting luminance Lv dominant wavelength d and excitation purity Pe Flicker Contrast Mode for displaying and outputting Contrast method...

Page 111: ...zer Auto 0 cal Save Destination Luminance Units 3 Press the UP or DOWN key to select Absolute Difference and then press the ENTER key MENU Trigger mode 0 cal AUTO Meas Cond User Calib Target Option Sy...

Page 112: ...Destination Luminance Units 3 Press the UP or DOWN key to select Brightness and then press the ENTER key MENU Trigger mode 0 cal AUTO Meas Cond User Calib Target Option System Absolute 3 Normal ON ON...

Page 113: ...ce Units 3 Press the UP or DOWN key to select Buzzer and then press the ENTER key MENU Trigger mode 0 cal AUTO Meas Cond User Calib Target Option System Absolute 3 Normal ON ON AUTO cd Color Space Abs...

Page 114: ...lute di erence Brightness Buzzer Auto 0 cal Save Destination Luminance Units 3 Press the UP or DOWN key to select Auto 0 cal and then press the ENTER key MENU Trigger mode 0 cal AUTO Meas Cond User Ca...

Page 115: ...nation Luminance Units 3 Press the UP or DOWN key to select Save Destination and then press the ENTER key MENU Trigger mode 0 cal AUTO Meas Cond User Calib Target Option System Absolute 3 Normal ON ON...

Page 116: ...Units 3 Press the UP or DOWN key to select Luminance Units and then press the ENTER key MENU Trigger mode 0 cal AUTO Meas Cond User Calib Target Option System Absolute 3 Normal ON ON AUTO cd Color Spa...

Page 117: ...d OFF 9600 ON English Power Save mode Date Time Date Format Bluetooth RS 232C baud rate DHCP Language Instrument Info Initialize 4 The screen for turning the Power Save mode ON OFF is displayed Press...

Page 118: ...etooth RS 232C baud rate DHCP Language Instrument Info Initialize 4 Press the UP or DOWN key to select date and time and then press the ENTER key MENU Trigger mode 0 cal AUTO Meas Cond User Calib Targ...

Page 119: ...nfo Initialize 3 Press the UP or DOWN key to select Date Format and then press the ENTER key MENU Trigger mode 0 cal AUTO Meas Cond User Calib Target Option System ON 10 min 2017 11 05 yyyy mm dd OFF...

Page 120: ...DHCP Language Instrument Info Initialize 3 Press the UP or DOWN key to select Language and then press the ENTER key MENU Trigger mode 0 cal AUTO Meas Cond User Calib Target Option System ON 10 min 20...

Page 121: ...7 11 05 yyyy mm dd OFF 9600 ON English Power Save mode Date Time Date Format Bluetooth RS 232C baud rate DHCP Language Instrument Info Initialize 3 Press the UP or DOWN key to select Instrument Info a...

Page 122: ...Bluetooth RS 232C baud rate DHCP Language Instrument Info Initialize 3 Press the UP or DOWN key to select Initialize and then press the ENTER key MENU Trigger mode 0 cal AUTO Meas Cond User Calib Targ...

Page 123: ...thernet P 125 Connection to a PC via Bluetooth Explains how to connect and set the Bluetooth module to enable communication with a PC or other device via Bluetooth P 128 Communicating with a PC Bidire...

Page 124: ...or Use a cross cable for the connector Operating Procedure 1 Set the POWER switch to OFF 2 Connect the data processor to a PC or PLC with an RS 232C cable RS connector for PC RS 232C cable 3 Make sure...

Page 125: ...ate and then press the ENTER key MENU Trigger mode 0 cal AUTO Meas Cond User Calib Target Option System ON 10 min 2017 11 05 yyyy mm dd OFF 9600 ON English Power Save mode Date Time Date Format Blueto...

Page 126: ...tting tension on the cable may cause connection failure or wire breakage Pay attention to the shape of the port connecting terminal for the USB cable connector and push the connector completely into t...

Page 127: ...the cable has sufficient length Putting tension on the cable may cause connection failure or wire breakage Pay attention to the shape of the port connecting terminal for the cable connector and push t...

Page 128: ...HCP Language Instrument Info Initialize 3 Press the UP or DOWN key to select DHCP and then press the ENTER key MENU Trigger mode 0 cal AUTO Meas Cond User Calib Target Option System ON 10 min 2017 11...

Page 129: ...f the setting in the middle of the procedure press the ESC key 8 Move to Complete and press the ENTER key 9 Press the ESC key twice The measurement screen is displayed on the LCD screen The DHCP setti...

Page 130: ...the instrument s Bluetooth function and configure the PIN code on the instrument as required Connecting the Bluetooth Module Operating Procedure 1 Remove the screw from the Bluetooth module slot on t...

Page 131: ...s set to OFF Operating Procedure Start the procedure from the measurement screen 1 Use the UP or DOWN key to move the cursor to Bluetooth and then press the ENTER key The Bluetooth screen is displayed...

Page 132: ...m dd OFF 9600 ON English Power Save mode Date Time Date Format Bluetooth RS 232C baud rate DHCP Language Instrument Info Initialize Bluetooth Set PIN code Complete 4 and are displayed above and below...

Page 133: ...verity that the instrument is not connected to the PC via another connection method 3 Start the Bluetooth utility on the PC 4 Search for nearby Bluetooth devices and select CM A219 from the list of di...

Page 134: ...132 Explanation This section explains the following items Dimensions P 133 Error Messages Please read when an error message appears on the LCD display P 134 Main Specifications P 135...

Page 135: ...133 Dimensions Unit mm 253 250 75 87 5 3 28 8 56 75 58 143 34 2 18 1 8 5 62 3 Rear wall mounting screw M4 4 locations CA DP40 Explanation...

Page 136: ...cility 0 cal Error Failed to shade Retry 0 cal ER21 Retry zero calibration so that the brightness of the measurement target the brightness around the measuring instrument does not exceed the measurabl...

Page 137: ...required For probes Mini DIN 8 pin cable for RS communication USB for USB communication Sync signal input BNC connector with trigger input Multi probe connection 10 max Operating Temp Humid Range 10...

Page 138: ...RESULTING FROM THE MISUSE MISHANDLING UNAUTHORIZED MODIFICATION ETC OF THIS PRODUCT OR FOR ANY INDIRECT OR INCIDENTAL DAMAGES INCLUDING BUT NOT LIMITED TO LOSS OF BUSINESS PROFITS INTERRUPTION OF BUS...

Page 139: ......

Page 140: ...En 9222 AA1J 12 2017 KONICA MINOLTA INC BIFBDA...

Reviews: