Solving Other Problems
229
Solving Other Problems
To order KONICA MINOLTA consumables, go to www.q-shop.com.
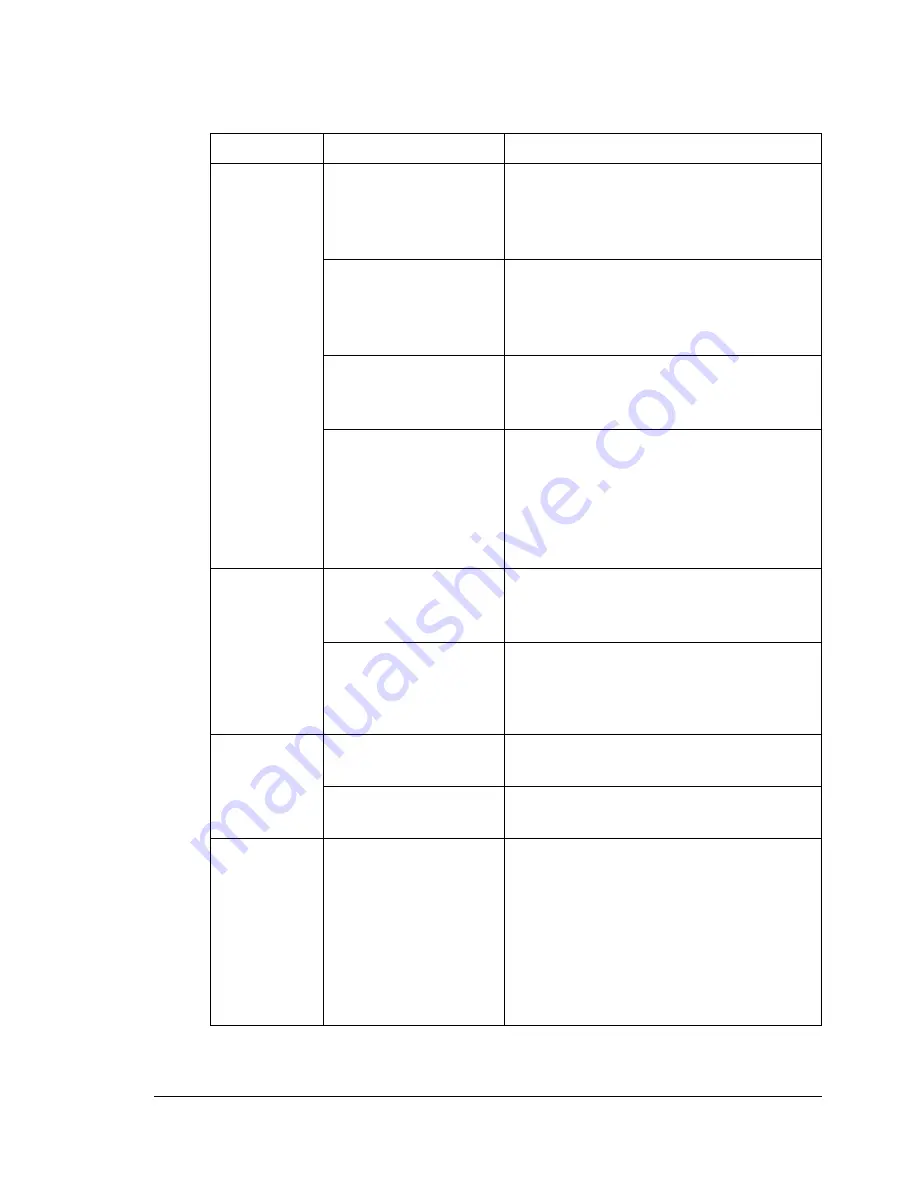
Symptom
Cause
Solution
Machine
power is not
on.
The power cord is not
correctly plugged into
the outlet.
Turn off the machine, confirm that the
power cord is correctly plugged into
the outlet, and then turn on the
machine.
Something is wrong
with the outlet con-
nected to the
machine.
Plug another electrical appliance into
the outlet and see whether it operates
properly.
The power switch is
not correctly turned
on (I position).
Turn the power switch off (O position),
then turn it back to the on (I position).
The machine is con-
nected to an outlet
with a voltage or fre-
quency that does not
match the machine
specifications.
Use a power source with the specifica-
tions listed in appendix A, “Technical
Specifications.”
The control
panel dis-
plays
Toner
Low
much
sooner than
expected.
One of the toner car-
tridges may be defec-
tive.
Remove the toner cartridges and
check for damage. If it is damaged,
replace it.
Printed with heavy
toner coverage.
See specifications in Appendix A.
Cannot print
the machine
status list.
The tray is empty.
Check that at least Tray 1 is loaded
with media, in place, and secure.
There is a media mis-
feed.
Clear the media misfeed.
When the
paper type or
paper size
for Tray 1 is
changed,
Check
Fax Mode
appears.
If a fax is received, it
could not be printed
on paper of the cur-
rently specified type
or size. However,
copy and print opera-
tions can be per-
formed.
To print a received fax, change the
paper type to
PLAIN PAPER
and the
paper size to
A4
,
LEGAL
,
LETTER
or
OFICIO
(Mexico only).
Summary of Contents for A0FD011
Page 1: ...magicolor 4690MF Printer Copier Scanner User s Guide A0FD 9561 00A 1800859 001A...
Page 13: ...1Introduction...
Page 23: ...2Control Panel and Configuration Menu...
Page 40: ...Configuration Menu Overview 28 REPORTING SCAN SETTING...
Page 46: ...Configuration Menu Overview 34 PAPER SETUP Menu PAPER SETUP TRAY1 PAPER TRAY2 PAPER...
Page 76: ...Configuration Menu Overview 64...
Page 77: ...3Media Handling...
Page 100: ...Loading Media 88 6 Close Tray 3...
Page 109: ...4Using the Printer Driver...
Page 118: ...Printer Driver Settings 106...
Page 119: ...5Using the Copier...
Page 133: ...6Using the Scanner...
Page 162: ...Scanning With the Machine 150...
Page 163: ...7Replacing Consumables...
Page 182: ...Replacing Consumables 170 3 Remove the transfer roller 4 Prepare a new transfer roller...
Page 198: ...Replacing Consumables 186...
Page 199: ...8Maintenance...
Page 211: ...9 9Troubleshooting...
Page 220: ...Clearing Media Misfeeds 208 3 Close the right side cover...
Page 263: ...10 10Installing Accessories...
Page 270: ...Tray 3 Lower Feeder Unit 258...
Page 271: ...AAppendix...
Page 282: ...Our Concern for Environmental Protection 270...


