Making Advanced Copies
115
"
To print only the front sides that were scanned first, press the
Start-Color
key or the
Start-B&W
key in step 5.
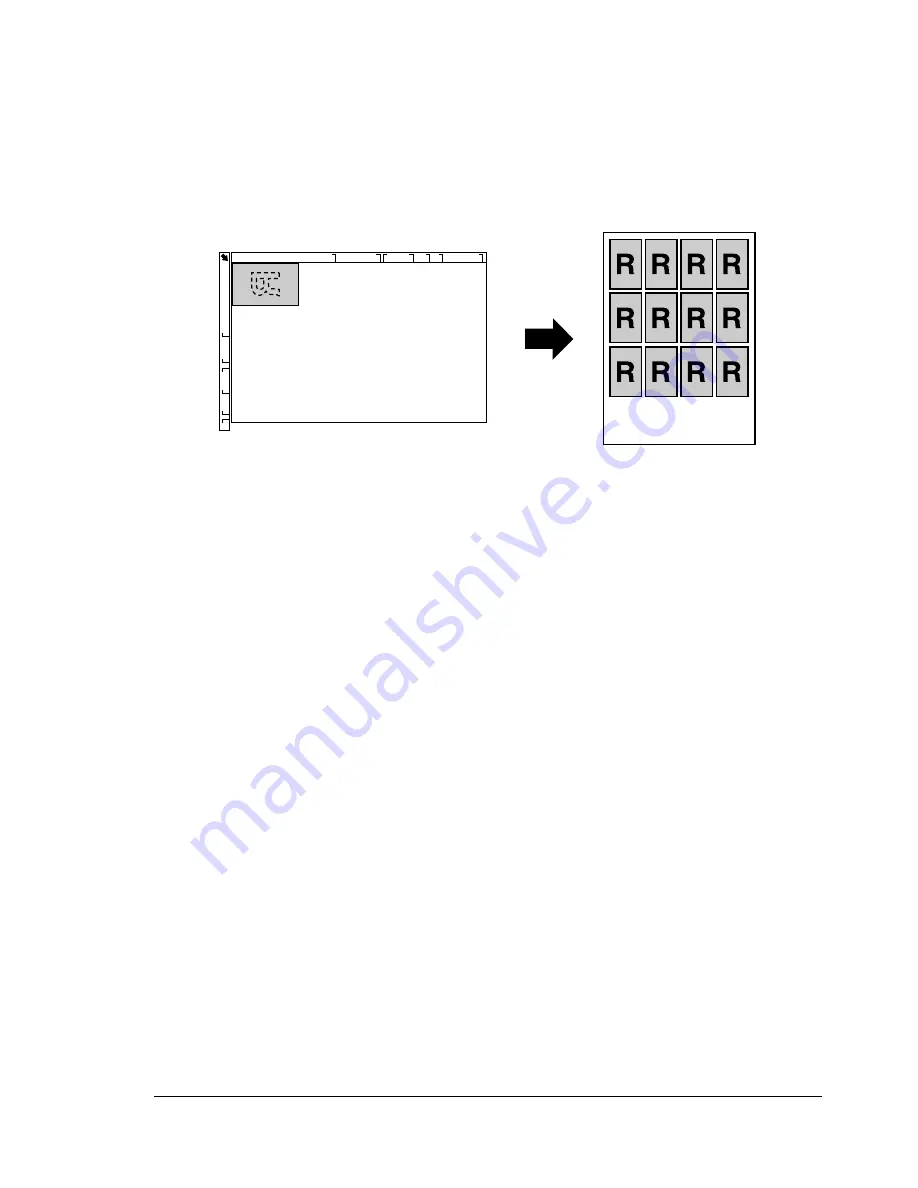
Repeat Copying
With repeat copying, small documents, such as memos, are tiled and printed
on a single page.
1
Position the document on the original glass.
"
For details on positioning the document on the original glass, refer
to “Placing a document on the original glass” on page 95.
2
In the main screen, press the
+
or
,
key to select the current copy func-
tion setting, and then press the
Select
key.
3
Press the
+
or
,
key to select
REPEAT COPY
, and then press the
Select
key.
4
When the How to Repeat Copy screen appears, check the settings, and
then press the
Select
key.
5
To print color copies, press the
Start-Color
key. To print monochrome
copies, press the
Start-B&W
key.
6
Use the keypad to type in the document length, and then press the
Select
key.
"
To change the document size, press the
Back
key to delete the
current size, and then use the keypad to specify the desired size.
7
Use the keypad to type in the document width, and then press the
Select
key.
After the document has been scanned, printing automatically begins.
The main screen appears again.
"
To change the document size, press the
Back
key to delete the
current size, and then use the keypad to specify the desired size.
Summary of Contents for A0FD011
Page 1: ...magicolor 4690MF Printer Copier Scanner User s Guide A0FD 9561 00A 1800859 001A...
Page 13: ...1Introduction...
Page 23: ...2Control Panel and Configuration Menu...
Page 40: ...Configuration Menu Overview 28 REPORTING SCAN SETTING...
Page 46: ...Configuration Menu Overview 34 PAPER SETUP Menu PAPER SETUP TRAY1 PAPER TRAY2 PAPER...
Page 76: ...Configuration Menu Overview 64...
Page 77: ...3Media Handling...
Page 100: ...Loading Media 88 6 Close Tray 3...
Page 109: ...4Using the Printer Driver...
Page 118: ...Printer Driver Settings 106...
Page 119: ...5Using the Copier...
Page 133: ...6Using the Scanner...
Page 162: ...Scanning With the Machine 150...
Page 163: ...7Replacing Consumables...
Page 182: ...Replacing Consumables 170 3 Remove the transfer roller 4 Prepare a new transfer roller...
Page 198: ...Replacing Consumables 186...
Page 199: ...8Maintenance...
Page 211: ...9 9Troubleshooting...
Page 220: ...Clearing Media Misfeeds 208 3 Close the right side cover...
Page 263: ...10 10Installing Accessories...
Page 270: ...Tray 3 Lower Feeder Unit 258...
Page 271: ...AAppendix...
Page 282: ...Our Concern for Environmental Protection 270...


