10.3.7.5 Install and start KAS IDE
The KAS IDE is included on the DVD that came with the AKD PDMM, as well as online at
www.kollmorgen.com. Insert the DVD and wait for installer to auto-start. Once installation is
complete, click the KAS IDE icon to start the program.
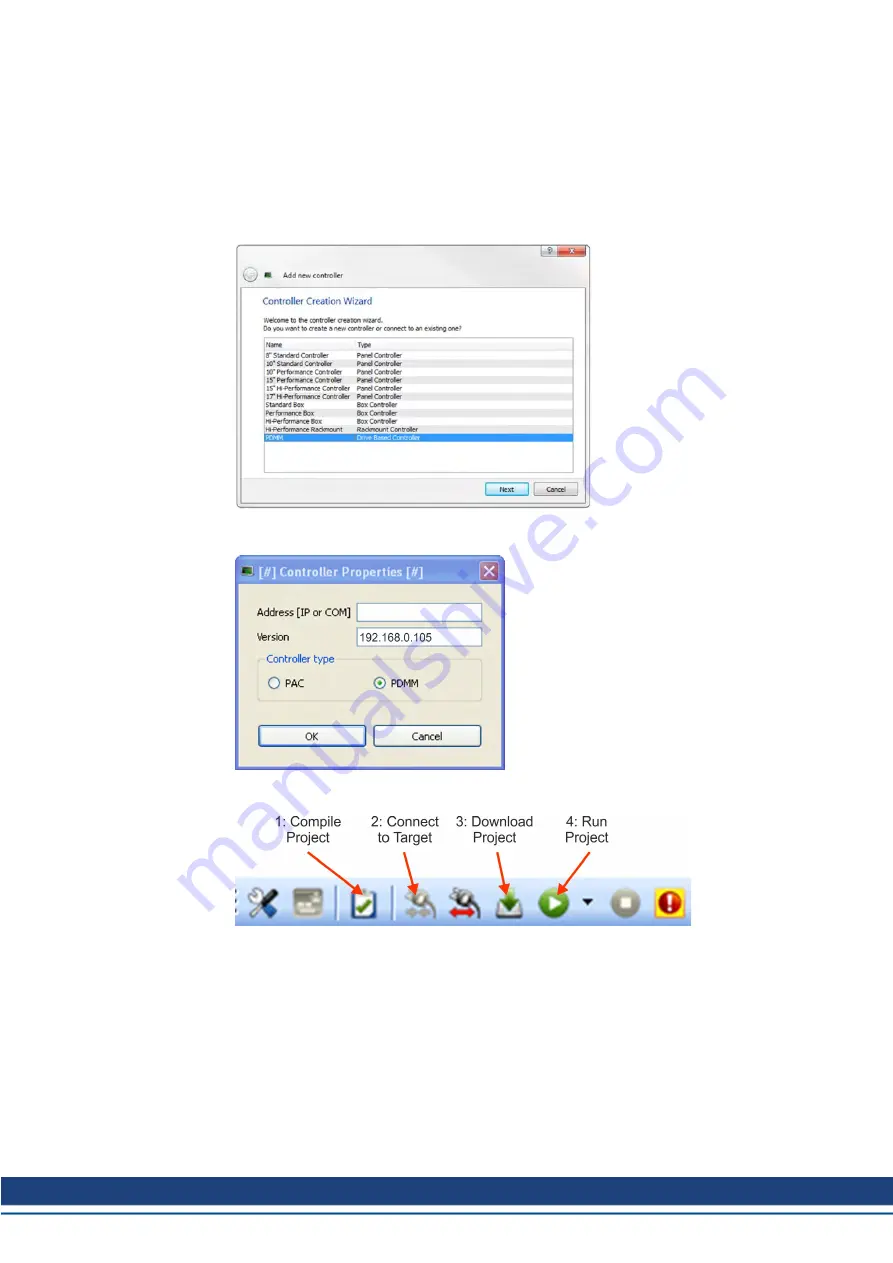
Begin a new project by selecting
File > New
. This will launch the
Add a New Controller
window. Select your AKD PDMM model from the list. The controller will then be added to the
project view.
To associate the project with an IP address of the AKD PDMM controller, right click on the
Controller option in the Project View. Select
Properties
and the following screen appears:
Type in the IP address of the AKD PDMM, set the
Controller Type
to PDMM and click OK.
To connect to the PDMM, download, and run the project use the following controls:
Double click on EtherCAT in the project view to open the EtherCAT devices view. Click on
scan devices in the upper-right corner, and the KAS IDE will automatically identify and add
your drive.
If multiple drives are detected, a drive can be uniquely identified using one of the following
methods:
1. The MAC address of the drive. This is printed on the sticker on the side of the drive.
2. The name of the drive. The drive name is set using KAS IDE. A new drive defaults to
“No_Name.”
3. Blinking the display. Select a drive and click Blink to force the display on the front of the
drive to blink on and off for 20 seconds.
AKD Installation | 10 Setup
Kollmorgen | kdn.kollmorgen.com | October 2017
197


