


16-11
Disk edit environment
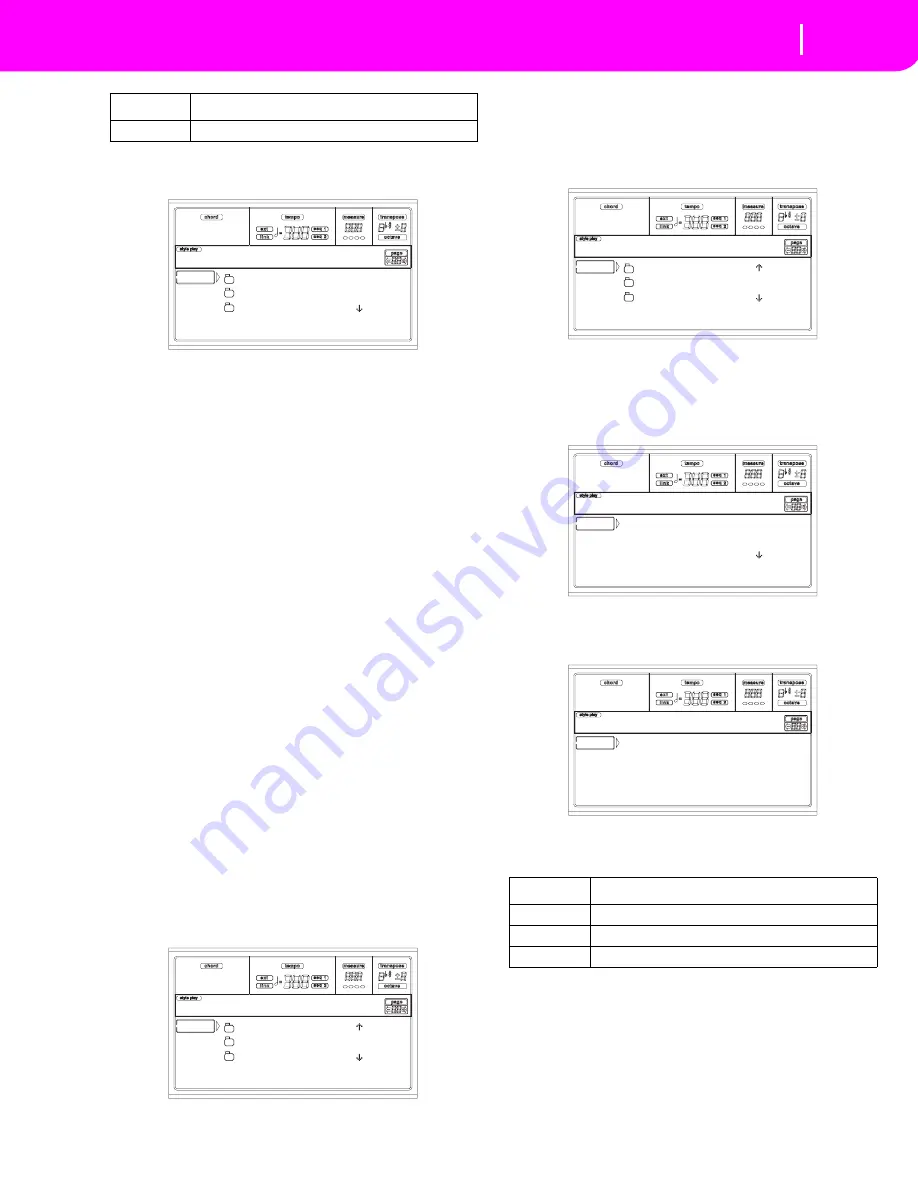
Page 2 - Save
8.
After selecting a target device, the content of the selected
device appears.
At this point, you can:
• Create a new “.SET” folder (see “Creating a new “.SET”
folder” on page 16-12).
• Save onto an existing “.SET” folder.
9.
If you are saving into an existing folder, move the
desired “.SET” folder to the first line of the display, using
the E-H (Scroll) buttons (or the TEMPO/VALUE con-
trols).
10.
Press F2 (Save) to confirm. A list of banks on the target
device appears. Only banks of the selected type are
shown.
11.
Use the E-H (Scroll) buttons (or the TEMPO/VALUE
controls) to move the target bank to the first line of the
display.
12.
Once the target bank is selected, press F2 (Save) to save
the files. The “Are you sure?” message will appear. Press
ENTER to confirm, or EXIT to abort.
Warning:
If you confirm, any data in the target bank will
be deleted.
When the operation is completed (the “Wait” indicator
disappears), the source page comes back in the display,
and you may perform further saving operations.
Saving a single item
You can save a single User item with a single operation.
1.
If saving on a floppy disk, insert the disk into the disk
drive.
2.
The whole content (“All”) of the internal memory is
already selected. Press F3 (Open) to open the “All”
folder. A list of User data types appear (each type is a
separate folder).
3.
Use the E-H (Scroll) buttons (or the TEMPO/VALUE
controls) to move the data type you are looking for to
the first line of the display.
4.
Once the data type is selected, press F3 (Open) to open
the folder and gain access to the separate banks.
5.
Use the E-H (Scroll) buttons (or the TEMPO/VALUE
controls) to move the bank containing the file to save to
the first line of the display.
6.
Once you have selected the bank, press F3 (Open) to
gain access to the single files.
7.
Once you have selected the file that you want to save,
press F2 (Save) to confirm the selection. You are
prompted to select a target device.
8.
Select the target device, using the F1 button. You can
select a device in this order: HD
➛
FD
➛
CRD
➛
HD…
CRD
Flash Card (For future development)
Device
Type
NEW_NAME.SET
LIVE.SET
ETHNICA.SET |
FD SAVE OPEN CLOSE
Disk:Save
GLOBAL |
PERFORM
PROGRAM |
FD SAVE OPEN CLOSE
Disk:Save
Device
Type
HD
Hard disk
FD
Floppy disk
CRD
Flash Card (For future development)
USER01.STY |
USER02.STY
USER03.STY |
FD SAVE OPEN CLOSE
Disk:Save
U1: 1 8B-Groove1
U1: 2 8B-Groove2
U1: 3 8B-Groove3 |
FD SAVE OPEN CLOSE
Disk:Save
Use F1 to select
a target device.
-- SAVE OPEN CLOSE
Disk:Save
Summary of Contents for KD-150
Page 1: ......
Page 5: ......
Page 11: ...TOC 6 ...
Page 12: ...INTRODUCTION ...
Page 13: ......
Page 29: ...4 4 Display and User Interface Grayed out non available parameters ...
Page 32: ...BASIC GUIDE ...
Page 33: ......
Page 39: ...6 6 Basic operations Shortcut to see the original bank for a Style Performance or Program ...
Page 47: ...7 8 Tutorial 5 Editing a Song ...
Page 53: ...8 6 MIDI Playing another instrument with the KD ...
Page 54: ...REFERENCE GUIDE ...
Page 55: ......
Page 103: ...11 14 Song Play operating mode Saving a list of Songs ...
Page 111: ...12 8 Backing Sequence operating mode How to delete a whole Song ...
Page 133: ...13 22 Song operating mode Event Edit procedure ...
Page 189: ...16 20 Disk edit environment Page 11 Card Restore ...
Page 190: ...APPENDIX ...
Page 191: ......
Page 225: ...17 34 Factory Data MIDI Setup ...
Page 283: ...18 58 Effects Mono Mono Chain ...
Page 287: ...19 4 Assignable parameters Scales ...
Page 303: ...24 2 Technical specifications ...
Page 307: ...25 4 Alphabetical Index ...


