


KINOVA
®
Gen3 Ultra lightweight robot
User Guide
61
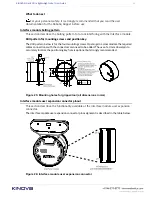
Note:
Set aside the O-ring with the screws and end cap for safe keeping.
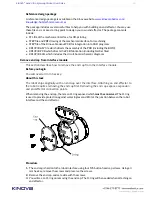
Robotiq Adaptive Grippers installation (optional)
This section describes the procedure for installing a Robotiq Adaptive Grippers on the
robot.
Before you begin
You will need four M5 X 40 mm Socket Head Cap Screws and 4 mm hex key (supplied).
You will also need to have
removed the interface end cap
(robot comes with end cap connected).
You will need the O-ring that was exposed when the end cap was removed.
About this task
This procedure describes the installation for Robotiq Adaptive Grippers (Robotiq 2F-85,
2F-140, or Hand-E Gripper) on the interface module of the robot. The interface module
allows easy mounting of Robotiq Adaptive Grippers. This procedure mechanically mounts
the gripper on the robot and integrates the gripper with the robot in terms of electrical
power and control. The interface module has four mounting holes corresponding to the
bolt pattern on the gripper. The 10 spring-loaded pins on the interface mate with a contact
plate on the inside of the Robotiq Gripper to establish electrical supply and controls.
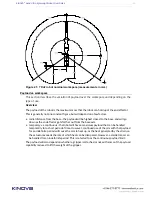
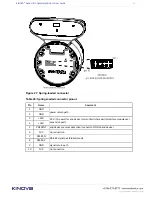
Figure 24: Robotiq Adaptive Gripper (Robotiq 2F-85 Gripper shown)
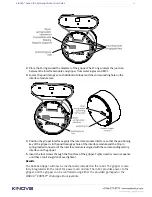
Procedure
1.
Prepare the four supplied M5 X 40mm Socket Head Cap Screws and a 4 mm hex key.


