


DP320 User's Manual
- 24 -
10. Make sure the printer cover is closed. Then turn on the printer. When the printer receives data,
it begins printing automatically.
When using push tractor and pull tractor at the same time
1. Turn the printer off; then remove the paper guide. Pull the paper-select lever forward to the
continuous paper position as shown in the illustration on page 2.3. Remove the printer cover
and tear part and Adjust the paper thickness lever according to the paper type.
2. Make sure the tractor installed correctly (refer to chapter 1).
3. Load the continuous paper on the sprocket of the push tractor refering to “Printing in the push
tractor position”
.
4. Turn on the printer, press
LOAD/EJECT
button to eject the paper automaticly and the print
head is at the original print position of the first page. Adjust the original print position of page
layout if necessary. Hold
LF/FF
button, the printer feeds one page automatically.
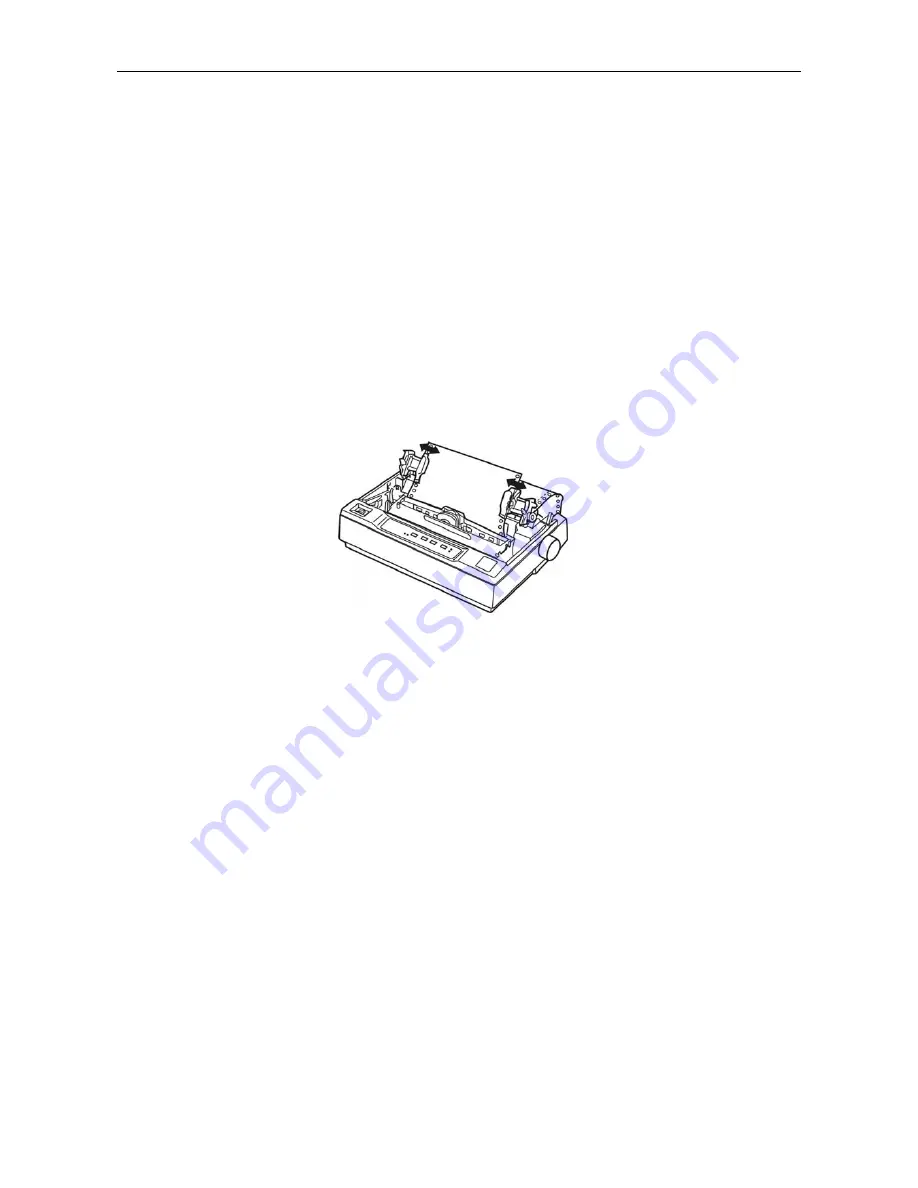
5. Release the sprocket lock of the pull tractor and open the sprocket cover. Pull straight the paper
upwards, adjust the left and right sprockets unit they match the width of your paper. Then clip the
perforation of the paper into the sprockets of the pull tractor, lock the prockets at last. The paper
should be without twisted.
6. If the perforation of the paper is not match with the sprocket of the pull tractor when tightening
the paper lengthways, then you can do as follows:
1) Dial the paper select lever backward to the single sheet position.
2) Turn the paper-in knob until the paper is tightened lengthways.
3) Dial the paper select lever forward to the continous position.
7. Attach the paper guide and print cover again.
8. The printer begins printing automatically when receiving print commands
3.1.3 Multi-part Forms
You can use the built-in tractor to print on carbonless multi-part forms of up to four parts (one
original plus three copies). Before you print on the forms, set the paper-thickness lever as
described in the previous section. These tips will help you get good results:
1. Load multi-part forms with the tractor only, not in the cut-sheet feeder or paper guide. For more
instruction, see “printing on continuous papers” on page 3.1.2.
2. Use only multi-part forms that are free of wrinkles and waves. Never load multi-part forms joined
by metal staples, tape, or continuous gluing.
3. If you need to adjust the loading position, use your software program or change the loading
position as described on page 2.2.2.
4. When you use multi-part forms, raise the paper guide as shown.
Note: If you print on multi-part forms without raising the paper guide, the paper may jam.
Figure 3-16 Adjust the position of the pull tractor
Summary of Contents for DP320
Page 1: ...User s Manual DP320 Dot Matrix Printer...
Page 45: ......


