


DP320 User's Manual
- 6 -
1.6 Installing the Tractor
There are two positions for the tractor to be installed, one is push installation position (back of
printer), and the other is pull installation position (top of printer). The tractor that installed in the
back of printer is called push tractor, and the one installed in the top of printer is called pull
tractor.
Generally, you can use push tractor when using standard continuous paper. Only in this way,
can the printer tear paper normally. If the print position requires high precision, such as printing
on the paper with forms, you are suggested use pull tractor.
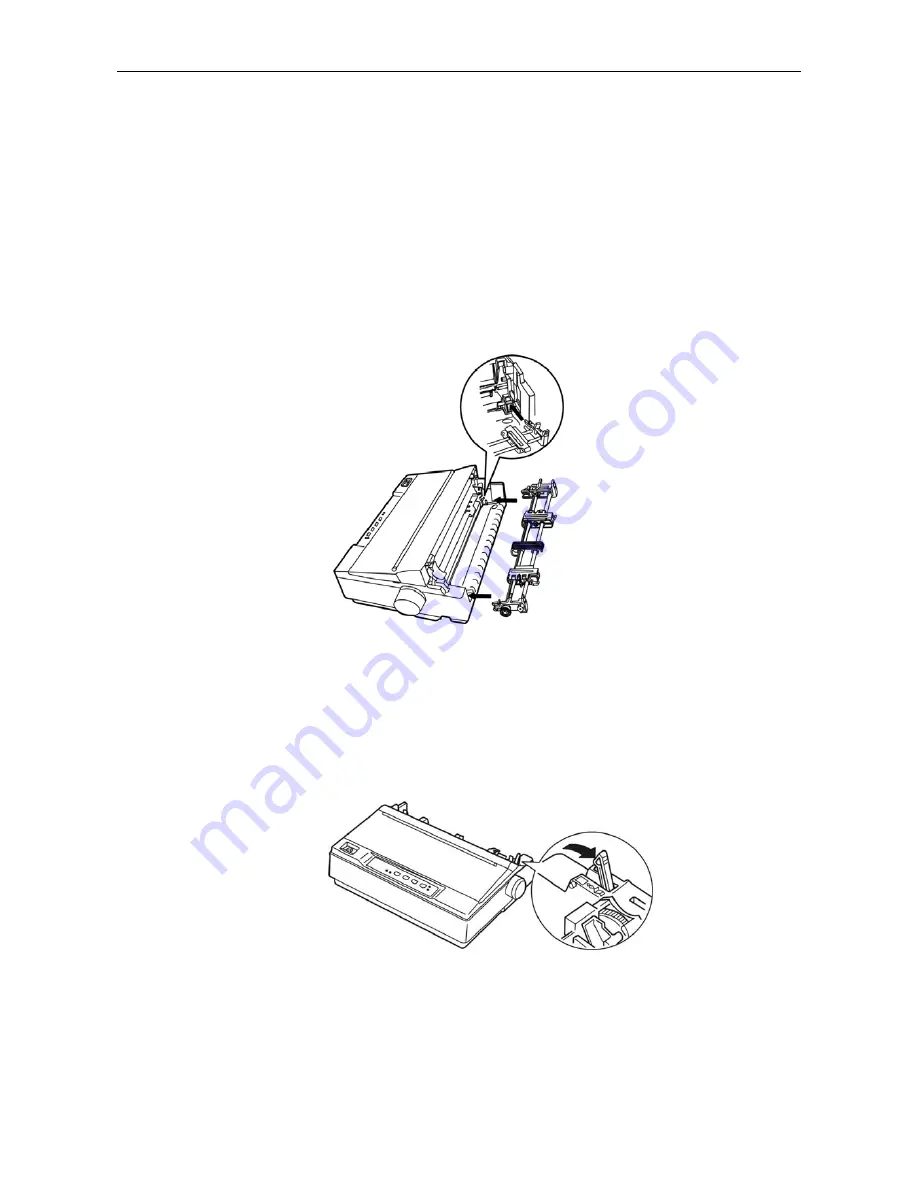
1.6.1 Installing the Push Tractor
Take the installing slots both sides of tractor aiming at the installation shell which is in the back
of printer, press forward till it locked into the position. (Shown as the following figure)
1.6.2 Installing the Pull Tractor
If the tractor has been installed in the push position (back of printer), take down the tractor, unpack
the tear cutter, and install the tractor in the pull position. The concrecte steps are as follows.
1.
Make sure the printer is turned off, take down the paper guide, and dial the paper-select lever to
the continuous paper position according to follow figure.
2. Take down the push tractor following the steps: Compact the locked piece of the tractor (shown as
the following figure), and pull out the tractor from the printer, take down the printer cover.
Figure1-13 Install the push tractor
Figure1-14 Set paper-select lever
Summary of Contents for DP320
Page 1: ...User s Manual DP320 Dot Matrix Printer...
Page 45: ......


