RAC Geo II User’s Manual
3-22
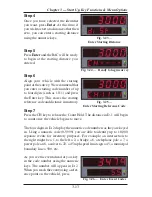
Once the RAC Geo has reached an F1
lock the Geo will then go into Count
Hold mode and wait for you to begin.
Step 3
When you are ready to begin the data
collection, we recommend that you first
check the quality of the GPS signal you
are receiving and, if you want, record the starting location.
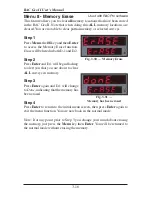
To do this, press the #9 key and the GPS
Accuracy screen will be displayed.
The first two digits on D-1 will display
the 'Fix Value' of the GPS information.
D-2 shows the number of satellites that
are being used to calculate the current
position. In general, the more satellites the receiver can see, the better the
data will be. The number can vary from 3 to 8 or more.
Press
#9
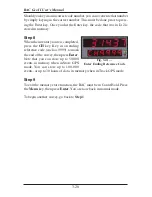
again and the latitude of your
location will be shown, with the first
three digits of the coordinates shown
in D-1 and the last six shown in D-2.
In figure 4.41, this would be read as
40.215497 degrees North.
Press
#9
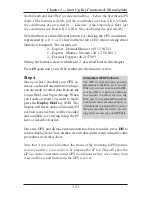
again and the longitude of
your location will be shown, again with
the first three digits of the coordinates
shown in D-1 and the last six shown in
D-2. In figure 3.47, this would be read
as 75.159008 degrees West.
Fig. 3.46 — Latitude Displayed
Fig. 3.47 — Longitude Displayed
Fig. 3.44 —
Count Hold, Ready to Begin
Fig. 3.45 —
GPS Accuracy Displayed
Summary of Contents for RAC Geo II
Page 5: ...Chapter 1 Introduction 1 1 Chapter 1 Quick Start Guide Introduction to the RAC Geo II...
Page 8: ...RAC Geo II User s Manual 1 4...
Page 9: ...Chapter 2 Installation 2 1 Chapter 2 Installation...
Page 38: ...RAC Geo II User s Manual 3 26...
Page 39: ...Chapter 4 External Sensor Mode 4 1 Chapter 4 External Sensor Mode...
Page 51: ...Chapter 5 Troubleshooting 5 1 Chapter 5 Troubleshooting...
Page 55: ...Appendix A 1 Appendix...


