3-9
Note:
To view the Clock/Timer while in the normal measuring mode (not
as a Menu function), press the #1 key. D-1 will then display the clock/timer
in hh.mm.ss format. Press the #1 key again to toggle back to distance. This
function does not interrupt the distance count.
IMPORTANT:
Once the RAC is turned off, the clock/timer shuts off and
will reset to zero on the next power up. Also note that the Count Hold
does
not
stop the clock/timer.
Menu 5 - Distance Pulse Output (DPO)
Note: Use of the Distance Pulse Output feature with a Modular Distance
Sensor (MDS) requires a factory modification to the MDS. Contact us us-
ing the information on page iv if you need to use this feature with an MDS.
When activated, the distance pulse output (DPO) will provide a +5 VDC
(TTL level) output pulse at a pre-selected distance interval and signal
duration. This low level signal is provided on the red wire in the power/
signal cable. The +5 VDC signal can be used to send distance pulsed to a
computer or other device that can accommodate low voltage, low current
signals. Should you wish to control a +12 VDC high current device, you
will need our optional DPO Amplifier.
In addition to creating a DPO pulse at the pulse interval, one byte of data is
sent out on the RS-232 communications port. This byte contains an ASCII
'S' at 9600 baud. This capability allows the RAC to effectively signal a PC
or other type of unit at the leading edge of the DPO pulse.
CAUTION: The DPO signal can be used to control potentially hazard-
ous equipment. When activated, the DPO could cycle this equipment at
any time. If you are working with this type of equipment, TURN OFF
the RAC, which will deactivate the DPO signal.
To activate the DPO signal:
Step 1
Press the
Menu
key, the
#5
key, then
the
Enter
key. At this point, the RAC
is ready to have an interval distance
entered.
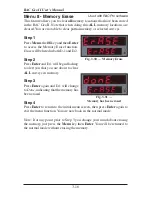
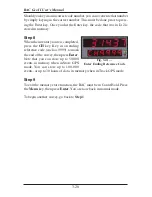
Fig. 3.12 — Enter DPO Distance
Chapter 3 — Start Up, Key Functions & Menu Options
Summary of Contents for RAC Geo II
Page 5: ...Chapter 1 Introduction 1 1 Chapter 1 Quick Start Guide Introduction to the RAC Geo II...
Page 8: ...RAC Geo II User s Manual 1 4...
Page 9: ...Chapter 2 Installation 2 1 Chapter 2 Installation...
Page 38: ...RAC Geo II User s Manual 3 26...
Page 39: ...Chapter 4 External Sensor Mode 4 1 Chapter 4 External Sensor Mode...
Page 51: ...Chapter 5 Troubleshooting 5 1 Chapter 5 Troubleshooting...
Page 55: ...Appendix A 1 Appendix...


