76
Ioline FlexJet Service Manual
Step 10: Secure and Arrange the ribbon cable bundle—Part 2
1.
Continue to smooth the ribbon cable bundle toward the right
end plate to stretch the black sheathing so that it lays relatively
flat and taut.
2.
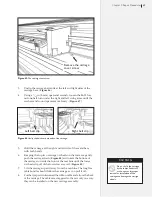
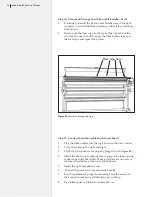
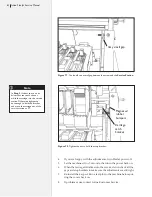
Firmly push the sleeving into the tape at the right end of the
traverse. If it does not stick, apply the foam backed tape over
the foam tape and repeat the process.
Place tape here
Figure 65.
Secure the sleeving with tape.
Step 11: Connect the ribbon cables to the logic board
1.
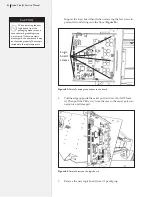
Plug the ribbon cables into the logic board in the correct order.
2.
Tyrap the cables to the right end plate.
3.
Verify that all connectors are properly plugged in. (
See
Figure 85
.
)
4.
Install the board cover, making sure to plug in the take-up wire
connections to the board first. Make sure there are no wires or
cables pinched between the cover and the body.
5.
Install the right side plastic cover.
6.
Connect the power and communication cables.
7.
Test the machine for proper functioning. Press the arrows on
the keypad to make sure all directions are working.
8.
If problems arise call Ioline Customer Service.
Summary of Contents for FlexJet
Page 1: ...Service Manual Ioline FlexJet ...
Page 3: ...Service Manual Ioline FlexJet ...
Page 4: ......
Page 8: ......
Page 12: ......
Page 60: ...60 Ioline FlexJet Service Manual This page intentionally left blank ...
Page 90: ...90 Ioline FlexJet Service Manual This page intentionally left blank ...
Page 96: ...96 Ioline FlexJet Service Manual This page intentionally left blank ...

