background image

IntesisBox

® 

KNX 

– Mitsubishi Electric A.C. 

       User's manual r2.3 eng 


© Intesis Software S.L.U. - All rights reserved 

This information is subject to change without notice


IntesisBox

®


is a registered trademark of Intesis Software SLU


URL 
Email 
tel 

  http://www.intesisbox.com                                          

[email protected] 
+34 938047134 

31 / 63 


Important: 

When  in  Auto  Mode  the  indoor  unit  will  choose  the  most 

appropriate vane up-down position, but this will be shown neither in KNX nor 
in the remote controller. 


4.5.9 

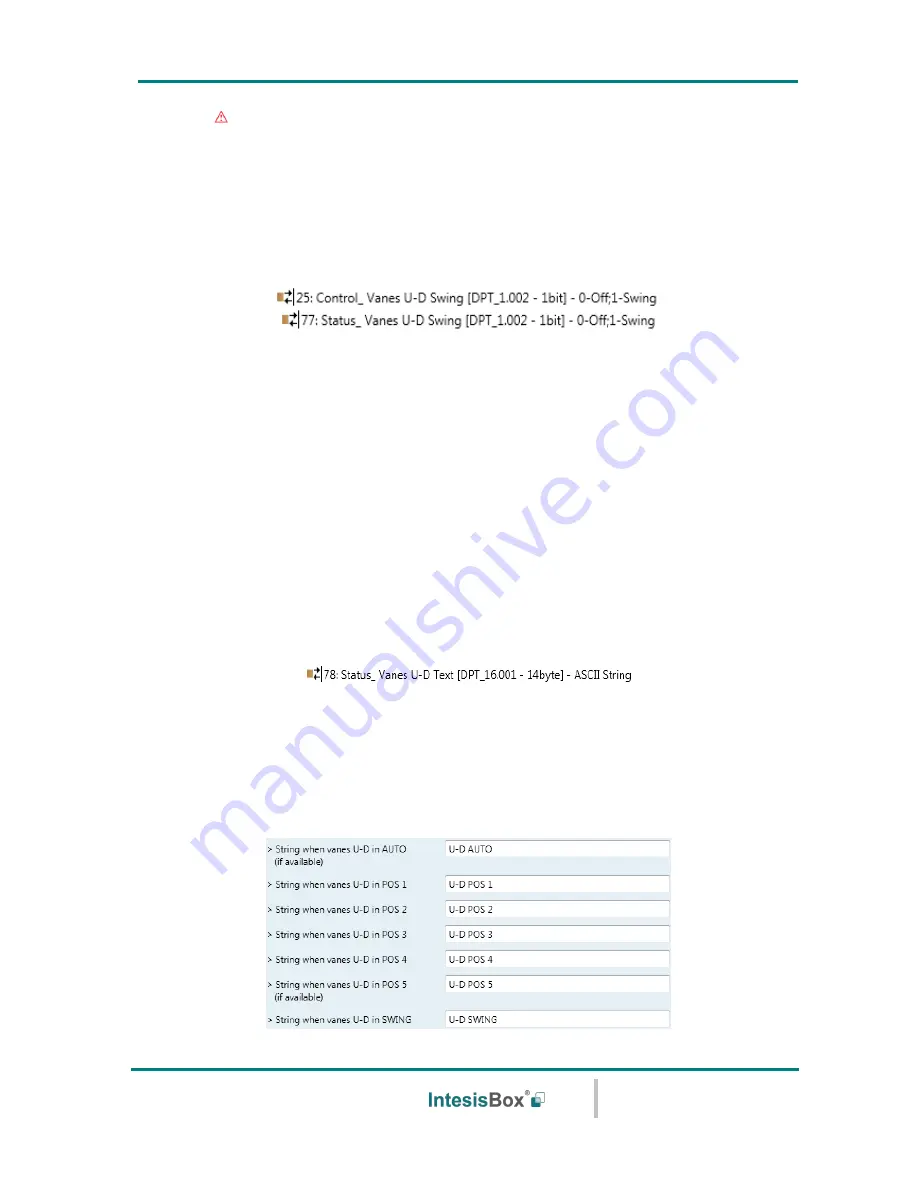
Enable “Vanes U-D Swing” objects (for Control and Status) 

 
This parameter shows/hides the 

Control_ Vanes U-D Swing 

and 

Status_ Vanes U-D Swingo 

communication objects. 


o


If set to 

“no” 

the objects will not be shown. 


o


If set to 

“yes”

 the 

Control_


Vanes U-D Swing 

and 

Status_


Vanes U-D Swing 

objects will 

appear. 


When  a 

“1”


value  is  sent  to  the 

Control_

  communication  object,  Vanes  Up-

Down will be in Auto mode, and the 

Status_ 

object will return this value.  


When  a 

“0”


value  is  sent  to  the 

Control_

  communication  object,  Vanes  Up-

Down  will  be  in  Manual  mode  and  the  first  position  will  be  enabled.  The 

Status_ 

object will return this value. 


4.5.10 Enable use of Text object for Vane U-D 

 
This parameter shows/hides the 

Status_ Vanes U-D Text 

communication object. 


o


If set to 

“no”

 the object will not be shown. 


o


If set to 

“yes”

 the 

Status_ Vanes U-D Text 

object will appear. Also, in the parameters 

will be shown seven text fields, five for the Vane Position and one for the Auto function 
and another one for the Swing function, that will let modify the text string displayed by 
the 

Status_ Vanes U-D Text 

when changing a vane position. 


Figure 4.24 

Parameter detail 

Summary of Contents for ME-AC-KNX-1i

Page 1: ...IntesisBox ME AC KNX 1i v1 1 User s Manual Issue Date 03 2018 r2 3 eng ...

Page 2: ...ument is furnished under a license agreement or nondisclosure agreement The software may be used only in accordance with the terms of those agreements No part of this publication may be reproduced stored in a retrieval system or transmitted in any form or any means electronic or mechanical including photocopying and recording for any purpose other than the purchaser s personal use without the writ...

Page 3: ... registered trademark of Intesis Software SLU URL Email tel http www intesisbox com info intesisbox com 34 938047134 3 63 Gateway for integration of Mitsubishi Electric air conditioners into KNX TP 1 EIB control systems Compatible with Domestic and Mr Slim line air conditioners commercialized by Mitsubishi Electric Application s Program Version 1 1 Order Code ME AC KNX 1i ...

Page 4: ... of ECONOMY mode 18 4 3 3 Enable use of ADDITIONAL HEATING mode 19 4 3 4 Enable use of ADDITIONAL COOLING mode 20 4 4 Fan Speed Configuration dialog 21 4 4 1 Fan is accessible in Indoor unit 21 4 4 2 Available fanspeeds in Indoor Unit 21 4 4 3 Indoor unit has AUTO fan speed 22 4 4 4 DPT object type for fanspeed 22 4 4 5 Enable use of object for Fan Speed 23 4 4 6 Enable Fan Speed Manual Auto objec...

Page 5: ... 35 4 7 1 Enable use of scenes 35 4 7 2 Scenes can be stored from KNX bus 36 4 7 3 Enable use of bit objects for scene execution 36 4 7 4 Scene x preset 37 4 8 Switch Off Timeouts Configuration dialog 39 4 8 1 Enable use of Open Window Switch off timeout function 39 4 8 2 Enable use of Occupancy function 40 4 8 3 Enable use of SLEEP timeout 43 4 9 Binary Input x Configuration dialog 44 4 9 1 Enabl...

Page 6: ...Timeout for Open Window and Occupancy Sleep function also available Control of the AC unit based in the ambient temperature read by the own AC unit or in the ambient temperature read by any KNX thermostat AC unit can be controlled simultaneously by the IR remote control of the AC unit and by KNX Total Control and Monitoring of the AC unit from KNX including monitoring of AC unit s state of interna...

Page 7: ...test uncovered part into the socket of the ME AC KNX 1i marked as AC Unit and the other connector the one in the largest uncovered part into the socket CN92 or CN105 of the AC unit s control board Fix the ME AC KNX 1i inside or outside the AC indoor unit depending on your needs remember that ME AC KNX 1i must be also connected to the KNX bus Close the AC indoor unit s front cover again Important D...

Page 8: ...p This is a fully compatible KNX device which must be configured and setup using standard KNX tool ETS ETS database for this device can be downloaded from https www intesisbox com intesis product media intesisbox_me ac knx 1i_ets_database zip Please consult the README txt file located inside the downloaded zip file to find instructions on how to install the database Important Do not forget to sele...

Page 9: ...S software for the first time the gateway shows the following default parameter configuration Figure 4 1 Default parameter configuration With this configuration it s possible to send On Off Control_ On Off change the AC Mode Control_ Mode the Fan Speed Control_ Fan Speed and also the Setpoint Temperature Control_ Setpoint Temperature The Status_ objects for the mentioned Control_ objects are also ...

Page 10: ...ransmit T and Update U flags enabled will send READs and their values will be updated with the response when received Figure 4 3 Parameter detail Delay before sending READs sec With this parameter a delay can be configured between 0 and 30 seconds for the READs sent by the Control_ objects This is to give time enough to other KNX devices on the bus to start up before sending the READs 4 1 2 Scene ...

Page 11: ...ilure happens Important If an initial scene is enabled and it has as Value for Remote Lock unchanged or unlocked this would unlock the remote controller because the initial scene has priority over the Control_ Lock Remote Control communication object 4 1 4 Enable func Control_ Lock Control Obj This parameter shows hide the Control_ Lock Control Obj communication object which depending on the sent ...

Page 12: ... written only if it s different from the existing one Important If the stored value is 0 hours the gateway will not send the status to KNX 4 1 6 Enable object Error Code 2byte This parameter shows hides the Status_ Error Code communication object which shows the indoor unit errors if occurred in numeric format o If set to no the object will not be shown o If set to yes the Status_ Error Code 2byte...

Page 13: ...P_20 105 Auto mode will be enabled with a 0 value Heat mode with a 1 value Cool mode with a 3 value Fan mode with a 9 value and Dry mode with a 14 value 4 2 1 Indoor unit has FAN mode This parameter has to be used to indicate if the indoor unit has the fan mode available o If set to no the indoor unit doesn t have the fan mode available o If set to yes the infoor unit has the fan mode available Im...

Page 14: ...these thermostats the percentage demand is meant to be applied on a fluid valve of the heating cooling system ME AC KNX 1i device does not provide individual control on the internal parts of the indoor unit as can be its compressor refrigerant valves etc Rather it provides the same level of control as a user remote controller Objects Control_ Mode Cool On and Control_ Mode Heat On intend to bring ...

Page 15: ...ypes o If set to no the object will not be shown o If set to yes the Control_ Mode object and a new parameter will appear Figure 4 7 Parameter detail DPT type for Mode Object This parameter lets choose between the datapoints 0 Up 1 Down DPT_1 008 and 0 Decrease 1 Increase DPT_1 007 for the Control_ Mode object The sequence followed when using this object is shown below Important Read the documenta...

Page 16: ... o If set to no the objects will not be shown o If set to yes the Status_ Mode objects for Auto Heat Cool Fan and Dry will appear When enabled a mode will return a 1 through its bit type object 4 2 7 Enable use of Text object for Mode This parameter shows hides the Status_ Mode Text communication object o If set to no the object will not be shown o If set to yes the Status_ Mode Text object will a...

Page 17: ...he predefined time for the Special Mode is finished or a 0 value is sent to stop it the previous state will be recovered Important If a value concerning On Off Mode Fan Speed or Setpoint Temperature is received from KNX while any Special Mode is running 1 the Special Mode will stop and the previous state will be recovered The value received will be also applied then Important If a value concerning...

Page 18: ... a Heat Cool Auto Heat or Auto Cool Mode Action time for this mode minutes Duration of Power Mode in minutes once started Setpoint delta increase HEAT or decrease COOL in Celsius Number of degrees Celsius that will increase in Heat Mode or decrease in Cool Mode while in Power Mode Fan Speed for this mode Fan Speed that will be set in the unit while in Power Mode 4 3 2 Enable use of ECONOMY mode Th...

Page 19: ... the unit while in EconoMode 4 3 3 Enable use of ADDITIONAL HEATING mode This parameter shows hides the Control_ Start Additional Heat Mode and Status_ Additional Heat Mode communication objects The Additional Heating Mode lets change the Setpoint Temperature and the Fan Speed within a given period of time o If set to no the objects will not be shown o If set to yes the Control_ Start Additional H...

Page 20: ...given period of time o If set to no the objects will not be shown o If set to yes the Control_ Start Additional Cool Mode and Status_ Additional Cool Mode objects and new parameters will appear When a 1 value is sent to the Control_ communication object Additional Cooling Mode will be enabled and the Status_ object will return this value When a 0 value is sent to the Control_ communication object ...

Page 21: ...accessible in Indoor unit This parameter lets choose if the unit has Fan Speed control available or not Figure 4 12 Parameter detail o If set to no all the parameters and communication objects for the Fan Speed will not be shown o If set to yes all the parameters and communication objects if enabled in the parameters dialog for the Fan Speed will be shown Important Read the documentation of your i...

Page 22: ...speed With this parameter is possible to change de DPT for the Control_ Fan Speed and Status_ Fan Speed byte type communication objects Datapoints Scaling DPT_5 001 and Enumerated DPT_5 010 can be selected Important The communication objects shown in this section may be different depending on the number of fan speeds available although they all share the same communication object number o When Enu...

Page 23: ...ntrol_ object and the value returned by the Status_ object Important Read the documentation of your indoor unit to check how many fan speeds are available 4 4 5 Enable use of object for Fan Speed This parameter shows hides the Control_ Fan Speed communication object which lets increase decrease the indoor unit fan speed by using two different datapoint types o If set to no the object will not be s...

Page 24: ...ng Control_ Fan Speed object as shown in the discontinuous segment at the picture below Roll over Speed at upper lower limit This parameter lets choose if roll over will be enabled yes or disabled no for the Control_ Fan Speed object 4 4 6 Enable Fan Speed Manual Auto objects for Control and Status This parameter shows hides the bit type Control_ Fan Speed Manual Auto objects o If set to no the Co...

Page 25: ...Speed objects for Status This parameter shows hides the bit type Status_ Fan Speed objects o If set to no the objects will not be shown o If set to yes the Status_ Fan Speed objects for Speed 1 Speed 2 Speed 3 if available and Speed 4 if available will appear When a Fan Speed is enabled a 1 value is returned through its bit type object 4 4 9 Enable use of Text object for Fan Speed This parameter s...

Page 26: ...will appear This object lets change the indoor unit fan speed but it uses a different data type It is used to maintain compatibility with old gateway models 4 5 Vanes Up Down Configuration dialog Figure 4 18 Vanes Up Down Configuration dialog All the parameters in this section are related with the Vanes Up Down properties and communication objects 4 5 1 Indoor unit has U D Vanes This parameter let...

Page 27: ...er lets choose if the indoor unit has Auto Vanes U D available or not Figure 4 21 Parameter detail o If set to no all the parameters and communication objects for the Auto Vanes U D will not be shown o If set to yes a new parameter will appear Find more information on section 2 5 8 Enable Vanes U D Man Auto objects for Control and Status Figure 4 22 Parameter detail Important Read the documentatio...

Page 28: ...bigger than 4 or 5 when available is sent to the Control_ object then the higher Position will be selected o When Scaling DPT 5 001 is selected Control_ Vane Up Down and Status_ Vane Up Down communication objects for this DPT will appear The next table shows the range of values that can be sent through the Control_ object and the value returned by the Status_ object Important Read the documentatio...

Page 29: ...UTO function is included yes or not no in the sequence when using Control_ Vanes U D object as shown in the discontinuous segment at the picture below Does sequence include SWING vanes Up Down This parameter lets choose if SWING function is included yes or not no in the sequence when using Control_ Vanes U D object as shown in the discontinuous segment at the picture below Roll over Vanes at upper...

Page 30: ... no the objects will not be shown o If set to yes the Status_ Vanes U D objects for each Position will appear When a Vanes Position is enabled a 1 value is returned through its bit type object 4 5 8 Enable Vanes U D Man Auto objects for Control and Status This parameter shows hides the Control_ Vanes U D Man Auto and Status_ Vanes U D Man Auto communication objects o If set to no the objects will ...

Page 31: ...ol_ Vanes U D Swing and Status_ Vanes U D Swing objects will appear When a 1 value is sent to the Control_ communication object Vanes Up Down will be in Auto mode and the Status_ object will return this value When a 0 value is sent to the Control_ communication object Vanes Up Down will be in Manual mode and the first position will be enabled The Status_ object will return this value 4 5 10 Enable...

Page 32: ...compatibility with old gateway models 4 6 Temperature Configuration dialog Figure 4 25 Default Temperature Configuration dialog All the parameters in this section are related with the Temperature properties and communication objects 4 6 1 Periodic sending of Status_ AC Setp This parameter lets change the interval of time in seconds from 0 to 255 at the end of which the AC setpoint temperature is s...

Page 33: ...This parameter will only be available for the only cyclically and cyclically and on change options and let s you change the interval of time in seconds from 1 to 255 at the end of which the AC return temperature is sent to the KNX bus 4 6 3 Enable use of object for Setpoint Temp This parameter shows hides the Control_ Setpoint Temp communication object which lets change the indoor unit setpoint te...

Page 34: ...r the setpoint temperature Control_ Set Temp Upper limit ºC This parameter lets to define the upper limit for the setpoint temperature Important If a setpoint temperature above the upper defined limit or below the lower defined limit is sent through the Control_ Setpoint Temperature object it will be ALWAYS applied the limit defined Important When limits are enabled any setpoint temperature sent t...

Page 35: ...he Control_ Setpoint Temperature and Control_ Ambient Temperature objects are written at least once from the KNX installation After that they are kept always consistent Note that this formula will always drive the AC indoor unit demand in the right direction regardless of the operation mode Heat Cool or Auto 4 7 Scene Configuration dialog Figure 4 28 Parameter detail All the parameters in this sec...

Page 36: ...ol_ Save Exec Scene and all the Control_ Store Scene if enabled communication objects o If set to no the communication objects will not be shown o If set to yes the communication objects and a new parameter will appear To store a scene through the byte type object a value from 128 to 132 has to be sent to the object correponding each one to a different scene i e 128 Scene 1 132 Scene 5 Figure 4 30...

Page 37: ...cute a scene by using these objects a 1 value has to be sent to the scene s object we want to execute i e to execute scene 4 a 1 has to be sent to the Control_ Execute Scene 4 object 4 7 4 Scene x preset This parameter lets define a preset for a scene the following description is valid for all the scenes Figure 4 32 Parameter detail o If set to no the preset for the scene x will be disabled o If s...

Page 38: ... unchanged Scene x Value for Vane U D if available This parameter lets choose the vane position of the indoor unit when the scene is executed The following options are available VANES U D AUTO if available VANES U D POS 1 VANES U D POS 2 VANES U D POS 3 VANES U D POS 4 VANES U D POS 5 if available VANES U D SWING or unchanged Scene x Value for Setp Temp ºC This parameter lets choose the setpoint t...

Page 39: ...ommunication objects 4 8 1 Enable use of Open Window Switch off timeout function This parameter shows hides the Control_ Switch Off Timeout communication object which lets Start Stop a timeout to switch off the indoor unit o If set to no the object will not be shown o If set to yes the Control_ Switch Off Timeout object and new parameters will appear If a 1 value is sent to this object and the ind...

Page 40: ...hile the window is open will be saved but not applied These commands will be used in the next parameter if set to yes Reload last On Off val once window is closed If set to no once the switch off timeout is stopped any value will be reloaded If set to yes once the switch off timeout is stopped the last On Off value sent will be reloaded If a 1 value is sent to the Control_ Switch Off Timeout objec...

Page 41: ...to save energy decreasing the setpoint when in Heat mode or increasing the setpoint when in Cool mode Also new parameters will appear Figure 4 37 Parameter detail Temp delta decrease HEAT or increase COOL ºC This parameter lets configure the delta temperature increase or decrease that will be applied when the timeout has elapsed Important When there is occupancy again after the application of a de...

Page 42: ...tinguished a delta temperature will be applied decreasing the setpoint when in Heat mode or increasing the setpoint when in Cool mode Also new parameters will appear Temp delta decrease HEAT or increase COOL ºC This parameter lets configure the delta temperature that will be applied when the timeout is extinguished Important When there is occupancy again after the application of a delta the same d...

Page 43: ...ol_ Occupancy object after the timeout period the indoor unit will turn on If a 0 value is sent to the Control_ Occupancy after the timeout period no action will be performed 4 8 3 Enable use of SLEEP timeout This parameter shows hides the Control_ Sleep Timeout communication object which lets start a timeout to automatically turn off the indoor unit o If set to no the object will not be shown o I...

Page 44: ... objects 4 9 1 Enable use of Input x This parameter enables the use of the Input x and shows hides the Status_ Inx communication object s which will act as configured in the Function parameter o If set to no the objects will not be shown o If set to yes the Status_ Inx object s and new parameters will appear 4 9 2 Contact type This parameter lets choose the behavior that will have the binary input...

Page 45: ... input can be disabled using the value 1 and enabled using the value 0 4 9 5 Function This parameter lets choose the function that will have the binary input There are 7 different functions available Switching Dimming Shutter Blind Value Execute Scene internal Occupancy internal and Window Contact internal o When Switching is selected the communication object and new parameters for the Input x wil...

Page 46: ...his parameter lets select the value that the Binary Input x will send on a rising edge contact activated When On is selected the binary input will always send telegrams with a 1 value When Off is selected the binary input will always send telegrams with a 0 value When Toggle On Off is selected the binary input will send a 1 value after a 0 value and viceversa When No action is selected the binary ...

Page 47: ...appear see below When Never is selected cyclical sending will be disabled Period for cyclical sending seconds This parameter lets configure a time in seconds for the cyclical sending Figure 4 44 Parameter detail o When Dimming is selected the communication objects and new parameters for the Input x will appear as shown below Figure 4 45 Parameter detail Send telegram after bus recovery This parame...

Page 48: ...an increase step for a long operation When Off decrease is selected the binary input will always send telegrams with a 0 value for a short operation and an decrease step for a long operation When Toggle On Off increase decrease is selected o For the short operation the binary input will send a 1 value after a 0 value and viceversa o For the long operation the binary input will send an increase ste...

Page 49: ...ew parameters for the Input x will appear as shown below Figure 4 47 Parameter detail Send telegram after bus recovery This parameter lets select if the Binary Input x will send a telegram or not after a bus recovery and the type of telegram sent if enabled When No action is selected no telegram will be sent after a bus recovery When Move Up is selected the binary input will send a telegram with a...

Page 50: ...occurs contact deactivated during the T1 no action will be performed If the rising edge is maintained longer than T1 a move telegram will be sent and will start a time called T2 If a falling edge occurs during the T2 a step stop telegram will be sent If a falling edge occurs after T2 no action will be performed When Move Step is selected On a rising edge a move telegram will be sent and will begin...

Page 51: ... Fixed value is selected the binary input will send a telegram with the same value configured in the Value on rising edge parameter Also a new parameter will appear see below Figure 4 50 Parameter detail Sending delay after a bus recovery seconds This parameter lets configure a delay in seconds that will be applied after a bus recovery and after which a telegram will be sent DPT to be sent This pa...

Page 52: ...Scene 1 when contact is activated The scene 1 will be activated on a rising edge This scene MUST be defined in the Scene Configuration dialog as an internal preset o When Occupancy internal is selected the binary input x will have the same behavior as configured in the parameter Enable use of Occupancy function inside the Switch Off Timeouts Configuration dialog Figure 4 53 Parameter detail o When...

Page 53: ... 4 x Potential free binary inputs Signal cable length 5m uschielded may be extended up to 20m with twisted Compliant with the following standards IEC61000 4 2 level 4 15kV air discharge 8kV contact discharge MIL STD 883E Method 3015 7 class3B Configuration Configuration with ETS Operating Temperature From 25ºC to 85ºC Storage Temperature From 40ºC to 85ºC Isolation Voltage 4000V RoHS conformity Co...

Page 54: ...registered trademark of Intesis Software SLU URL Email tel http www intesisbox com info intesisbox com 34 938047134 54 63 6 AC Unit Types compatibility A list of Mitsubishi Electric indoor unit models compatible with ME AC KNX 1i and their available features can be found in https www intesisbox com intesis support compatibilities IntesisBox_ME AC xxx 1_AC_Compatibility pdf ...

Page 55: ...2 or connector 51CM opened 4118 Error in the anti phase detector electronic board 4124 Connector 49L opened 4210 Cut due to over current of compressor 4220 Voltage anomaly 4230 Radiator panel temperature anomaly TH8 5101 Ambient temperature probe anomaly TH1 indoor unit 5102 Liquid probe anomaly TH2 5103 Cond Evap probe anomaly TH5 5104 Error detection in discharge temperature 5105 Outdoor probe e...

Page 56: ...y 2 Control_ Mode Cool Heat 1 bit DPT_Heat Cool 1 100 W T 0 Cool 1 Heat 3 Control_ Mode Cool On 1 byte DPT_Scaling 5 001 W T 0 Off 0 1 100 On Cool 4 Control_ Mode Heat On 1 byte DPT_Scaling 5 001 W T 0 Off 0 1 100 On Heat 5 Control_ Mode Auto 1 bit DPT_Bool 1 002 W T 1 Auto 6 Control_ Mode Heat 1 bit DPT_Bool 1 002 W T 1 Heat 7 Control_ Mode Cool 1 bit DPT_Bool 1 002 W T 1 Cool 8 Control_ Mode Fan...

Page 57: ...te DPT_Enumerated 5 010 W T 1 Speed 1 2 Speed 2 3 Speed 3 4 Speed 4 12 Control_ Fan Speed Manual Auto 1 bit DPT_Bool 1 002 W T 0 Manual 1 Auto 13 Control_ Fan Speed 1 1 bit DPT_Bool 1 002 W T 1 Set Fan Speed 1 14 Control_ Fan Speed 2 1 bit DPT_Bool 1 002 W T 1 Set Fan Speed 2 15 Control_ Fan Speed 3 1 bit DPT_Bool 1 002 W T 1 Set Fan Speed 3 16 Control_ Fan Speed 4 1 bit DPT_Bool 1 002 W T 1 Set F...

Page 58: ...ion 4 24 Control_ Vanes U D Pos5 1 bit DPT_Bool 1 002 W T 1 Set Position 5 25 Control_ Vanes U D Swing 1 bit DPT_Bool 1 002 W T 0 Off 1 Swing 26 Control_ Vanes U D 1 bit DPT_Step 1 007 W 0 Decrease 1 Increase Control_ Vanes U D 1 bit DPT_UpDown 1 008 W 0 Up 1 Down Temperature 27 Control_ Setpoint Temperature 2 byte DPT_Value_Temp 9 001 W T ºC 28 Control_ Setpoint Temp 1 bit DPT_Step 1 007 W 0 Decr...

Page 59: ...to 4 Exec Scene 1 to 5 128 to 132 Save Scene 1 to 5 40 Control_ Store Scene1 1 bit DPT_Bool 1 002 W 1 Store Scene 41 Control_ Store Scene2 1 bit DPT_Bool 1 002 W 1 Store Scene 42 Control_ Store Scene3 1 bit DPT_Bool 1 002 W 1 Store Scene 43 Control_ Store Scene4 1 bit DPT_Bool 1 002 W 1 Store Scene 44 Control_ Store Scene5 1 bit DPT_Bool 1 002 W 1 Store Scene 45 Control_ Execute Scene1 1 bit DPT_B...

Page 60: ... bit DPT_Switch 1 001 R T 0 Off 1 On Mode 55 Status_ Mode 1 byte DPT_HVACContrMode 20 105 R T 0 Auto 1 Heat 3 Cool 9 Fan 14 Dry 56 Status_ Mode Cool Heat 1 bit DPT_Heat Cool 1 100 R T 0 Cool 1 Heat 57 Status_ Mode Auto 1 bit DPT_Bool 1 002 R T 1 Auto 58 Status_ Mode Heat 1 bit DPT_Bool 1 002 R T 1 Heat 59 Status_ Mode Cool 1 bit DPT_Bool 1 002 R T 1 Cool 60 Status_ Mode Fan 1 bit DPT_Bool 1 002 R ...

Page 61: ...1 002 R T 1 Fan is in speed 2 67 Status_ Fan Speed 3 1 bit DPT_Bool 1 002 R T 1 Fan is in Speed 3 68 Status_ Fan Speed 4 1 bit DPT_Bool 1 002 R T 1 Fan is in Speed 4 69 Status_ Fan Speed Text 14 byte DPT_String_8859_1 16 001 R T ASCII String Vanes Up Down 70 Status_ Vanes U D 4 pos 1 byte DPT_Scaling 5 001 R T 25 Pos1 50 Pos2 75 Pos3 100 Pos4 Status_ Vanes U D 4 pos 1 byte DPT_Enumerated 5 010 R T...

Page 62: ... Error Alarm 1 bit DTP_Alarm 1 005 R T 0 No Alarm 1 Alarm 82 Status_ Error Code 2 byte Enumerated R T 0 No Error Any other see user s manual 83 Status_ Error Text code 14 byte DPT_String_8859_1 16 001 R T 4 char ME Error Empty none Special Modes 84 Status_ Power Mode 1 bit DPT_Switch 1 001 R T 0 Off 1 On 85 Status_ Econo Mode 1 bit DPT_Switch 1 001 R T 0 Off 1 On 86 Status_ Additional Heat 1 bit D...

Page 63: ...2_Ucount 7 001 R T 2 byte unsigned value Status_ Inx Value 2 byte DPT_Value_2_Count 8 001 R T 2 byte signed value Status_ Inx Value 2 byte DPT_Value_Temp 9 001 R T Temperature ºC Status_ Inx Value 4 byte DPT_Value_4_Ucount 12 001 R T 4 byte unsigned value Status_ Inx Dimming Step 1 bit DPT_Control_Dimm 3 007 R T Dimming step Status_ Inx Shut Blind Move 1 bit DPT_UpDown 1 008 R T 0 Move Up 1 Move D...

Reviews: