
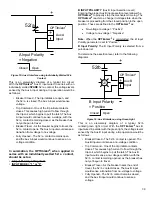


52
Example for Calculating Accumulated Duty Wear
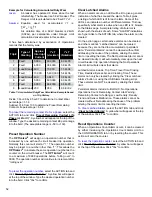
Given:
A breaker has operated 8 times since the last
refurbishing. The breaker is a 38 kV breaker. The
Danger Limit is calculated to be 2.5e+07
I
2
x T
.
Assume:
Equation used for accumulated
I
2
T
is:
∑ W
N
= (I
N
)
2
T
Arc duration time of a 69kV breaker is 24mS
(0.024s), per explanation under Danger Limit
calculation derived earlier in this section.
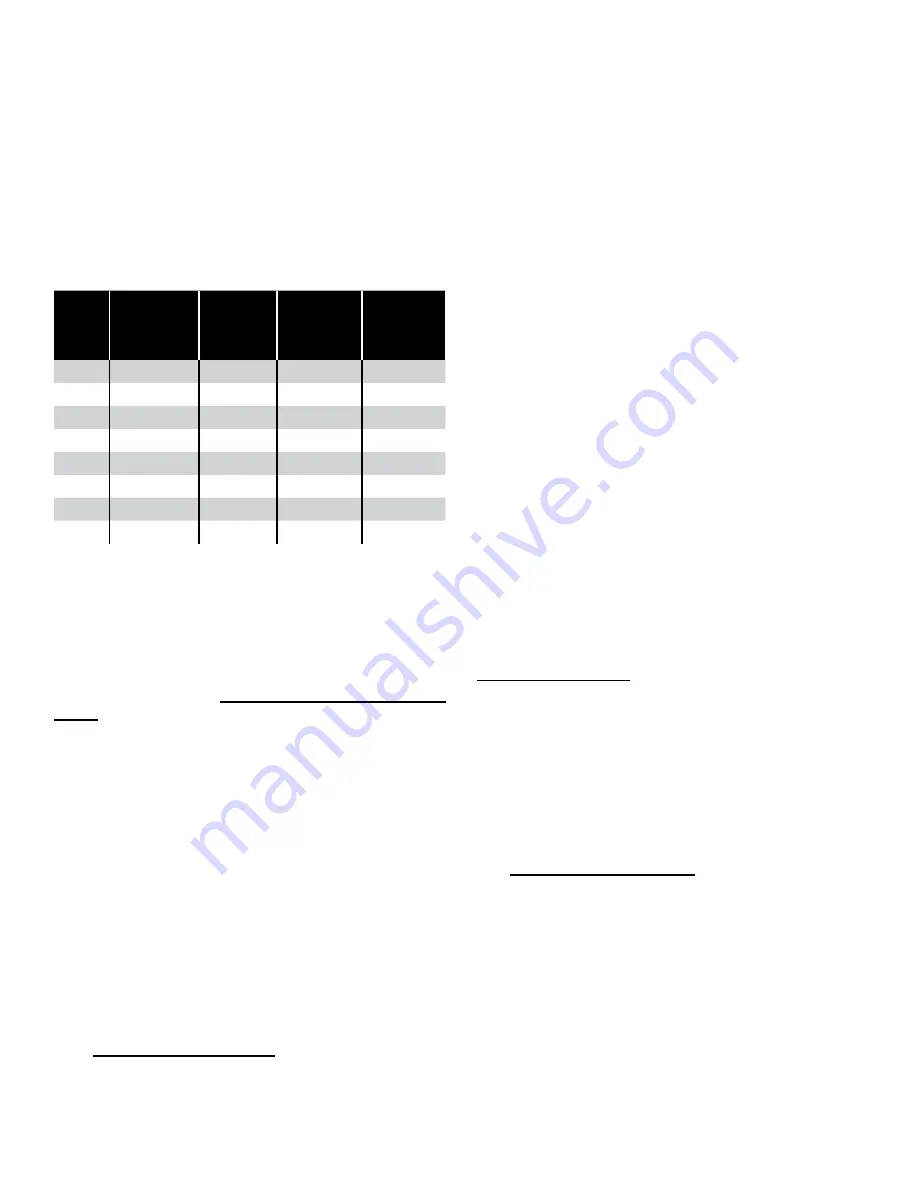
It has been determined by examination of Operations
records that the history was:
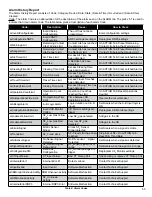
Trip #
Type of
Clearing
Approx.
Interrupt
Current
I
2
x T
(decimal)
I
2
x T
(Notation)
1
Fault
5,000
600,000
6.0 E+05
2
Fault
4,000
384,000
3.8 E+05
3
Load Break 800
15,360
1.5 E+04
4
Fault
15,000
5,400,000 5.4 E+06
5
Load Break 400
3,840
3.8 E+03
6
Fault
5,000
600,000
6.0 E+05
7
Fault
6,000
864,000
8.6 E+05
8
Load Break 200
960
9.6 E +02
Table 7: Accumulated Duty Wear Calculation Example based
on Trip History
Divide 7.9 e+06 by 2.5 e+07 to determine Contact Wear
percentage = 31.6
Subtract 31.6 from 100 to determine Preset Remaining
Contact Life percentage = 68.4
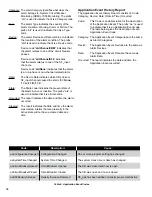
To preset the remaining contact life for a phase
, select the
ACTION tab and click “
Preset Remaining Contact Life
Phase (A, B or C)
”. A yellow bar will appear at the top of the
window. Type the desired remaining contact life percentage
into the field (The acceptable range is -50 to +100).
Preset Operation Number
The
OPTI
mizer
2
will assign an operation number that is
increased by one with each circuit breaker trip operation.
Normally this count will start at “1”. The operation number
may be preset to a number other than “1”. This allows the
OPTI
mizer
2
to indicate the same operation number as the
counter on the circuit breaker. The
OPTI
mizer
2
will count
to a maximum of 9999 operations before “rolling over” to
0000. The operation number will continue to increment after
“rolling over”.
To preset the operation number
, select the ACTION tab and
click “
Preset Operation Number
”. A yellow bar will appear
at the top of the window. Type the desired operation number
into the field. Click "Yes" to confirm.
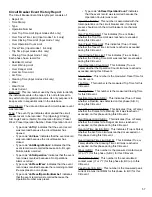
Clear Latched Alarms
When an alarm occurs, an LED will be lit to give a general
indication of what has caused the alarm. Table 4 gives
a listing of which LED is lit for each alarm. Some of the
LED’s can indicate a number of different alarms. To know
specifically what alarm is active when an LED is lit, browse
to the Status page. A complete listing of all alarms is
shown with the status of each. Some "ALARM" indications
are hyper-links to the ACTION tab, where the alarm can be
cleared.
On the action page, certain active alarms can be cleared
and others cannot. “Latched Alarms” can be cleared
because they are not tied to accumulated or persistent
data. “Persistent Alarms” cannot be cleared without first
addressing the cause of the problem, altering the alarm
limit or resetting the data. The No Operations Alarm cannot
be cleared directly. It will automatically clear upon the next
circuit breaker trip operation. Raising the No Operations
Alarm Limit will also clear that alarm.
Latched Alarms include: Trip Time; Travel Time; Closing
Time; Restrike; Excess Arc and Clearing Time. These
alarms can only be cleared by clicking the “Clear Latched
Alarms” button or using the USB Alarm Clearing script.
These alarms can NOT be cleared by altering their alarm
limit.
Persistent Alarms include: A-B LOGIC; No Operations;
Operations Count; Remaining Contact Life Warning;
Remaining Contact Life Danger; Low Density; Density
Trend and Sensor Malfunction. These alarms cannot be
cleared without first addressing the cause of the problem,
altering the alarm limit or resetting the data.
To Clear Latched Alarms
, select the ACTION tab and click
“
Clear Latched Alarms
”. A yellow bar will appear at the top
of the window. Click "Yes" to confirm.
Reset Operations Counter
When an Operations Count Alarm occurs, it can be cleared
by either increasing the Operations Count Alarm Limit on
the CONFIGURATION tab, or by resetting the counter. This
action will zero the counter.
To reset the operation counter
, select the ACTION tab and
click “
Reset Operations Counter
”. A yellow bar will appear
at the top of the window. Click "Yes" to confirm.


