background image


8

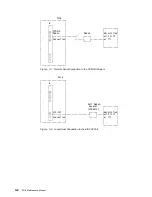
Remove the screws from the rack-mounting brackets.

2

4

1

3

9

Hold the 2216 from the top of the back and bottom of the front, and then slide it forward out of the
rack.

10

Place the 2216 on a table.


Chapter 2. Removal and Replacement Procedures

2-19

Summary of Contents for Nways 2216

Page 1: ...2216 Nways Multiaccess Connector ÉÂÔ Service and Maintenance Manual SY27 0350 02 ...

Page 2: ......

Page 3: ...2216 Nways Multiaccess Connector ÉÂÔ Service and Maintenance Manual SY27 0350 02 ...

Page 4: ...he back of this publication If the form has been removed address your comments to Department CGF Design Information Development IBM Corporation PO Box 12195 RESEARCH TRIANGLE PARK NC 27709 9990 USA When you send information to IBM you grant IBM a non exclusive right to use or distribute the information in any way it believes appropriate without incurring any obligation to you Copyright Internation...

Page 5: ...tart 2 1 Equipment You Need 2 1 Safety Precautions 2 1 Disconnecting the Power Cord 2 1 Reconnecting the Power Cord 2 2 2216 FRU Exchange 2 3 Exchanging a Power Supply 2 4 Exchanging the System Card 2 5 Exchanging the Hard Drive on the System Card 2 8 Installing Operational Software on the New Hard Drive 2 10 Exchanging the Memory on the System Card 2 11 Exchanging the Fan Tray 2 13 Exchanging an ...

Page 6: ...ommand Line Interface Operational Diagnostics 5 2 Testing the Adapters 5 8 Powering On the IBM 2216 5 8 Running Diagnostics on the Adapter 5 9 ESCON only Tests 5 12 Run the Light Test on the New Fiber Optic Cable 5 12 ESCON Interactive Test Options 5 15 ESCON Optical Power Measurement Test 5 16 Appendix A Hardware Error Codes A 1 Appendix B Parts Listing B 1 Assembly 1 Final Assembly 2216 Model 40...

Page 7: ...dding an Adapter at Initial Configuration F 4 Adding an Adapter after Initial Configuration F 5 Running Quick Configuration F 6 Disabling an Adapter Port F 6 Enabling an Adapter Port F 6 Suspend Traffic on an Adapter Port F 7 Resume Traffic on an Adapter Port F 7 Removing and Deleting an Adapter F 8 Up to Date IBM 2216 Information F 8 Disabling Interfaces that Have WAN Reroute Enabled F 8 Enabling...

Page 8: ...vi 2216 Maintenance Manual ...

Page 9: ...f the 2216 Run firmware and operational diagnostics Who Should Read This Manual This manual is for the use of the person providing level 1 remote support of the IBM 2216 Also IBM service representatives will refer to this manual when servicing the 2216 on site The person using this manual should be Trained to service the 2216 Familiar with the configuration and operation of the 2216 Copyright IBM ...

Page 10: ...Common Tasks and the IBM 2216 Library viii 2216 Maintenance Manual ...

Page 11: ...tallation GA27 4106 2216 Nways Multiaccess Connector Installation and Initial Configuration Guide This booklet explains how to install the IBM 2216 and verify its installation GX27 3988 2216 Nways Multiaccess Connector Hardware Configuration Quick Reference This reference card is used for entering and saving hardware configuration information used to determine the correct state of an IBM 2216 Diag...

Page 12: ...C30 3885 Nways Multiprotocol Access Services Protocol Configuration and Monitoring Reference Volume 2 These books describe how to access and use the Nways Multiprotocol Access Services command line user interface to configure and monitor the routing protocol software shipped with the product They include information about each of the protocols that the device supports SC30 3682 Nways Event Logging...

Page 13: ...s and Corrections This page provides information on engineering changes clarifications and fixes that were implemented after the books were printed http www networking ibm com 216 216lib html relnts About This Manual xi ...

Page 14: ... HSSI LIC 288 10 100 Mbps Ethernet LIC 287 ESCON Channel from Release 1 1 LIC 294 high performance 155 Mbps ATM multimode fiber MMF LIC 295 high performance 155 Mbps ATM single mode fiber SMF System card 200 Mhz with 64 MB base memory and additional 64 MB memory option Software Updates Protocol Enhancements IP IPX Bridging APPN Appletalk DLSw Infrastructure Enhancements Serviceability Server Enhan...

Page 15: ...nt limit circuits for the 12 V and 48 V outputs at the same time System Card LEDs After power on reset POR the green and yellow LEDs will remain on until successful completion of the power on tests which will be under 2 minutes The green LED will begin blinking which indicates that the code is being loaded into memory The green LED will be switched on to indicate that the system code is operationa...

Page 16: ...LED Indicators The IBM 2216 has a number of light emitting diodes LEDs that indicate how the unit is functioning Figure 1 1 Power Supply System Card and Adapter Card LEDs 1 2 2216 Maintenance Manual ...

Page 17: ...low On Adapter has a fault Wrong slot Yellow On Adapter is in the wrong slot The wrong slot LED is ON only when an adapter that is plugged into the 2216 violates the plugging rules described in Appendix E Adapter Plugging Defaults on page E 1 Green port1 On Port is operating normally enabled and configured Off Port is not configured or is disabled For the ESCON adapter Blinking The optical power m...

Page 18: ...rs on page 1 2 for LED status and indicators for the IBM 2216 See 2216 FRU Exchange on page 2 3 for information on removal and replacement procedures for field replaceable units FRUs See Chapter 4 Using 2216 Firmware or Chapter 5 Using Operational Diagnostics depending on how you are connected to the IBM 2216 to run hardware diagnostics before the IBM 2216 has been configured Diagnosing Operationa...

Page 19: ...s on the 2216 should have the following status when operating normally Table 1 1 Machine LEDs When Operational LED Status Power supply overcurrent yellow OFF Power supply DC indicator ON Power supply AC indicator ON System card PCMCIA with device installed Port 1 yellow OFF System card PCMCIA with device installed Port 2 yellow OFF System card green ON System card yellow OFF All adapter green LEDs...

Page 20: ... of airflow Fan motor problem Memory error with DIMM slot y Replace the system card See Exchanging the System Card on page 2 5 Table 1 3 LED and symptoms LED Status Action AC indicator LED on a power supply is OFF Step 005 DC indicator LED on a power supply is OFF and the AC indicator is ON Step 008 on page 1 7 Overcurrent Indicator LED on power supply is ON Step 011 on page 1 7 Adapter yellow fau...

Page 21: ...your support center for assistance 007 Restart the verification procedure Go to Step 001 on page 1 5 008 The DC indicator on a power supply is OFF Replace the power supply See Exchanging a Power Supply on page 2 4 Is the problem corrected Yes No 009 Contact your support center for assistance 010 Restart the verification procedure Go to Step 001 on page 1 5 011 The Overcurrent LED on a power supply...

Page 22: ... Go to Step 001 on page 1 5 021 The yellow Wrong Slot LED indicator on an adapter is ON If adapter LIC 280 or LIC 281 is in slot 3 then slot 4 must be empty If adapter LIC 280 or LIC 281 is in slot 4 then slot 3 must be empty If adapter LIC 280 or LIC 281 is in slot 7 then slot 8 must be empty If adapter LIC 280 or LIC 281 is in slot 8 then slot 7 must be empty The Wrong Slot LED indicates that on...

Page 23: ...problem with the ESCON adapter run the list test see page 5 12 025 A yellow LED on the system card is ON Is the Hard Drive LED ON Yes No 026 Is a PCMCIA Slot 1 or 2 LED ON Yes No 027 If system card fault yellow LED is on the system card is defective Replace it See Exchanging the System Card on page 2 5 Restart the verification procedure Go to Step 001 on page 1 5 028 The LED will be ON if there is...

Page 24: ...r High ambient electromagnetic interference EMI levels Power line disturbances Defective 2216 system board 001 Does the 2216 go to the active state within 2 minutes of resetting or powering on Active state is indicated by the green system LED on and the yellow system LED off Yes No 002 Go to Step 001 on page 1 5 003 Go to Step 004 004 Press the service terminal break key sequence and press Enter Y...

Page 25: ...This action causes the 2216 to autobaud Enter Ctrl c The prompt should be displayed If the console baud rate is satisfactory you can reboot the 2216 and the terminal will work If the console baud rate is unsatisfactory and you want to change the rate 1 Enter bc at the prompt and select an IBD boot module 2 Wait for the Config only prompt to be displayed 3 Enter set baudrate 0 at the Config only pr...

Page 26: ...EIA 232 cable between the terminal and the 2216 grounded correctly and shielded Yes No 016 Ground or shield the cable correctly or replace the cable Go to Step 001 on page 1 5 017 Is the terminal or the terminal emulator functioning correctly Yes No 018 Replace the terminal or the terminal emulator Go to Step 001 on page 1 5 019 Is the 2216 in an area with high ambient electromagnetic interference...

Page 27: ... the system board Go to Step 001 on page 1 5 022 Install an uninterruptible power supply to minimize the effects of the power fluctuations Go to Step 001 on page 1 5 023 Move the 2216 to a more isolated area Go to Step 001 on page 1 5 024 Go to Step 001 on page 1 5 Chapter 1 Problem Determination 1 13 ...

Page 28: ... Port ISDN Pri T1 57G8097 LIC 284 85H4894 2284 1 Port 155 Mbps MMF ATM 16G5609 LIC 286 86H0967 2286 1 Port FDDI two 16G5609 LIC 287 85H4878 2287 1 Port ESCON Channel 5605670 fiber optic jumper cable 14F3797 LIC 288 86H1005 2288 1 Port 10 100 Mbps Ethernet 21H4811 LIC 289 85H9703 2289 1 Port HSSI 86H0974 for Adapter 86H0973 for Cable LIC 290 85H4874 2290 6 Port V 35 V 36 CRD 72F0168 V 35 BRICK 72F0...

Page 29: ...or the wrap plug usage for LICs with multiple wrap plugs 71G3496 OCTOPUS CABLE 6 LIC 282 WRAP PLUG 33F8985 8 PORT EIA 232 WRAP PLUG 68F7208 Brick 72F0167 LIC 291 06H3358 WRAP PLUG 52G3378 8 PORT X 21 CABLE WRAP PLUG 06H3357 Figure 1 2 LIC 282 and LIC 291 Wrap Support Chapter 1 Problem Determination 1 15 ...

Page 30: ... 6 LIC 290 WRAP PLUG 73H2508 6 PORT V 35 V 36 WRAP PLUG 72F0168 V 35 V 36 BRICK LIC 290 05F2044 WRAP PLUG 72F0167 6 PORT V 35 V 35 CABLE V 35 V 36 WRAP PLUG 72F0168 V 35 V 36 Figure 1 3 LIC 290 Wrap Support 1 16 2216 Maintenance Manual ...

Page 31: ...d read the common safety precautions and then proceed Equipment You Need You need the following equipment to remove and replace the FRUs in the IBM 2216 7 mm nut driver 5 32 inch nut driver Flat blade screwdriver Screw starter optional Safety Precautions DANGER To avoid a shock hazard do not connect or disconnect any cables or perform installation maintenance or reconfiguration of this product dur...

Page 32: ...ord must be connected to a properly wired and grounded receptacle Any equipment to which this product will be attached must also be connected to properly wired receptacles Connect the power cord to the IBM 2216 and then to the ac power outlet 2 2 2216 Maintenance Manual ...

Page 33: ...the operator at the operator console Each time you change a FRU carefully record its location and check that the attached cables are correctly labeled and reconnected In Table 2 1 find the FRU you want to exchange and go to the procedure indicated Table 2 1 FRU Exchange FRU Name Go to Power supply Exchanging a Power Supply on page 2 4 System card Exchanging the System Card on page 2 5 Hard drive E...

Page 34: ...move the power supply by loosening the screws at the top and bottom and pulling the handle 4 Install the new power supply The power supply will slide into place on metal rails in the unit 5 Attach the power cord 6 Switch on the power 7 Verify the LEDs See LED Indicators on page 1 2 8 Notify the network administrator that you are finished repairing the 2216 2 4 2216 Maintenance Manual ...

Page 35: ...o 32 MB DIMMs 64 MB of memory whereas the redesigned system cards supports two 64 MB DIMMs 128 MB of memory If you replace the old system part number 75H5081 or 85H7916 card with the new card you need to upgrade the firmware to allow the use of the new memory DIMMs 1 Switch off each power supply 2 Label the cables on the system card Unplug the cables and the PCMCIA modem or other PCMCIA cards 3 Lo...

Page 36: ... Exchanging the Memory on the System Card on page 2 11 and put it on the new system card 7 Install the new system card Make sure the card is aligned with the plastic grooves and then slide it in until it is flush with the box Hold the locking latches so that they are perpendicular to the face of the system card With the card in full contact with the rear of the IBM 2216 press the locking latches i...

Page 37: ...and follow the procedures for using the Utilities option a Under Utilities select option 9 View or Set Vital Product Data b Select slot B c Select the Hardware Vital Product Data option d Type in the box serial number 13 Notify the network administrator that you are finished repairing the 2216 Chapter 2 Removal and Replacement Procedures 2 7 ...

Page 38: ...support the hard drive to avoid damaging the pins when the screws are removed 2 Lay the system card on a soft non conductive surface 3 On the bottom of the system card remove the four screws with a screw starter while holding the hard drive in place 4 On the reverse side of the system card disconnect the drive from the connector and lift it off the system card 2 8 2216 Maintenance Manual ...

Page 39: ... hard drive will be visible next to the hard drive connector on the system card Install the new hard drive by reversing steps 3 and 4 above Be sure to support the hard drive while installing the screws 6 Reinstall the system card as described in Exchanging the System Card on page 2 5 Chapter 2 Removal and Replacement Procedures 2 9 ...

Page 40: ...Select Test IDE devices c Press the F4 key for Parm Setup d Select Run Interactive Test and Stop on Error e Press F6 to begin the tests Attention The next step formats the hard disk and destroys all data on the hard disk f Select Format IDE device and press Enter g Return to step 3 4 Reload the firmware to the hard disk using Xmodem see Updating System Firmware on page 4 14 5 The hard drive is now...

Page 41: ...ing procedure If you are replacing DIMMs that you previously removed go to step 6 on page 2 12 a Remove the DIMM in its antistatic bag from its shipping container Attention Electrostatic discharge ESD can damage the static sensitive devices on circuit boards To avoid this kind of damage use the following precautions Do not remove the DIMM until you are ready to insert it into the 2216 Use correct ...

Page 42: ...d thumb place it connector edge down into the DIMM socket Applying slight pressure to the top edge of the DIMM move it forward until it is correctly aligned and snaps in place The lever will snap back into place as the DIMM is fully inserted 7 If your only task was to remove and replace or initially install a DIMM you are ready to reinstall the system card Go to Exchanging the System Card on page ...

Page 43: ...6s that do not have the Release 1 system card PN number 75H5081 or 85H7916 however you must install the new tray within 3 minutes of removing the defective tray to prevent overheating the IBM 2216 1 Loosen the two thumbscrews that secure the fan tray and remove the fan tray 2 Slide the new fan tray in until the tabs on the back of the fan tray are in the slots This aligns the connectors with the p...

Page 44: ... may become idle c If you are removing a serial adapter EIA 232E V 24 V 35 V 36 X 21 which are LICs 282 290 and 291 you need to disable the WAN Reroute process before you remove the adapter See Disabling Interfaces that Have WAN Reroute Enabled on page F 8 2 Label the cables for correct reconnection 3 Loosen the screws if present that secure the cable or cables 4 Remove the cable or cables Attenti...

Page 45: ...6 Remove the adapter from its location Chapter 2 Removal and Replacement Procedures 2 15 ...

Page 46: ...g Slot 8 Carefully position the notches of the adapter card in the appropriate adapter slot s upper and lower rails Then guide the adapter forward on the rails as pictured 9 Make sure the adapter card is aligned with the plastic grooves and then slide it in until the thumbscrews contact the frame 2 16 2216 Maintenance Manual ...

Page 47: ...rsists call the support center Otherwise continue 12 If you are replacing inserting a serial adapter EIA 232E V 24 V 35 V 36 X 21 which are LICs 282 290 and 291 and you went through the WAN Reroute disable procedure Disabling Interfaces that Have WAN Reroute Enabled on page F 8 you need to enable the WAN Reroute process See Enabling WAN Reroute after You Have Disabled it on page F 9 13 Replace the...

Page 48: ...ard should be in the area on the underside of the IBM 2216 on the left 5 CAUTION A fully populated IBM 2216 weighs about 43 1 kg 95 lb If the 2216 is rack mounted continue with step 6 otherwise go to step 11 on page 2 20 6 Remove the Power supplies loosen the screws on each component and pull the handle System card see Exchanging the System Card on page 2 5 Adapters see Exchanging an Adapter on pa...

Page 49: ...om the rack mounting brackets 2 4 1 3 9 Hold the 2216 from the top of the back and bottom of the front and then slide it forward out of the rack 10 Place the 2216 on a table Chapter 2 Removal and Replacement Procedures 2 19 ...

Page 50: ...ve the top panel To do this go to the rear of the 2216 Lift the top panel and then slide the panel toward you 13 On each side of the 2216 remove the three screws along the rear of the side panels of the 2216 that hold the backplane in place Top Rear O O O 2 20 2216 Maintenance Manual ...

Page 51: ...n Tray Area 15 Hold the backplane by the finger holes and lift it straight out of the 2216 16 Hold the new backplane by the finger holes and lower it gently into the 2216 17 Align the screw holes on the backplane with those on the sides of the box 18 Loosely install the top two screws on each side of the 2216 Chapter 2 Removal and Replacement Procedures 2 21 ...

Page 52: ... Align the five tabs on the top panel with the slots on the top front of the 2216 b Lower the top and then press it back into place c Reinstall the middle screw on each side 24 Reinstall and tighten the three screws that secure the top of the box to each side of the box 25 Mount the 2216 in the rack It is recommended that you use a screw starter here a If you have a shelf install it in the rack fi...

Page 53: ...l the fan tray Slide the fan tray in until the tabs on the back of the fan tray are in the slots This aligns the connectors with the plugs When the fan tray is flush with the box tighten the two screws Chapter 2 Removal and Replacement Procedures 2 23 ...

Page 54: ... remaining adapters Slide each adapter along the plastic grooves until it clicks into place See Exchanging an Adapter on page 2 14 for details 30 Finally install the power supplies The power supplies will slide into place by following metal rails in the box 31 Connect the cables and power cord to the power receptacle 32 Switch on the power 33 Verify the LEDs See LED Indicators on page 1 2 34 Notif...

Page 55: ...n You can set up both a local and a remote connection to the IBM 2216 However only one port can be active at any given time If a workstation is connected locally to the serial port and a call comes in over the PCMCIA modem priority is given to the call After the call the workstation being used to configure will have to log back into the IBM 2216 With local or remote connection you can use a telety...

Page 56: ... SLIP Connection or TTY Figure 3 1 Remote Serial Connection to the PCMCIA Modem 2216 B Null Modem Adapter 10H5570 EIA 232 Workstation with SLIP Connection or TTY Figure 3 2 Local Serial Connection to the EIA 232 Port 3 2 2216 Maintenance Manual ...

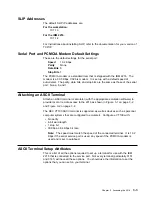
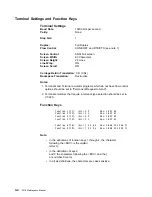
Page 57: ...riate emulation software to provide local or remote access to the 2216 as shown in Figure 3 1 on page 3 2 and Figure 3 2 on page 3 2 The DEC VT100 ASCII terminal is supported as well as devices such as personal computer systems that are configured to emulate it Configure a VT100 with No parity 8 bit word length 1 stop bit 300 bps 38 4 Kbps bit rate Note The speed must match the speed of the connec...

Page 58: ... set to Permanent Request to Send 2 Terminal emulators that require a terminal type selection should be set to VT 220 Function Keys Function 1 F1 Esc O P Hex 1B 4F 50 Function 2 F2 Esc O Q Hex 1B 4F 51 Function 3 F3 Esc O R Hex 1B 4F 52 Function 4 F4 Esc O S Hex 1B 4F 53 Function 6 F6 Esc 0 0 6 q Hex 1B 5B 30 30 36 71 Function 9 F9 Esc 0 0 9 q Hex 1B 5B 30 30 39 71 Note In the definitions of funct...

Page 59: ... storing two copies of its operational software and four copies of configuration information for each copy of the operational software Without interrupting the operation of the IBM 2216 you can store software or configuration files in it Changes to the configuration are activated in one of the following ways immediately after a timed interval or at the next restart Should the IBM 2216 fail when a ...

Page 60: ...3 6 2216 Maintenance Manual ...

Page 61: ...f and power on the IBM 2216 Note Make sure the screen size for your terminal emulation software is set to 80 columns by 24 rows Connection in Supervisory mode is a TTY using limited VT100 VT220 IBM 3151 or 3161 emulation connection You can transfer files using the Xmodem protocol for TTY Supervisory Attended Mode When the IBM 2216 is configured to come up in Attended mode you are given access to t...

Page 62: ...yright IBM Corporation 1996 All Rights Reserved System Management Services Select one 1 Manage Configuration 2 Boot Sequence Selection 3 Select Device to Test 4 Utilities Enter Esc Quit F1 Help F3 Reboot F9 Start OS Figure 4 1 Main Menu Panel The Function Keys As seen in Figure 4 1 various function keys appear in the lower part of the panel You can also use the Esc keys in combination with number ...

Page 63: ...all diagnostics are run on every boot attempt enabled The router skips Power On Self Test hardware diagnostics resulting in a faster boot time but less hardware error checking Stop On Error disabled The default When disabled the router proceeds booting the operating system without regard to diagnostic results enabled The router stops the boot sequence in the firmware if any of the POST diagnostic ...

Page 64: ...rial Port 4 COM2 x 2f8 PCMCIA Modem Boot Flags Fast Boot Disabled Stop On Error Disabled L2 Cache 512KB Installed PCI Slots Name of Adapter Slot Device ID Revision ID 060000 B 0037 02 060100 B 000a 03 Unknown 0001 010000 B 0100 01 060400 B 0022 01 060400 B 0022 01 Unknown 104c 060700 B ac15 01 ff0000 B 0046 00 Enter Esc Quit F1 Help Figure 4 2 System Configuration Information 4 4 2216 Maintenance ...

Page 65: ...th Boot Device Esc Quit 6 Display Current Settings 7 Restore Default Settings 8 Boot Other Device Enter Esc Quit F1 Help F3 Reboot F9 Start OS Figure 4 3 Boot Sequence Selection Panel 3 Select one of the options 1through 5 and press Enter The appropriate Boot Device Selection panel will be displayed Default boot devices are None IDE hard drive Network adapter IBM PCMCIA Modem Network adapter IBM S...

Page 66: ...e 1 Manage Current Boot Sequence 2 Boot Se 3 Select Your current boot sequence is 4 Utiliti 1 IDE Disk Drive ID 0 IBM DSOA 21080 2 PCMCIA Modem Not installed 3 EIA 232 Port ID 0 IBM SLIP EIA 232 Port 4 None 5 None Enter Enter Esc Quit F1 Help F3 Reboot F9 Start OS Figure 4 4 Current Boot Sequence 4 6 2216 Maintenance Manual ...

Page 67: ... panel is displayed Figure 4 5 Note The Select Device to Test panel is created dynamically depending on what diagnostics have been loaded but the items shown always appear Nways System Firmware Version 1 0 C Copyright IBM Corporation 1996 All Rights Reserved System Management Services Select one 1 Manage Configuration 2 Boot Sequence Select Device to Test 3 Select Device Esc Quit 4 Utilities F1 He...

Page 68: ...nable Unattended Start Mode 4 Disable Unattended Start Mode 5 Remove Power On Password 6 Remove Supervisory Password 7 Update System Firmware 8 Display Error Log 9 View or Set Vital Product Data 10 Manipulate Dead Man Timer 11 Remote Initial Program Load Setup 12 Change Management 13 Prepare Hard Disk Enter Esc Quit F1 Help Figure 4 6 Utilities Selection Panel 3 Make your selection You will be pro...

Page 69: ... password can consist of from 1 to 8 characters with no restrictions on which characters can be used Nways System Firmware Version 1 0 C Copyright IBM Corporation 1996 All Rights Reserved System Management Utilities Select one 1 Set Power On P Set Power On Password 2 Set Supervisor 3 Enable Unatten Type your new password and then 4 Disable Unatte press Enter 5 Remove Power O 6 Remove Supervi 7 Upd...

Page 70: ...ord again Note The supervisory password can consist of from 1 to 8 characters with no restrictions on which characters can be used Nways System Firmware Version 1 0 C Copyright IBM Corporation 1996 All Rights Reserved System Management Utilities Select one 1 Set Power On P Set Supervisory Password 2 Set Supervisor 3 Enable Unatten Type your new password and then 4 Disable Unatte press Enter 5 Remo...

Page 71: ...served System Management Utilities Select one 1 Set Power On Password 2 Set Supervisor Unattended Start Mode Changed 3 Enable Unatten 4 Disable Unatte Unattended start mode has been 5 Remove Power O enabled 6 Remove Supervi 7 Update System Enter 8 Display Error 9 View or Set Vi 10 Manipulate Dead Man Timer 11 Remote Initial Program Load Setup 12 Change Management 13 Prepare Hard Disk Enter Esc Qui...

Page 72: ...start mode has been disabled and prompts you to press Enter Nways System Firmware Version 1 0 C Copyright IBM Corporation 1996 All Rights Reserved System Management Utilities Select one 1 Set Power On Password 2 Set Supervisory Password 3 Enable Unatten Unattended Start Mode Changed 4 Disable Unatte 5 Remove Power O Unattended start mode has been 6 Remove Supervi disabled 7 Update System 8 Display...

Page 73: ...t IBM Corporation 1996 All Rights Reserved System Management Utilities Select one 1 Set Power On Password 2 Set Supervisory Password 3 Enable Unatten Remove Supervisory Password 4 Disable Unatte 5 Remove Power O Do you want to remove the 6 Remove Supervi Supervisory password 7 Update System 8 Display Error Yes No 9 View or Set Vi 10 Manipulate Dea 11 Remote Initial Program Load Setup 12 Change Man...

Page 74: ... Set Vi 3 Use a Local Image File 10 Manipulate Dea 11 Remote Initial Enter Esc Quit F 1 Help 12 Change Managem 13 Prepare Hard D Enter Esc Quit F1 Help Figure 4 12 System Firmware Update Panel Attention Do not power off the IBM 2216 during the process of updating the firmware If the update fails the IBM 2216 will boot a backup firmware image If this happens repeat the update procedure to reload th...

Page 75: ...nection is not established If 10 12 appears Xmodem will likely time out and need to be restarted 3 After Xmodem completes a message similar to the following is displayed This selection will update your system firmware Do you want to continue The system asks if you want to build a recovery block It is optional but recommended Note Be patient as the system writes from RAM to the hard drive It may ta...

Page 76: ...ars in the Error Codes field Nways System Firmware Version 1 0 C Copyright IBM Corporation 1996 All Rights Reserved System Management Utilities Select one 1 Set Power On Password 2 Set Supervisory Password 3 Enable Unattended Start Mode 4 Disable Unattended Start Mode 5 Remove Power On Password Event Log 1 Src 1 08 src arp sysext c200 io_int c 324 00000005 012B 2 Bootup 0 00 01 21 01 03 96 16 23 2...

Page 77: ...l Rights Reserved System Management Utilities Select one 1 Set Power On Password 2 Set Supervisory Password 3 Enable Unattended Start Mode 4 Disable Unattended Start Mode 5 Remove Power On Password 6 Remove Supervisory Password 7 Update System Firmware View or Set Vital Product Data 8 Display Error Log 9 View or Set Vital Produc 10 Manipulate Dead Man Time Firmware Part Number 11 Remote Initial Pr...

Page 78: ...meaningful values AT Main logic card type DS Text description of card FN FRU number PN Manufacturing part number ML Maintenance level MF Manufacturing location SN Serial number BF Boot flash level and ID NA Burned in MAC Address in ASCII Format ZB Burned in MAC Address in Hex Canonical Format TM Machine type and model F Feature Number BS Box serial number RC Recycle count Z0 Vendor ID 4 18 2216 Ma...

Page 79: ...ies Select one 1 Set Power On Password Network Parameters 2 Set Supervisory Password 3 Enable Unattended Start 1 IP Parameters 4 Disable Unattended Start 2 Adapter Parameters 5 Remove Power On Password 3 Ping 6 Remove Supervisory Passw 7 Update System Firmware 8 Display Error Log Enter Esc Quit F1 Help 9 View or Set Vital Produc 10 Manipulate Dead Man Time 11 Remote Initial Program Load Setup 12 C...

Page 80: ... Version 1 0 C Copyright IBM Corporation 1996 All Rights Reserved System Management Utilities Select one 1 Set Supervisory Password 2 Enable Unattended Start Mode 3 Disable Unattended Start Mode 4 Remove Supervisory Password 5 Update System Firmware 6 Display Error Log 7 View or Set Vital Product Data 8 Copy Remote Files 9 Remote Initial Program Load 10 Manipulate Dead Man Time Dead Man Timer Opti...

Page 81: ...here is no active configuration or image Therefore you should use caution when specifying where to write new images or configurations 2 When using Xmodem to transfer a multiple load module image used in Release 2 in the form of several files ending in ld you must transfer each of the modules ld files one by one to get the entire load module image When an entire load image has transferred the statu...

Page 82: ...Esc Quit F1 Help 1 Select 5 Copy Software Nways System Firmware Version 1 0 C Copyright IBM Corporation 1996 All Rights Reserved Change Management Software Control 1 Add Description Data 2 Describe Software 3 Control Rebooting of Router 4 Control Dumping Select Type 5 Copy Software 6 Erase Software 1 Config 7 List Software 2 Load Image 8 Lock Config File 9 Set Boot Informa Enter Esc Quit F1 Help 1...

Page 83: ...02 Jan 1994 20 41 CONFIG 3 NONE 1994 20 43 CONFIG 4 NONE 1994 20 45 Last Used Config L Config F Enter 1 Bank A 12 XMODEM Software 2 Bank B Esc Quit Enter Esc Quit F1 Help F1 Help The following figure is an example of the Config selection Nways System Firmware Version 1 0 C Copyright IBM Corporation 1996 All Rights Reserved System Management Utilities 2216 Software Control BANK A BANK B IMAGE PENDI...

Page 84: ...4 24 2216 Maintenance Manual ...

Page 85: ... for the presence of diagnostic aids such as wrap plugs The Restore from Loop Test to prompt you to remove diagnostic aids that have been installed prior to testing Many of the diagnostic pages have help information that provides definitions of the status fields and testing options These diagnostics operate in a multi tasking environment that allows several diagnostic processes to be active at the...

Page 86: ... page you can also link to the Device Status and Control page for each adapter 2 The Diagnostic Test History Log contains a summary of recent diagnostic testing activity 3 The Diagnostic Error Log contains error information for recent diagnostic tests that have detected errors First time users should review the 4 Introduction to using the diagnostics Select 1 4 or E Exit Diagnostics Figure 5 1 Ope...

Page 87: ...The devices that are testable or that have additional status available can be selected Selecting a device will then display the Device Status and Control page for that device The Status displayed for a device may have the following values ENABLED Device is enabled for normal operation For multi port devices this means that at least one port is enabled ENABLE PENDING Waiting for completion of Enabl...

Page 88: ...tems that are active on the Device Status and Control panel are dynamically determined depending on the state of the device that is whether it is enabled disabled or testing In this example the device is disabled The Enable Device choice and all of the choices to start a test are active and can be selected If the device were enabled it would need to be disabled before testing When the Device Statu...

Page 89: ...ess for the device is active and the device is being tested LOOP AND LOG A testing process for the device is active and will loop and log any errors until stopped LOOP UNTIL ERROR A testing process for the device is active and will loop until an error occurs or it is stopped MESSAGE A testing process for the device is active and it is waiting for user input Fault Status OK The last test of the dev...

Page 90: ...orms the same function as the disable command available at the router s monitoring talk 5 console Run Default Test This starts a test which assumes that the device is set up for normal operation For communication adapters this means that it has a cable attached and is connected to the network Run Interactive Test This starts a test which will present an additional menu of options such as cable att...

Page 91: ...re Error Log Displays a list of errors detected by diagnostic tests 5 Type E and press Enter to exit the diagnostic menus and return to the command line interface prompt Chapter 5 Using Operational Diagnostics 5 7 ...

Page 92: ...iagnostic Functions and Status Information on page 5 1 for additional information on the use of IBM 2216 operational diagnostics Powering On the IBM 2216 1 Power on the IBM 2216 Messages equivalent to the following appear on the TTY console after powering on the IBM 2216 PRESENCE_MGR LIC280 detected in slot 1 PRESENCE_MGR LIC287 detected in slot 3 PRESENCE_MGR LIC287 detected in slot 4 Please pres...

Page 93: ...List Page 4 Select a device to test for example type 4 for ESCON to test the ESCON channel adapter in slot 4 5 Select Run Interactive Test The Test Options menu appears Screen 1 of 1 Test Options LIC 287 ESCON Channel Adapter Slot 4 Operational Status Diagnostic Status Fault Status Network Connection NOT CONFIGURED MESSAGE UNKNOWN UNKNOWN Do not remove this device while testing Select one of the f...

Page 94: ...plug Type 1 and press Enter to start the test This is a long running test The Device Status and Control Menu is displayed again Note that the Diagnostic Status is TESTING This indicates that the tests are running and will take about 3 minutes to complete Screen 1 of 1 Device Status and Control Menu LIC 287 ESCON Channel Adapter Slot 4 Operational Status Diagnostic Status Fault Status Network Conne...

Page 95: ...the fiber connection Select Back to see the results of the test Select B Back R Refresh H Help b 9 Remove the wrap plug 10 Reconnect the network cable to the adapter 11 Select b to view the results of the test In this example the system reports test completion with No Errors If the test fails you will receive a message directing further action Screen 1 of 1 Test Results LIC 287 ESCON Channel Adapt...

Page 96: ...st 2 Run all tests including external wrap test Individual tests 3 PCI BUS 4 PROCESSOR 5 MEMORY 6 MEMORY PROT 7 TIMER 8 AIB 9 WRAP PLUG 10 OPTICAL POWER 11 LIGHT RECEPTION Select 1 11 or B Back R Refresh H Help 11 2 Enter 11 on the Test Options Panel to run the light reception test At this point the following panel appears Screen 1 of 1 Setup For Light Reception Test LIC 287 ESCON Channel Adapter ...

Page 97: ...B Back R Refresh H Help r 4 After the message Diagnostic Test for adapter_x has status available appears select Refresh to show the status information for a device At this point the following panel is displayed Screen 1 of 1 Restore From Light Reception Test LIC 287 ESCON Channel Adapter Slot 4 Net 0 Operational Status Diagnostic Status Fault Status Network Connection NOT CONFIGURED MESSAGE OK UNK...

Page 98: ...ed on the fiber optic cable Screen 1 of 1 Test Results LIC 287 ESCON Channel Adapter Slot 4 Net 0 Operational Status Diagnostic Status Fault Status Network Connection NOT CONFIGURED INACTIVE NON ISOLATED UNKNOWN No light is being detected on the ESCON adapter in slot 4 Ensure that the ESCON fiber is connected to an ESCON director or an ESCON channel Select B Back e If light was not detected an err...

Page 99: ...ly If you select option 3 4 6 or 7 the results will be displayed immediately If you select test option 1 2 5 8 9 or 11 all long running tests the result may not be available for a few minutes In this case the test will continue to run and the Device Status and Control Menu will be displayed again If you select option 1 2 5 8 9 or 11 you will also notice that the Operational Status field indicates ...

Page 100: ... MESSAGE UNKNOWN UNKNOWN Do not remove this device while testing Select one of the following test options 1 Run all tests excluding external wrap test 2 Run all tests including external wrap test Individual tests 3 PCI BUS 4 PROCESSOR 5 MEMORY 6 MEMORY PROT 7 TIMER 8 AIB 9 WRAP PLUG 10 OPTICAL POWER 11 LIGHT RECEPTION Select 1 11 or B Back R Refresh H Help 10 The optical power measurement test ver...

Page 101: ...et the meter connect the black biconic connector of the test cable to the biconic receptacle on top of the power meter 8 Enter 1 to start the test as indicated in the following example Screen 1 of 1 Setup For Optical Test LIC 287 ESCON Channel Adapter Slot 4 Net 0 Operational Status Diagnostic Status Fault Status Network Connection DISABLED TESTING UNKNOWN UNKNOWN Do not remove this device while t...

Page 102: ...ng IDLE sequences You may now record the power level displayed on the optical power meter A properly functioning ESCON should have a power level of 21 0dBm or more for example 18 0dBm Select 1 Stop test when you have finished measuring the signal level Select 1 or B Back R Refresh H Help 1 11 The following Test Results panel is displayed when you stop the test Screen 1 of 1 Test Results LIC 287 ES...

Page 103: ...ruption during last boot sequence update 00017007 PPC Board Security Maximum unsuccessful attempts to enter password was reached Time and date are logged 00020000 Memory Memory Memory test error run further tests 000210y0 SIMM slot y Memory Memory error with SIMM slot y where y 1 or 2 1 U13 2 U14 01291000 L2 Cache L2 Cache For later release 1msceddd PPC Board Octal Uart Octal Uart error 2msceddd P...

Page 104: ...A 2 2216 Maintenance Manual ...

Page 105: ...e in the Units column indicates that the part is non procurable and that the individual parts or the next higher assembly should be ordered NR Not Recommended in the Units column indicates that the part is procurable but not recommended for field replacement and that the next higher assembly should be ordered R Restricted in the Units column indicates that the part has a restricted availability IN...

Page 106: ...Assembly 1 Final Assembly 2216 Model 400 B 2 2216 Maintenance Manual ...

Page 107: ...IC 283 Not Illustrated 1 Port ISDN Pri T1 FC 2283 85H4894 1 LIC 284 Not Illustrated 1 Port 155Mbps MMF ATM FC 2284 86H0967 1 LIC 286 Not Illustrated 1 Port FDDI 85H4878 1 LIC 287 Not Illustrated 1 Port ESCON Channel FC 2287 86H1005 1 LIC 288 Not Illustrated 1 Port 10 100 Mbps Ethernet FC 2288 85H9703 1 LIC 289 Not Illustrated 1 Port HSSI FC 2289 85H4874 1 LIC 290 Not Illustrated 6 Port V 35 V 36 F...

Page 108: ...557 FC 2908 Hong Kong PCMCIA MODEM Modem 85H3558 FC 2909 Ireland PCMCIA MODEM Modem 85H3559 FC 2910 Italy PCMCIA MODEM Modem 85H3560 FC 2911 Japan PCMCIA MODEM Modem 85H3561 FC 2912 Korea PCMCIA MODEM Modem 85H3562 FC 2913 Luxemberg PCMCIA MODEM Modem 85H3563 FC 2914 Netherland PCMCIA MODEM Modem 85H3564 FC 2915 New Zealand PCMCIA MODEM Modem 85H3565 FC 2916 Norway PCMCIA MODEM Modem 85H3569 FC 29...

Page 109: ...RECT ATTACH FC 2708 38H7079 LIC 290 V 36 SERIAL INTERFACE FC 2709 38H7077 LIC 290 V 36 DIRECT ATTACH FC 2710 38H7070 LIC 291 X 21 SERIAL INTERFACE FC 2711 38H7073 LIC 291 X 21 DIRECT ATTACH FC 2712 41H9082 MULTIPURPOSE RJ 45 STP CABLE FC 2713 85H3509 LIC 283 ISDN PRI CABLE T1 FC 2714 80G3984 LIC 292 ISDN PRI CABLE E1 FC 2715 57G8042 LIC 283 ISDN PRI CABLE J1 FC 2716 V 35 SERIAL CABLES FRANCE FC 27...

Page 110: ...B 6 2216 Maintenance Manual ...

Page 111: ...dapter slot weighs 0 1 kg 0 2 lb A filler plate for a second power supply weighs 0 2 kg 0 4 lb A second power supply weighs 3 5 kg 7 7 lb A fully populated IBM 2216 with a second power supply and eight adapters will weigh about 43 1 kg 95 lb Note During installation two people will be required to lift the 2216 Service Clearances You must leave free space for service around the machine as follows F...

Page 112: ...nd is either being installed or removed The second power supply must have its power switch in the off position while it is being installed or removed If a second power supply is not installed a filler plate is used to cover the position where it would have been installed The power supply uses a voltage sensing system that converts line current of 100 240 volts ac 50 60 Hz single phase to dc input ...

Page 113: ... Austria Belgium Finland France Germany Greece Norway Portugal Saudi Arabia Spain Sweden Turkey Netherlands China Brazil 250 V 10 A 2 7 m 9 ft CEE7 VII 4 14F0033 9825 Brunei China Hong Kong India Malaysia Singapore Ireland Kuwait United Arab Emirates United Kingdom 250 V 10 A 2 7 m 9 ft BS 1363 5 14F0051 9828 Switzerland Liechtenstein 250 V 10 A 2 7 m 9 ft SEV 24507 6 14F0069 9830 Italy Chile 250 ...

Page 114: ...1 2 3 4 5 6 7 8 9 10 Figure C 1 Power Cord Plugs by Country C 4 2216 Maintenance Manual ...

Page 115: ...d configurations the IBM 2216 has a software change management feature This utility enables you to determine which operational software file and which configuration file is active while the IBM 2216 is running How to View the Files To use the change management tool in the command line interface to view the operational software image and the configuration files follow these steps 1 From the OPCON p...

Page 116: ... You can reset the IBM 2216 using any one of these methods Press the hardware reset on the system card At the Config only prompt type reload and press Enter Note The Config only prompt appears when no file is active Lack of an active file indicates that an active configuration has become corrupted or that the IBM 2216 is not configured At the OPCON prompt type reload and press Enter File Transfer ...

Page 117: ...the same directory to enable the successful transfer of all the modules The following example shows a Version 2 software code load talk 6 Config boot Boot config tftp get load modules Specify the server IP address dotted decimal 1 2 3 4 192 9 200 1 Specify the remote files directory u bin usr 601bin 204img Select the destination bank A B A a TFTP SW load image get usr 601bin 204img LML ld from 192...

Page 118: ...e message box will appear to inform you of the file transfer 10 Select the Set Boot Information option on the Change Management menu and select The Bank to boot from The Config to boot with Permanent or once File Transfer Using Xmodem If you use Xmodem you will get similar prompts that enable you to specify the bank for the image files or the bank and the config number for the configuration files ...

Page 119: ...load image 4 Respond to the prompt to select which bank to load Note Files to be retrieved from the server should all be in the same directory and their permissions should be such that read is allowed for anybody 5 After you selected 2 Load Image you will be prompted to select the type of load image that is single image or modules If the code load that you want to transfer consists of an LML ld fi...

Page 120: ...u use the Send option to send a new configuration to the IBM 2216 the new configuration is written to the ACTIVE bank and overwrites the file located in the position just below the currently ACTIVE configuration The new configuration is PENDING if a time is set for a reset If the configuration file is sent without a specified time for the reset to occur it gets AVAIL status For example suppose tha...

Page 121: ...IG 1 has become AVAIL and CONFIG 2 has become ACTIVE If the Configuration Program were now used to send down a new configuration to the IBM 2216 and the file were not marked to be loaded at any specified time the view of the software in the IBM 2216 would look like this BANK A BANK B IMAGE ACTIVE IMAGE AVAIL CONFIG 1 AVAIL CONFIG 1 AVAIL CONFIG 2 ACTIVE CONFIG 2 AVAIL CONFIG 3 AVAIL CONFIG 3 AVAIL...

Page 122: ...bles the dumping of memory without intervention from anyone in the event that the IBM 2216 has a catastrophic error The IBM 2216 will dump memory onto the hard disk Once a successful dump has been taken the IBM 2216 attempts to restart Depending upon the failure of the IBM 2216 it cannot always restart In this case you should restart it manually and call a service person who will dial into the IBM...

Page 123: ...ion that was in BANK B CONFIG 1 is overwritten by a copy of the configuration file that is in BANK A CONFIG 1 This copy retains the status of the file that it overwritten in this case PENDING These are the prompts that you would use to perform this copy process Boot config copy config Copy FROM Bank number A Copy FROM Config number 1 Copy TO Bank number B Copy TO Config number 1 If you copy an ima...

Page 124: ...o download files to the IBM 2216 2 IP connection of operational IBM 2216 over functioning network using the TFTP Get and Put commands to download and upload files Xmodem in ProComm or an equivalent communications program from the workstation This method uses ASCII terminal emulation and can download files to the IBM 2216 The IBM 2216 does not have to be operational in the network to use this metho...

Page 125: ...rs FC 2280 and FC 2281 are installed left to right beginning with slot 1 A maximum of six can be installed in any single IBM 2216 Other adapters are installed right to left in the first available slot beginning with slot 8 on the bottom and far right Table E 1 Slot Numbering Slot 1 Slot 2 Slot 3 Slot 4 Slot 5 Slot 6 Slot 7 Slot 8 Table E 2 FC 2280s LIC 280s and FC 2281s LIC 281s first third fifth ...

Page 126: ...peed adapters FDDI FC 2286 10 100 Mbps Ethernet FC 2288 and HSSI FC 2289 as desired however you may not be able to achieve full media throughput concurrently on all the adapters When planning for installation review system performance expectations with an IBM representative Any adapter can be installed in any of the eight adapter slots with the following restrictions 1 If the 2 port Token Ring FC ...

Page 127: ... access See Chapter 3 Accessing the 2216 on page 3 1 for more information Command Line Interface Question How do I access the command line interface the operating code from within the firmware Answer From within the firmware menu system System Management Services press F9 The prompt is displayed after the system boots The command line interface is described in the Multiprotocol Access Services Sof...

Page 128: ...Interface with the protocol command as an example Displaying List of Configured Interfaces Question How do I display a list of active interfaces Answer 1 Access the command line interface the prompt 2 Type talk 6 and press Enter twice to reach the Config prompt 3 Enter list dev 4 Press Ctrl p to return to the OPCON prompt F 2 2216 Maintenance Manual ...

Page 129: ... the prompt 2 Type talk 5 and press Enter twice to reach the prompt 3 Type protocol and press Enter 4 Type ip and press Enter The prompt changes to IP 5 Type ping IP address value and press Enter Press Enter to stop the ping process 6 Type exit at the IP prompt and press Enter The prompt changes to 7 Press Ctrl p to return to the OPCON prompt Viewing Vital Software Data Question How do I view vita...

Page 130: ... at the Config only prompt 1 Enter add device type of device Note The steps only create the interface You still have to use the net command to configure characteristics unique to that interface for example T R Ethernet PPP FR SDLC X 25 You also need to use the protocol command to configure protocols on the interface For example add device token or add device to see a list of device choices 2 Enter...

Page 131: ...umber 1 8 5 If you are adding an interface on a single port adapter go to step 6 Otherwise continue with this step Enter the port number 0 7 depending on the type of adapter The range of port numbers supported depends on the multi port adapter type For the Token Ring FC 2280 and Ethernet FC 2281 adapters port numbers 1 and 2 are supported For the 8 port EIA 232E V 24 FC 2282 and 8 port X 21 adapte...

Page 132: ...terface number 6 Enter write to save your changes The next time that the 2216 is rebooted the configuration changes become active For details of this procedure refer to the Multiprotocol Access Services Software User s Guide Enabling an Adapter Port Question How do I enable a configured adapter port that was disabled using disable interface in Disabling an Adapter Port Use this procedure to enable...

Page 133: ...c on an Adapter Port to resume traffic Answer 1 Access the command line interface prompt 2 Type talk 5 and press Enter twice to reach the prompt 3 Enter the configuration command 4 Make a note of the interface number of the adapter you wish to enable 5 Enter test interface number Note If you use the test command to enable an interface that has been configured at the Config prompt from talk 6 as di...

Page 134: ...IBM 2216 Information Question How can I find out the most current information about the IBM 2216 Answer Point your web browser to http www networking ibm com 216 216prod html Disabling Interfaces that Have WAN Reroute Enabled Question How do I ensure that WAN Reroute does not try to automatically enable an alternate interface that is on an adapter about to be removed Answer 1 Access the command li...

Page 135: ...able WAN Reroute on this interface Yes No No Yes Interface 4 is enabled as a WAN Reroute alternate circuit Are you sure that you want to test this interface Yes No No Yes Testing net 4 ATM 0 successful Remote File Download Question How do I download a configuration file to the 2216 using the Firmware Menu System Answer Use the Systems Management Services 1 Using a local console select 4 Disable Un...

Page 136: ...om the Select Bank dialog box d Select the config to send the configuration file to from the Select Config dialog box e When the BEGIN FILE TRANSFER dialog box closes use your Xmodem software to transfer the files For example with PROCOMM Press the PAGE UP key when the dialog box disappears Press X for xmodem mode Type in the path and file name of the configuration you are going to transfer to the...

Page 137: ...e to be downloaded onto the 2216 and press Enter Spare Interfaces Question Can I move traffic from a defective adapter to another adapter without restarting the 2216 Answer Yes Use the spare interface function of the 2216 See Configuring Spare Interfaces in the Multiprotocol Access Services Software User s Guide Appendix F Common Tasks F 11 ...

Page 138: ...F 12 2216 Maintenance Manual ...

Page 139: ...pment has been tested and found to comply with the limits for a Class A digital device pursuant to Part 15 of the FCC Rules These limits are designed to provide reasonable protection against harmful interference when the equipment is operated in a commercial environment This equipment generates uses and can radiate radio frequency energy and if not installed and used in accordance with the instruc...

Page 140: ... equipment is used in a domestic environment radio disturbance may arise When such trouble occurs the user may be required to take corrective actions CISPR22 Compliance Statement This product has been tested and found to comply with the limits for Class A Information Technology Equipment according to CISPR 22 European Standard EN 55022 The limits for Class A equipment were derived for commercial a...

Page 141: ...escheinigung laut dem Deutschen Gesetz über die elektromagnetische Verträglichkeit von Geräten EMVG vom 30 August 1995 bzw der EMC EG Richlinie 89 336 Dieses Gerät ist berechtigt in Übereinstimmung mit dem Deutschen EMVG das EG Konformitätszeichen CE zu führen Verantwortlich für die Konformitätserklärung nach Paragraph 5 des EMVG ist die IBM Deutschland Informationssysteme GmbH 70548 Stuttgart Inf...

Page 142: ...sible You will be advised of your right to file a complaint with the FCC Your telephone company may make changes in its facilities equipment operations or procedures that could affect the proper operation of your equipment If they do you will be given advance notice so as to give you an opportunity to maintain uninterrupted service If trouble is experienced with this equipment for repair or warran...

Page 143: ...de télécommunications L installation de cet équipement doit aussi se faire selon un mode de raccordement acceptable Dans certains cas le câblage interne de l entreprise associé au service individuel offert par une ligne d abonné peut être prolongé au moyen d un connecteur homologué prolongateur de téléphone Le client devrait être informé que la conformité de son équipement aux conditions susmentio...

Page 144: ...nications systems in the United Kingdom Trademarks The following terms used in this publication are trademarks or service marks of IBM Corporation in the United States or other countries Other company product and service names may be trademarks or service marks of others AT Nways Presentation Manager AIXwindows Operating System 2 PS 2 ESCON OS 2 RETAIN IBM Personal System 2 RS 6000 NetView PR SM c...

Page 145: ... electrische apparatuur op een veilige manier moet bekabelen en aansluiten Danger Avant de procéder à l installation de ce produit lisez d abord les consignes de sécurité dans la brochure ATTENTION Consignes de sécurité A lire au préalable SD21 0030 Cette brochure décrit les procédures pour câbler et connecter les appareils électriques en toute sécurité Perigo Antes de começar a instalar este prod...

Page 146: ...D21 0030 qui décrit les procédures à respecter pour effectuer les opérations de câblage et brancher les équipements électriques en toute sécurité Vorsicht Bevor mit der Installation des Produktes begonnen wird die Sicherheitshinweise in Achtung Sicherheitsinformationen Bitte zuerst lesen ibm Form SD21 0030 Diese Veröffentlichung beschreibt die Sicherheitsvorkehrungen für das Verkabeln und Anschlie...

Page 147: ...m beskriver sikkerhetsrutinene for kabling og tilkobling av elektrisk utstyr Perigo Antes de iniciar a instalação deste produto leia as informações de segurança Cuidado Informações de Segurança Leia Primeiro SD21 0030 Este documento descreve como efectuar de um modo seguro as ligações eléctricas dos equipamentos Appendix H Safety Information H 3 ...

Page 148: ...cumento describe los procedimientos de seguridad para cablear y enchufar equipos eléctricos Varning livsfara Innan du börjar installera den här produkten bör du läsa säkerhetsinformationen i dokumentet Varning Säkerhetsföreskrifter Läs detta först SD21 0030 Där beskrivs hur du på ett säkert sätt ansluter elektrisk utrustning H 4 2216 Maintenance Manual ...

Page 149: ... 43 1 kg ATTENTION Un IBM 2216 entièrement équipé pèse environ 43 1 kg ACHTUNG Eine voll bestückte IBM 2216 wiegt ungefähr 43 1 kg ATTENZIONE Un IBM 2216 cui sono collegate tutte le unità pesa circa 43 1 kg CUIDADO Um IBM 2216 totalmente preenchido pesa cerca de 43 kg Precaució Un IBM 2216 completamente equipado pesa alrededor de 43 1 kg 95 lb VARNING En fullt utbyggd IBM 2216 väger ca 43 kg ADVAR...

Page 150: ...UWAGA Całkowicie wypełnione urządzenie IBM 2216 waży około 43 1 kg H 6 2216 Maintenance Manual ...

Page 151: ... 1 Operational 2 Pertaining to a node or device that is connected or is available for connection to another node or device Advanced Peer to Peer Networking APPN network node A node that offers a broad range of end user services and that can provide the following Distributed directory services including registration of its domain resources to a central directory server Topology database exchanges w...

Page 152: ...ed information rate circuit 1 One or more conductors through which an electric current can flow See physical circuit and virtual circuit 2 A logic device circuit switching 1 A process that on demand connects two or more data terminal equipment DTEs and permits the exclusive use of a data circuit between them until the connection is released I A 2 Synonymous with line switching CMIP Common Manageme...

Page 153: ... digits T 2 Pertaining to data in the form of digits A 3 Contrast with analog DLCI Data link connection identifier DLS Data link switching DLUR Dependent LU requester DTE Data terminal equipment A DTE Data terminal equipment DTMF Dual tone modulation frequency DTR Data terminal ready E E M Earth mark EIA Electronic Industries Association EIA unit A unit of measure established by the Electronic Ind...

Page 154: ... In the IBM Token Ring Network a device and its associated software that connect a local area network to another local area network or a host that uses different logical link protocols Gbps Gigabits per second 1000000000 bits per second GUI Graphical user interface H HDLC High level data link control high level data link control HDLC An access service used over data networks It uses a non real tim...

Page 155: ...ting and Transmission Control Protocol TCP for end to end control A Internet Protocol IP A connectionless protocol that routes data through a network or interconnected networks IP acts as an intermediary between the higher protocol layers and the physical network However this protocol does not provide error recovery and flow control and does not guarantee the reliability of the physical network In...

Page 156: ...ement Information Base MIB 1 A collection of objects that can be accessed by means of a network management protocol 2 A definition for management information that specifies the information available from a host or gateway and the operations allowed 3 In OSI the conceptual repository of management information within an open system MB Megabyte 1000000 bytes Mbps Megabits per second 1000000 bits per ...

Page 157: ...or on a device to which cables for other devices such as display stations and printers are attached Synonymous with socket 3 The representation of a physical connection to the link hardware A port is sometimes referred to as an adapter however there can be more than one port on an adapter There may be one or more ports controlled by a single DLC process 4 In the Internet suite of protocols a 16 bi...

Page 158: ...a transmission header RSC Remote Support Center RSF Remote Support Facility RT Real time S s Second SDH Synchronous digital hierarchy SDLC Synchronous Data Link Control SDT Structured data transfer Serial Line Internet Protocol SLIP A TCP IP protocol used on a point to point connection between two IP hosts over a serial line for example an RS EIA 232 connection into a modem over a telephone line I...

Page 159: ...ally attached Telnet uses the Transmission Control Protocol as the underlying protocol TFTP Trivial File Transfer Protocol time division multiplexing TDM See channelization TN3270 An informally defined protocol for transmitting 3270 data streams over Telnet TN3270 An informally defined protocol for transmitting 3270 data streams over Telnet token 1 In a local area network the symbol of authority p...

Page 160: ...data terminal equipment DTE and data circuit terminating equipment DCE at rates of 48 56 64 or 72 kilobits per second version A separately licensed program that usually has significant new code or new function virtual circuit 1 In packet switching the facilities provided by a network that give the appearance to the user of an actual connection T See also data circuit Contrast with physical circuit...

Page 161: ...est 5 16 change management 3 5 D 1 change management functions D 8 change supervisory password 4 13 code updates D 5 command line interface 5 8 common tasks F 1 config as seen in change management D 1 configuration management 4 3 connecting power cord 2 2 control panel functions 1 1 copy command in change management D 9 corrections documentation x coupler duplex to duplex 5 16 D dead man timer man...

Page 162: ...0 5 13 Diagnostic Menu 5 9 Optical Test in Progress 5 18 Restore from Light Reception Test 5 13 Restore from Light Reception Test panel 5 13 Restore From Wrap Test 5 11 Setup for Light Reception Test 5 12 Setup for Optical Test 5 17 Setup for Wrap Test 5 10 Test Options 5 9 5 12 5 16 Test Results 5 11 5 14 parts catalog B 1 password supervisory 4 9 4 10 removing 4 13 pending file status D 2 physic...

Page 163: ...tive options 5 15 light reception 5 15 optical power 5 15 5 16 Restore from Light Reception Test panel 5 13 Restore From Wrap Test panel 5 11 Test Options panel 5 9 5 12 5 15 5 16 Test Results panel 5 11 5 14 wrap plug 5 15 Test Options panel 5 9 5 12 Test Results panel 5 11 5 14 testing a device 4 7 TFTP for file transfer D 2 tools FRU removal and replacement 2 1 TTY console messages 5 8 U Unatte...

Page 164: ......

Page 165: ... to us at 1 800 253 3520 Elsewhere your local IBM branch office or representative will forward your comments or you may mail them directly to us Specific comments or problems Please tell us how we can improve this book Thank you for your comments If you would like a reply provide the necessary information below Name Address Company or Organization Phone No Overall how satisfied are you with the in...

Page 166: ... NECESSARY IF MAILED IN THE UNITED STATES BUSINESS REPLY MAIL FIRST CLASS MAIL PERMIT NO 40 ARMONK NEW YORK POSTAGE WILL BE PAID BY ADDRESSEE Design Information Development Dept CGF Bldg 656 International Business Machines Corporation PO BOX 12195 RESEARCH TRIANGLE PARK NC 27709 9990 Fold and Tape Please do not staple Fold and Tape SY27 0350 02 ...

Page 167: ......

Page 168: ...s Guide SC30 3884 Protocol Configuration and Monitoring Reference Volume 1 SC30 3885 Protocol Configuration and Monitoring Reference Volume 2 Multipurpose Publications SC30 3682 Nways Event Logging System Messages Guide GC30 3830 Configuration Program User s Guide Supplemental information SG24 4957 IBM 2216 Nways Multiaccess Connector Description and Configuration Scenarios Volume I HW and Basic M...

Reviews: