


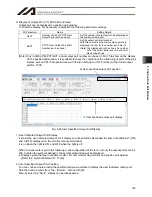

6. Position Data Edit W
indow
136
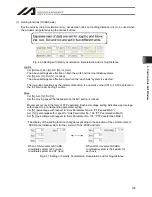
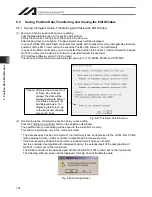
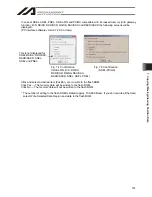
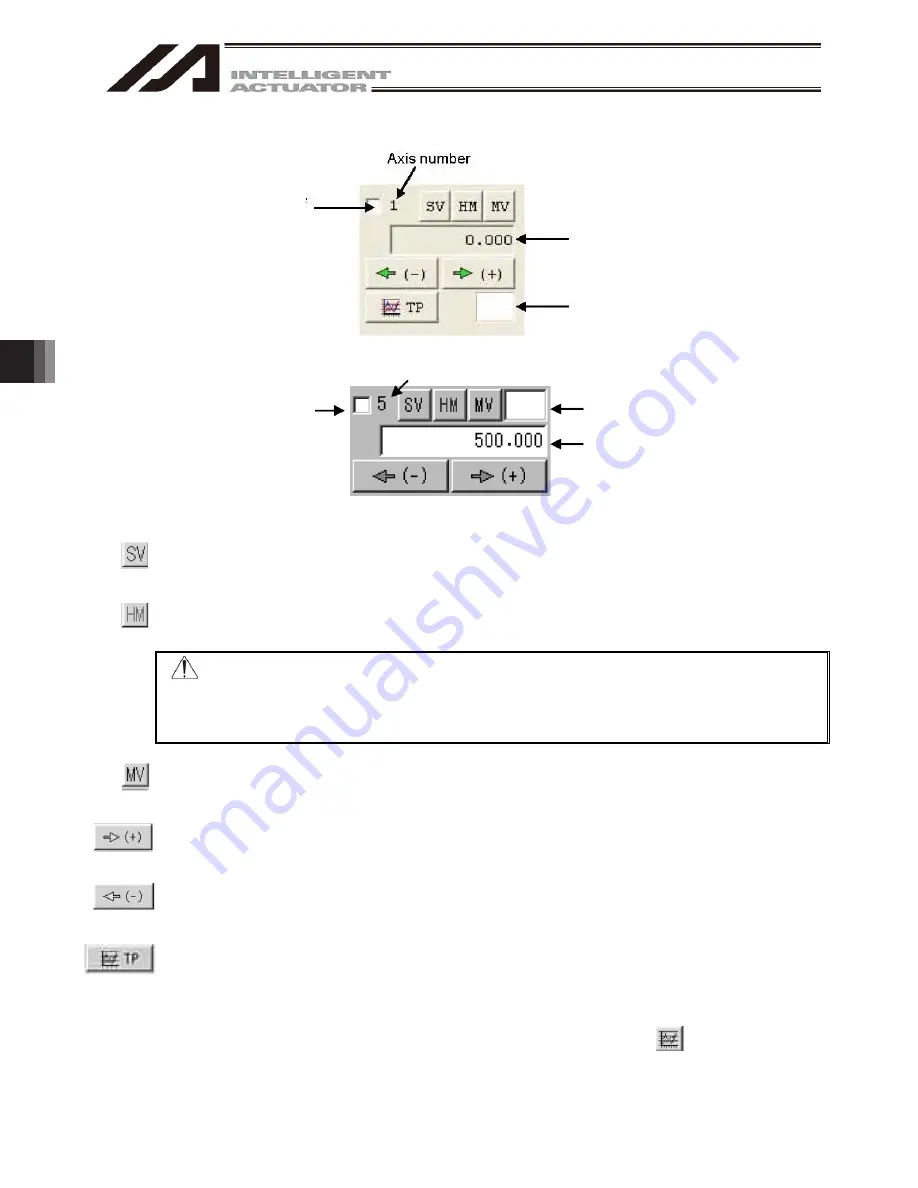
The axis you want to move
using the common buttons
Current position of the selected axis
Error code
Select the axis to be operated
with the common buttons.
Error code
Current position of the selected axis
Axis number
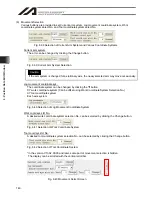
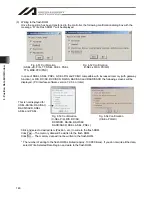
(4) Axis-specific buttons (Orthogonal axis)
(Note) The display on SCRA axis of MSEL-PCX/PGX is the same.
Fig. 6.29 Axis-specific buttons (Orthogonal axis)
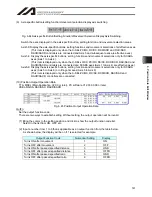
Fig. 6.30 Axis-specific buttons (Orthogonal axis) (X-SEL-RX/SX and RAX/SAX)
Clicking this button will turn the servo of the selected axis OFF if it is currently ON, or turn the axis
servo ON if it is currently OFF.
(The button is shown in light blue when the servo is ON.)
Clicking this button will perform homing if the servo of the selected axis is ON.
(The button will be shown in light blue after homing.)
Note: For the Linear Servo actuator, LSAS-N10/N15 quasi absolute type, the actuator
moves in a range of approximately 16mm from the stop position when a home return
operation is conducted after the power is turned on to confirm the current position.
Watch the actuator movement during operation.
Clicking this button will move the selected axis to the position specified by the data in the position
number corresponding to the cursor position, if the axis servo is ON. (The button remains yellow
while the axis is moving.)
The selected axis will jog forward while this button is clicked, if the axis servo is ON.
If a value (0.001 to 1) is enter red in the Inc. field in the setting function group, the axis will perform
inching. In this case, one click will move the axis by one inching distance.
The selected axis will jog backward while this button is clicked, if the axis servo is ON.
If a value (0.001 to 1) is entered in the Inc. field in the setting function group, the axis will perform
inching. In this case, one click will move the axis by one inching distance.
Clicking this button will capture the current position of the selected axis into the position number
corresponding to the cursor position. (The captured position is not yet transferred to the controller.)
(Note) In the case of the X-SEL-RX/SX and RAX/SAX controller, there is no “TP” button below the
axis-specific buttons.
To load the current position, click the current position load button ( ) among the
common buttons in [2] and [3].
Summary of Contents for IA-101-X-MW
Page 2: ......
Page 4: ......
Page 8: ......
Page 50: ...1 Before You Begin 42 1 4 Connection to Controller Fig 1 48 X SEL K J Type Controller...
Page 52: ...1 Before You Begin 44 Figure shows example of TT Fig 1 50 Table Top Actuator TT TTA...
Page 53: ...1 Before You Begin 45 Fig 1 51 X SEL KX JX Type Controller...
Page 62: ...1 Before You Begin 54 Fig 1 60 ASEL Type Controller USB Cable...
Page 63: ...1 Before You Begin 55 Fig 1 61 PSEL Type Controller USB Cable...
Page 189: ...9 Symbol Edit Window 181...
Page 251: ...13 How to Reset an Absolute Encoder 243 Fig 13 38 Arm Length 120 Reference Position...
Page 386: ...16 Appendix 378...
Page 391: ......


