Installation
71
In
st
al
la
ti
o
n
Step 4: Install BCCs
The disk system comes with one or two BCCs, depending on the option
purchased. If you are installing only one BCC, you will install a BCC filler in the
open BCC slot.
1. Attach your ESD strap to ground.
2. Unpack the BCC from the accessories box and ESD bag.
WARNING
Do not touch the pins on the back of the BCC.
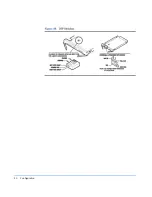
3. Loosen the locking screws (D in
Figure 41
) if necessary on the BCC
cam latches.
4. Open the BCC cam latches (C in
Figure 41
) by pulling them away
from the center.
5. Align the BCC alignment guides (E) with the slot, and insert the BCC
into the the left slot at the back of the disk system. Stop pushing when
the BCC meets the midplane.
6. Press the cam latches inward and flat against the center. The cam action
draws the BCC completely into the slot and seats the connector pins
on the midplane.
7. Tighten the locking screw (D).
Summary of Contents for StorageWorks 2300 - Disk System
Page 1: ...hp StorageWorks disk system 2300 Edition E0902 user s guide ...
Page 10: ...10 ...
Page 14: ...14 Product Description ...
Page 35: ...Installation 35 Installation 2 ...
Page 40: ...40 Installation ...
Page 41: ...Installation 41 Installation ...
Page 48: ...48 Installation ...
Page 58: ...58 Installation ...
Page 59: ...Installation 59 Installation 4 Install clipnuts as shown in Figure 28 ...
Page 76: ...76 Installation ...
Page 77: ...Installation 77 Installation ...
Page 83: ...Configuration 83 Configuration 3 ...
Page 86: ...86 Configuration ...
Page 94: ...94 Configuration ...
Page 95: ...Troubleshooting 95 Troubleshooting 4 ...
Page 108: ...108 Removal and Replacement ...
Page 132: ......
Page 134: ......
Page 140: ......
Page 150: ...150 Reference E VCCI Statement Japan Harmonics Conformance Japan F BCIQ EMC Statement Taiwan ...
Page 151: ...Reference 151 Reference G Declaration of Conformity ...
Page 158: ...158 ...

